In SISTRIX, you can also analyse individual URLs instead of entire domains in the Onpage projects section. This way you can specifically analyse the weaknesses of certain URLs of your domain and fix them.
Analysing Individual Subpages

Once you are logged in to SISTRIX, open the project overview. Open an existing project there. If you do not have one yet, first create a new Onpage project and open it.
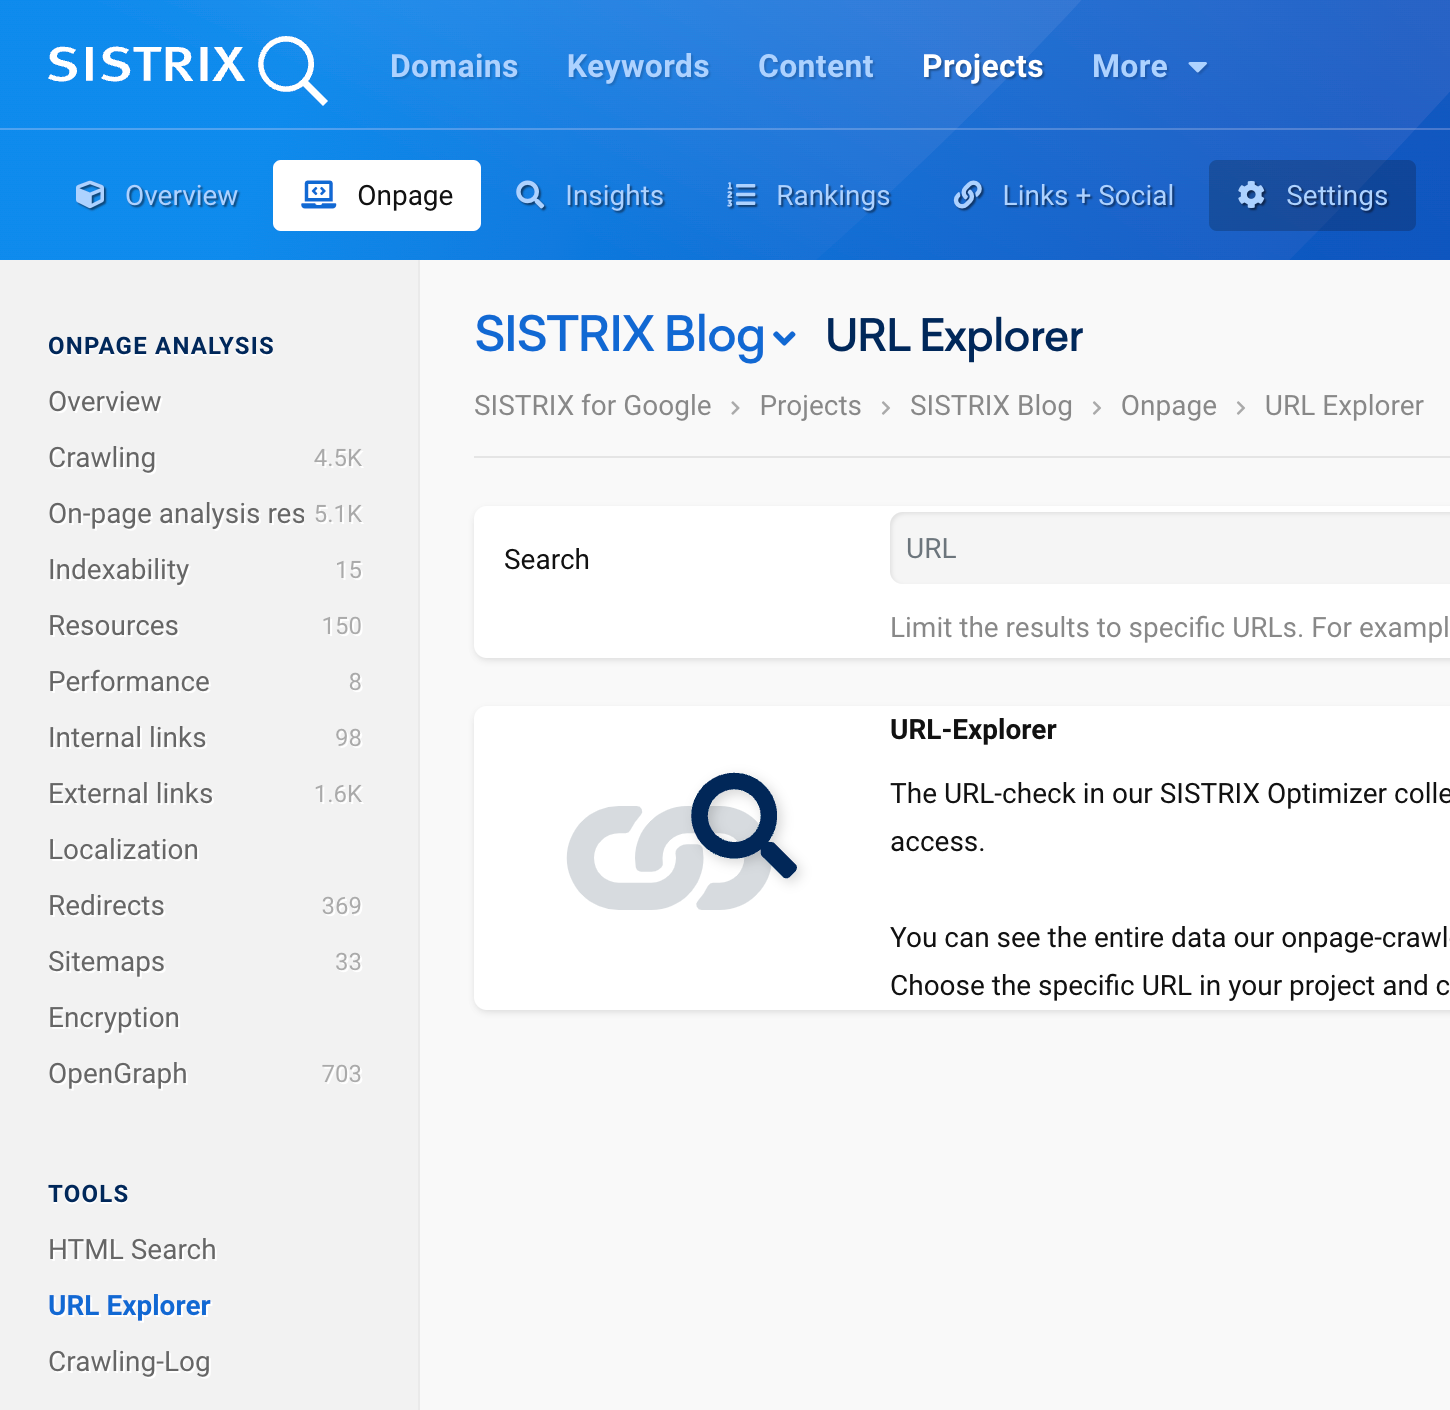
Use the navigation at the top of the page to open the Onpage section of your project 1 and then click on the menu item “URL Explorer” 2 under “Tools” on the left-hand side.
Enter a URL that you would like to have a closer look at into the search field at the top. As you type, the available URLs of your project will be displayed as suggestions. This makes it easier for you to select a URL for the analyses.

At the top of the URL Explorer page, you will find further navigation that will take you to various topic pages related to the Onpage analysis of a URL. 3
We will now go through these sections in order, starting with the first page, the overview.
Overview
Once you have entered a URL and started the search, you are taken to the URL check overview. Here, you will find the most important Onpage data as well as performance information about your page.
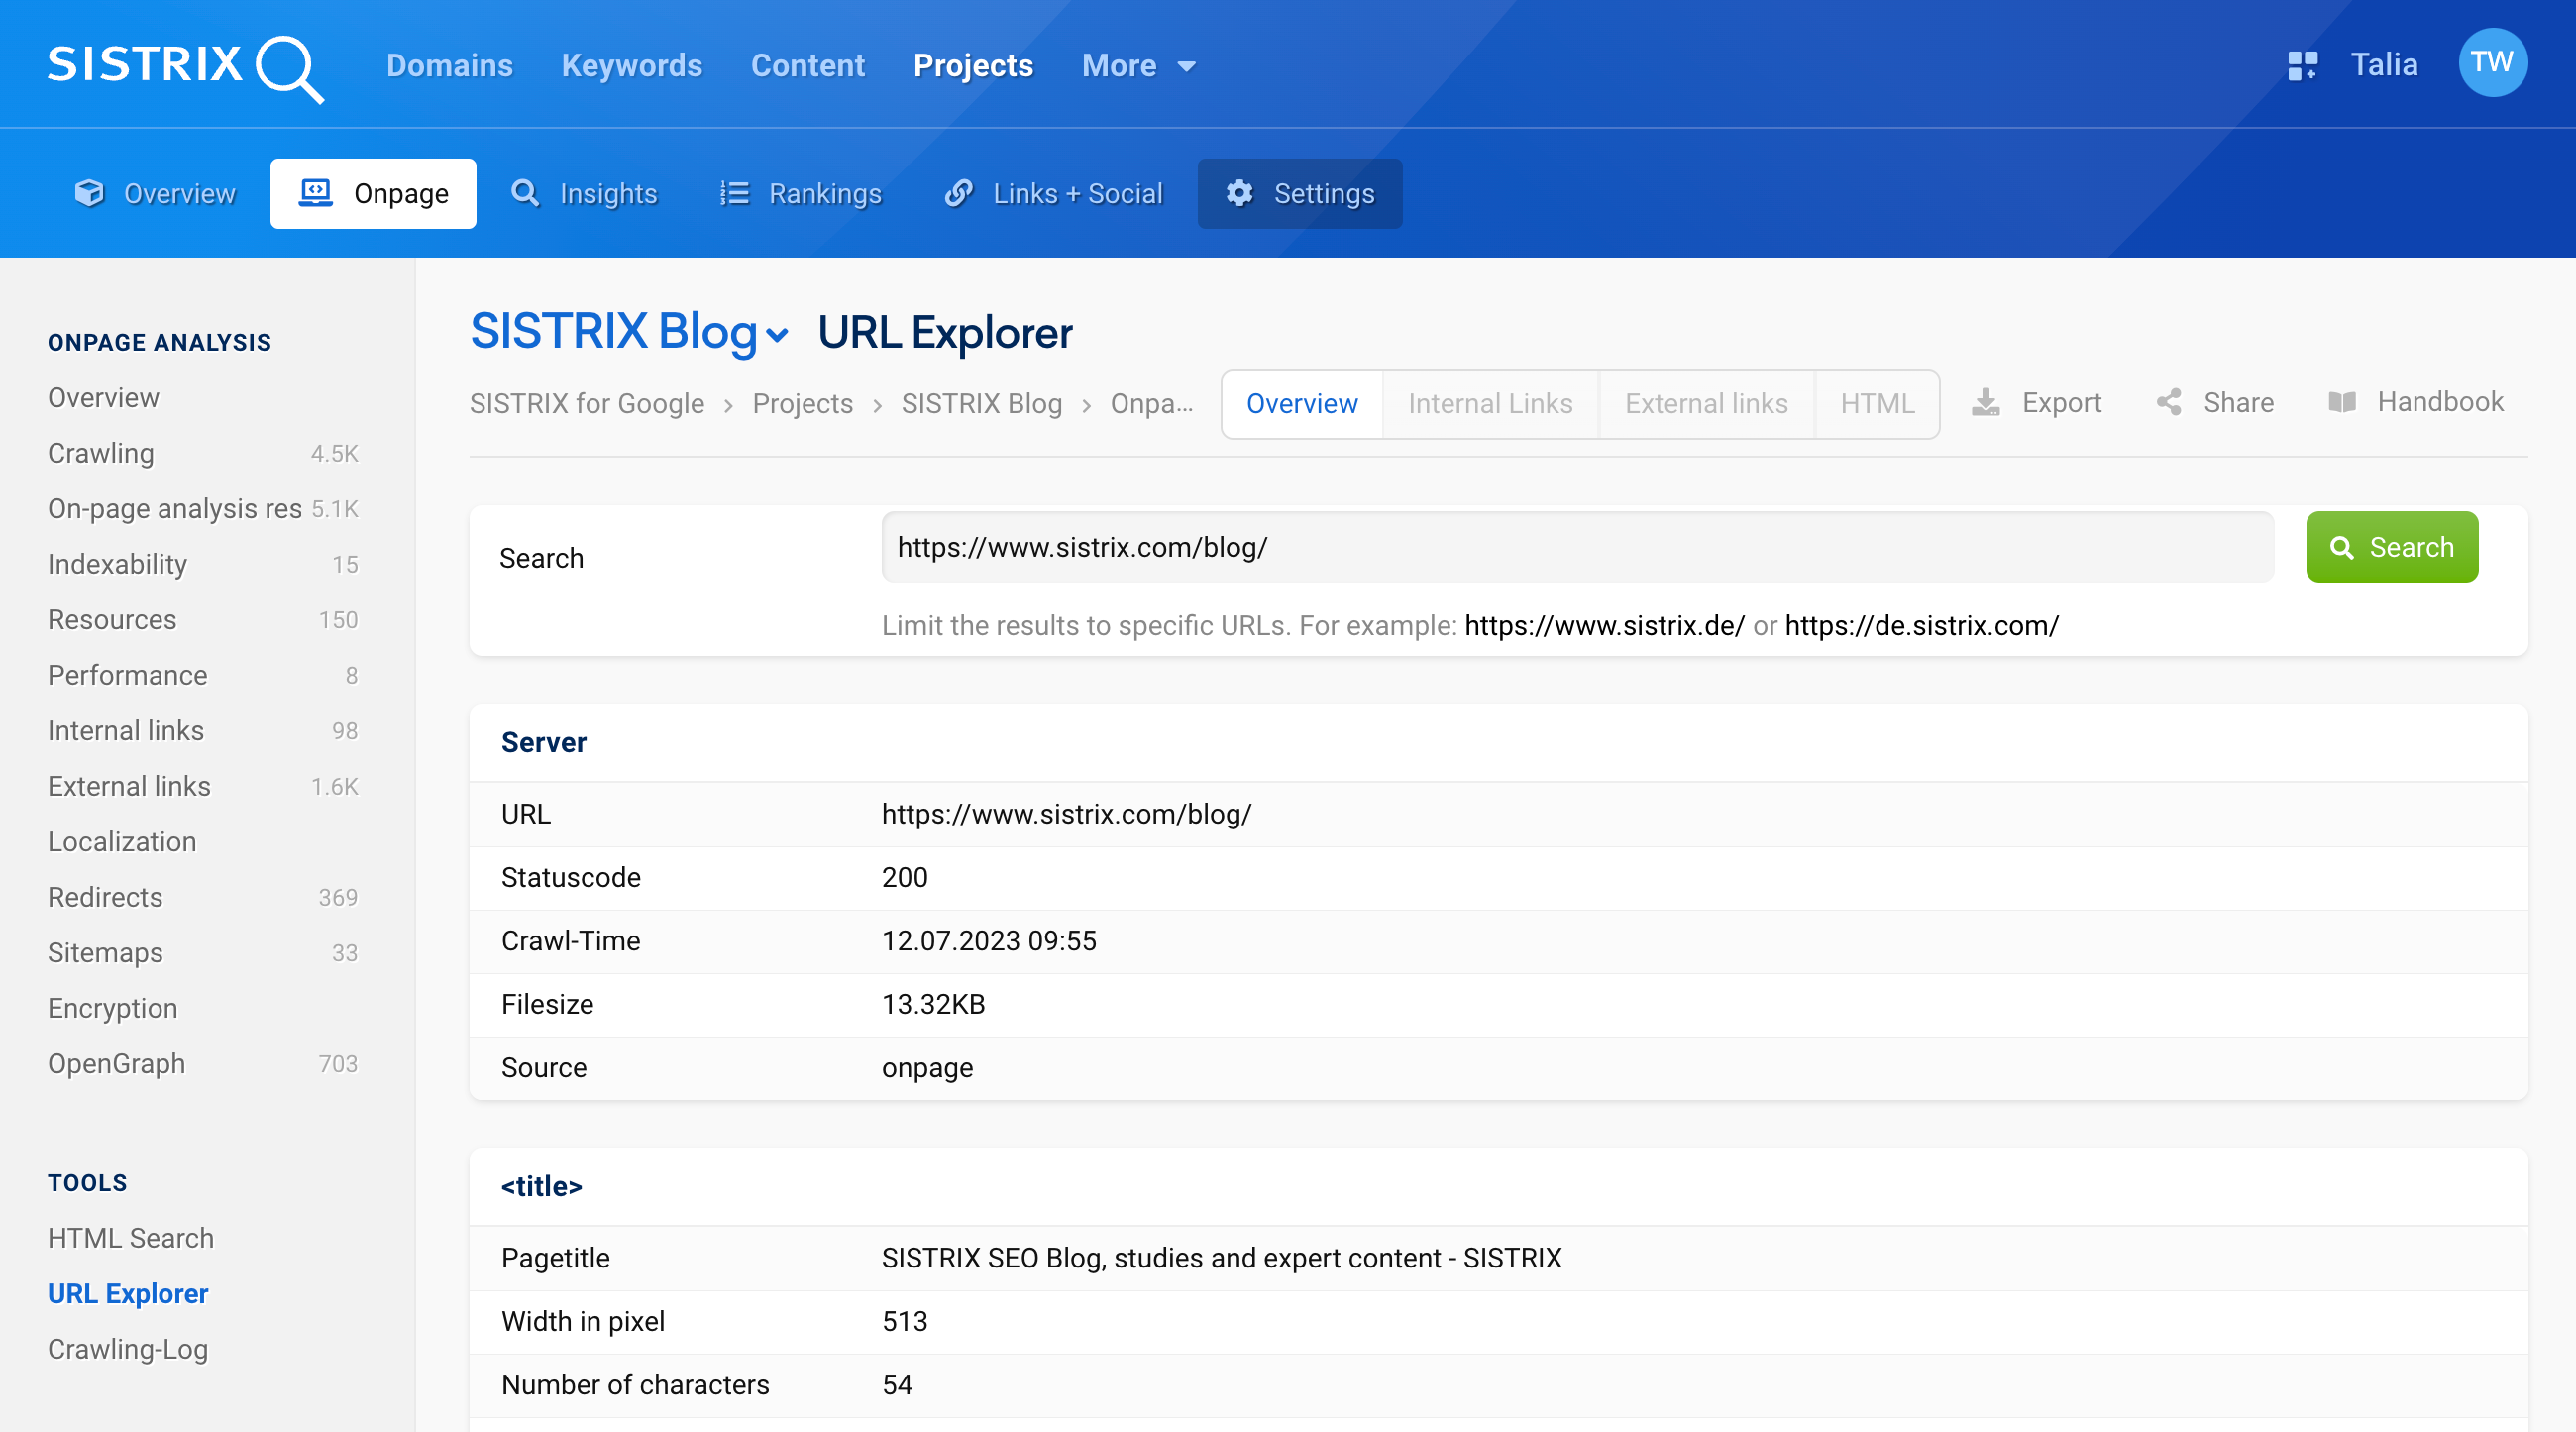
The first part concerns the server information of your URL. You will see the status code, for example (in this case, “Statuscode: 200” for “Available”).
Further on, you will get the first Onpage data for the document. The important information here will focus on the page title, the headings and the metadata.
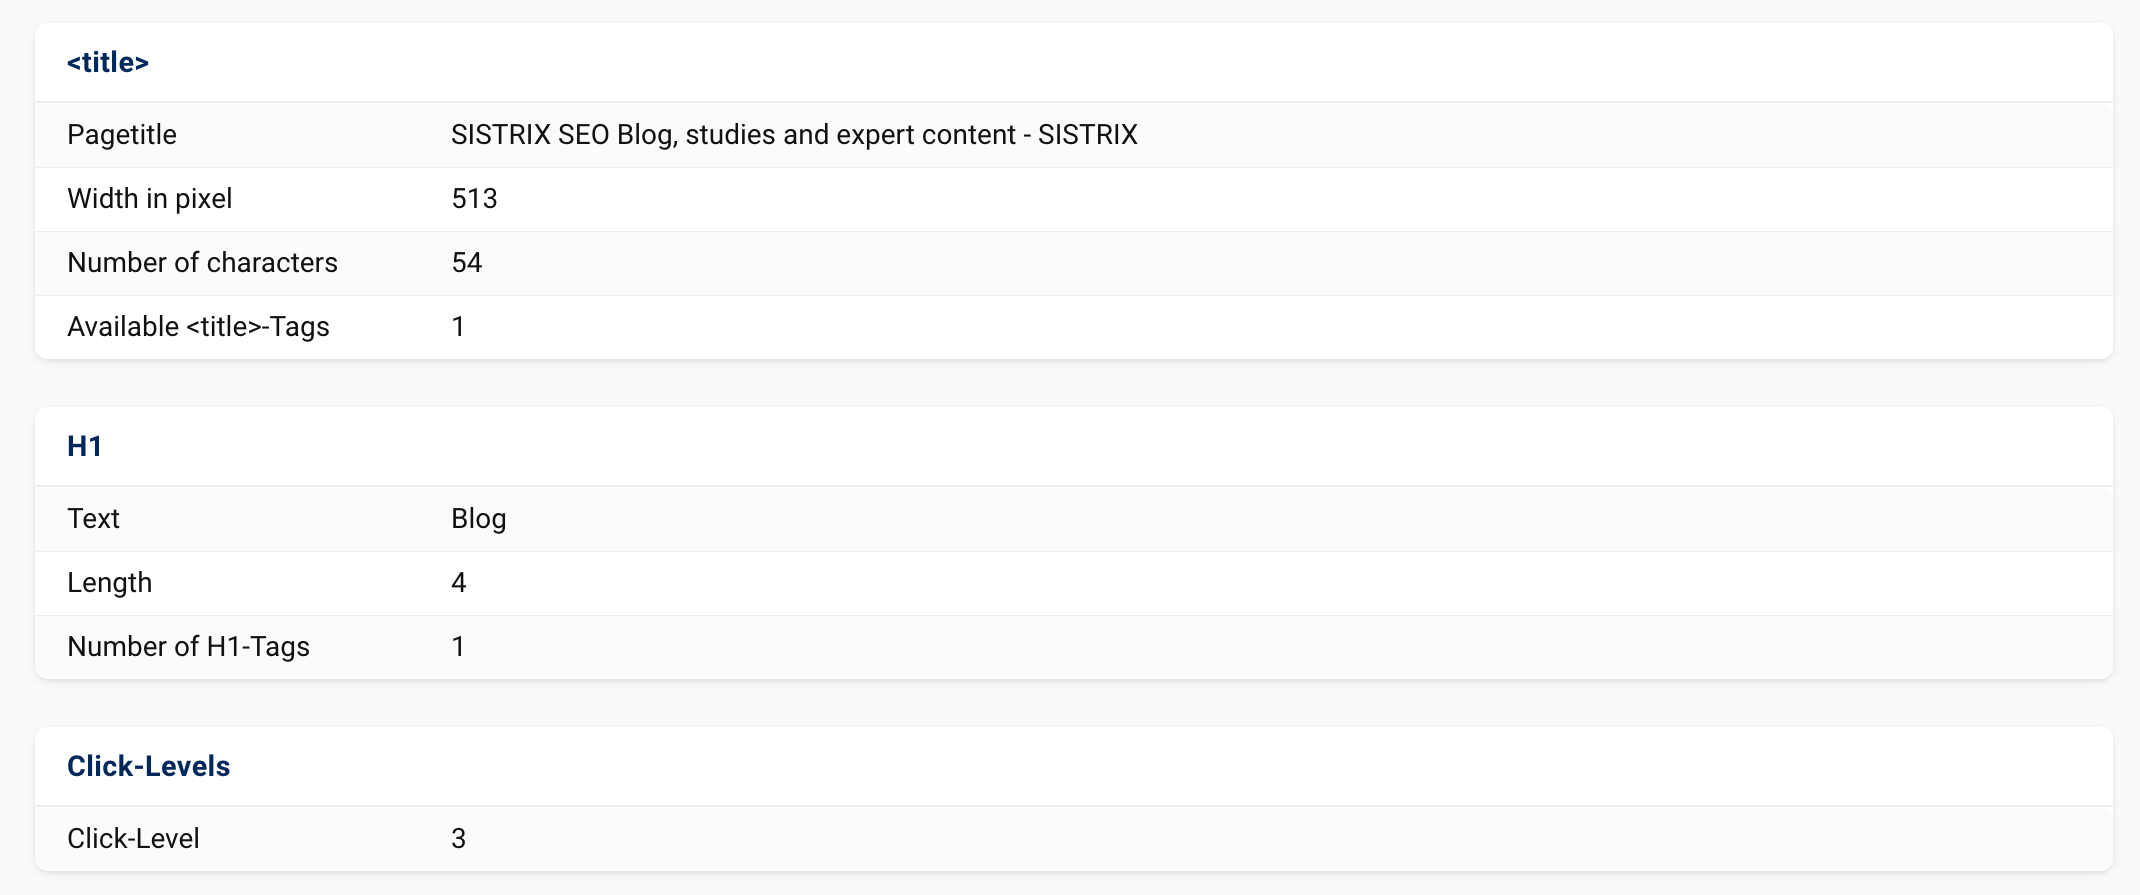
Let us go through the relevant information one by one.
Page Titles
The length of the page title will be shown to you in pixels and characters. We do this because Google also measures the page title length in the search results in pixels.
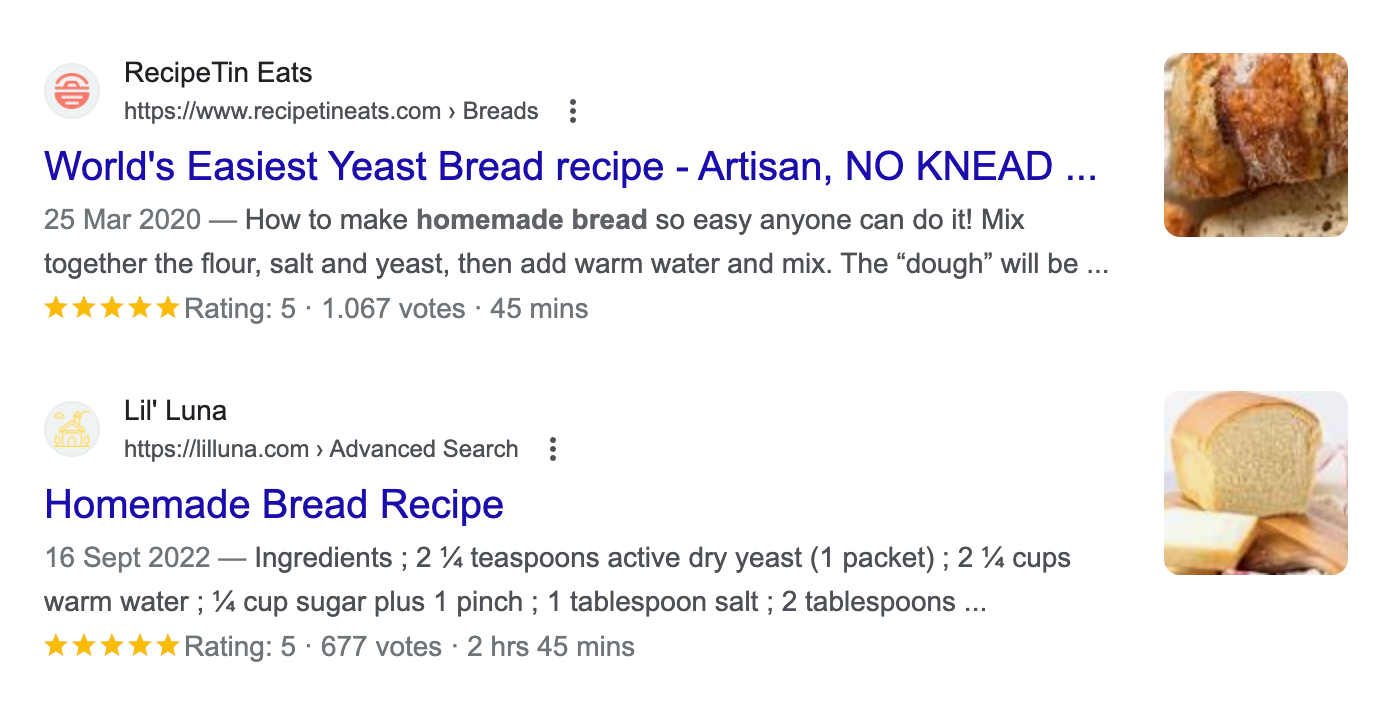
Below, you will see a comparison of page titles, as an example. The first page title is too long. Therefore, it is shortened with … at the end. As a result, an essential part of the title’s information is missing: What else does the “World’s Easiest Yeast Bread recipe” entail?
The second page title has just the right length and is shown in its entirety in the search results.
Tip: In our SEO knowledge base “Ask SISTRIX” you can find an extensive article on Title-Tag Optimisation.
H1 Heading
Another typical mistake is using the H1 heading multiple times. This is why we also show you this heading in the URL check. The H1 heading should only be used once per subpage. You should use the headings H2 through H6 to add a more precise outline to the document.
Click Level
The click level shows you the level on which a document is located. The top level is always 0. Normally, this is the start page of your project. If you set up a subdirectory as a “project”, the first page of this directory will be level 0, as it is the first page of the project.
Blog posts that are child pages to this subpage are located on click level 3. Pages located even deeper would then be on the level 4 and so on.
Metadata
Metadata are the information that are shown in the source code of your website and are used by Google to create snippets, among other things. You also use the metadata to give Google directions on whether the document should be added to the index of the search engine. Additionally, you determine whether the links of the page are to be followed (No/follow) as well as any originals (Canonical Tag) of the page.
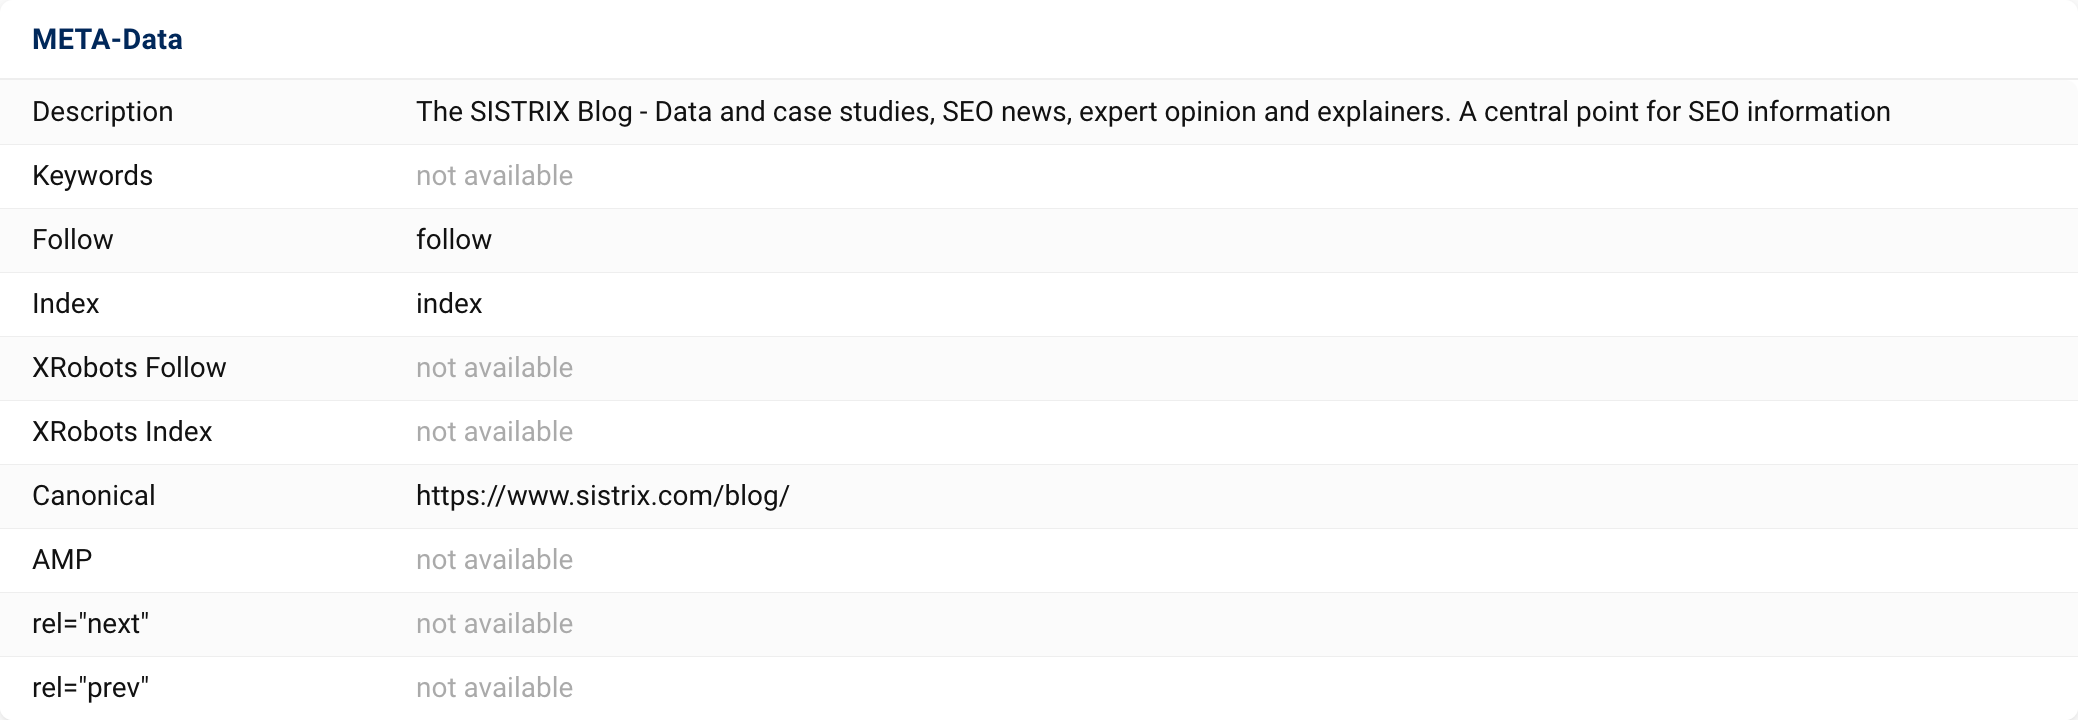
Lines that show “not available” do not indicate an error. It just means that no information could be found in the source code of the document. In most cases, that is fine. If no information exists about “Follow” or “Index”, Google will automatically decide in favour of the document and add it into the index. URLs linked there will be followed by the crawler.
More information will follow in the overview pages on links, images, CSS and JavaScript. There, you will be notified if an image is missing the alt attribute or if too many CSS- or JavaScript-files are integrated into the source code.
Internal Links
After the “Overview”, let us now take a look at the next section in the Onpage analysis: “Internal Links”.

Internal outbound links should generally be checked. This will usually give you a good idea which other pages you are linking to internally from your page, i.e., internal and outgoing links. In this example, there are links to the start page, free tools, tutorials and even Ask SISTRIX, among other things.
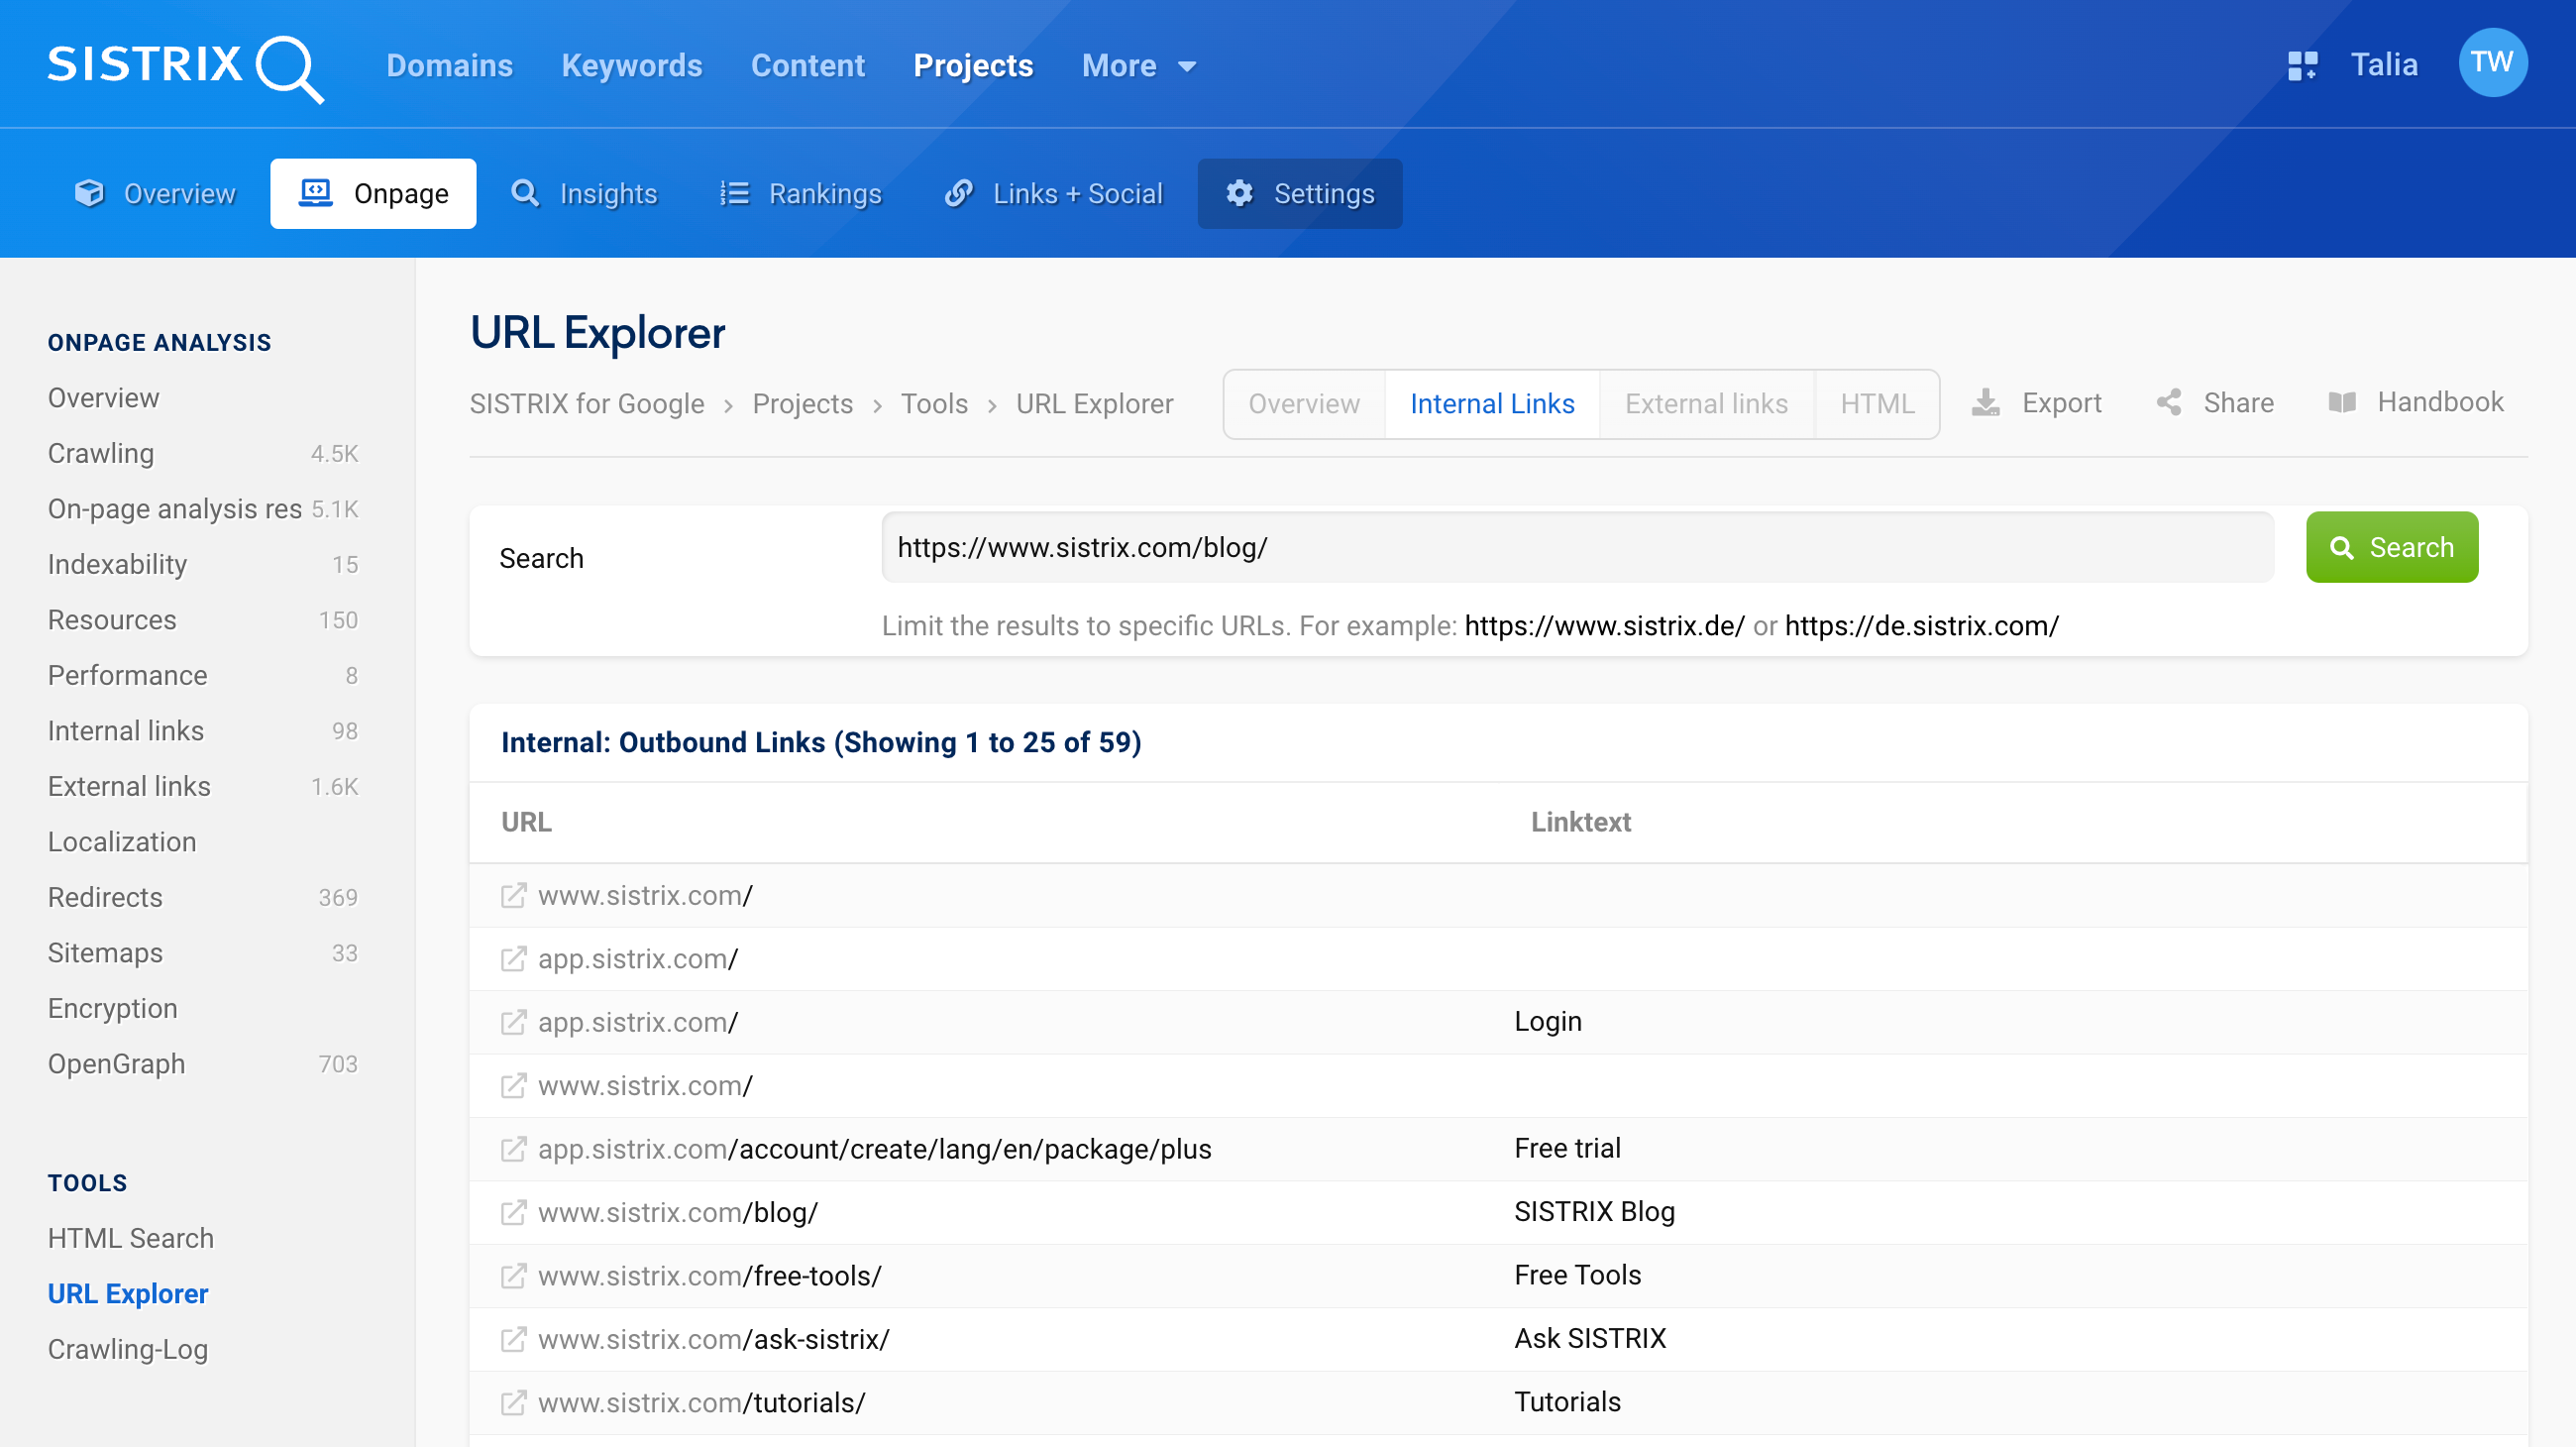
With this analysis, you will sometimes even come upon past internal links that may no longer be needed. Or you may recognise mistakes in your link texts that are not visible in the browser, due to certain formatting.
On this overview page, you can also find the internal inbound links. Here, you can see which other documents on your website refer to the URL you are currently analysing. Here, the evaluation is also restricted to the pages within the created Onpage project.

External Links

The “External Links” section covers all links that lead from your page to other websites, and those that lead from other websites to your page.
The first part concerns the external outbound links. In the table, you will see all the references to other websites. In many cases, those will be the social media buttons or, in our case, the links to our websites in other languages.

External inbound links are those that lead to your project from other domains, subdomains etc. These can also be links from your own websites in other countries.
HTML Code

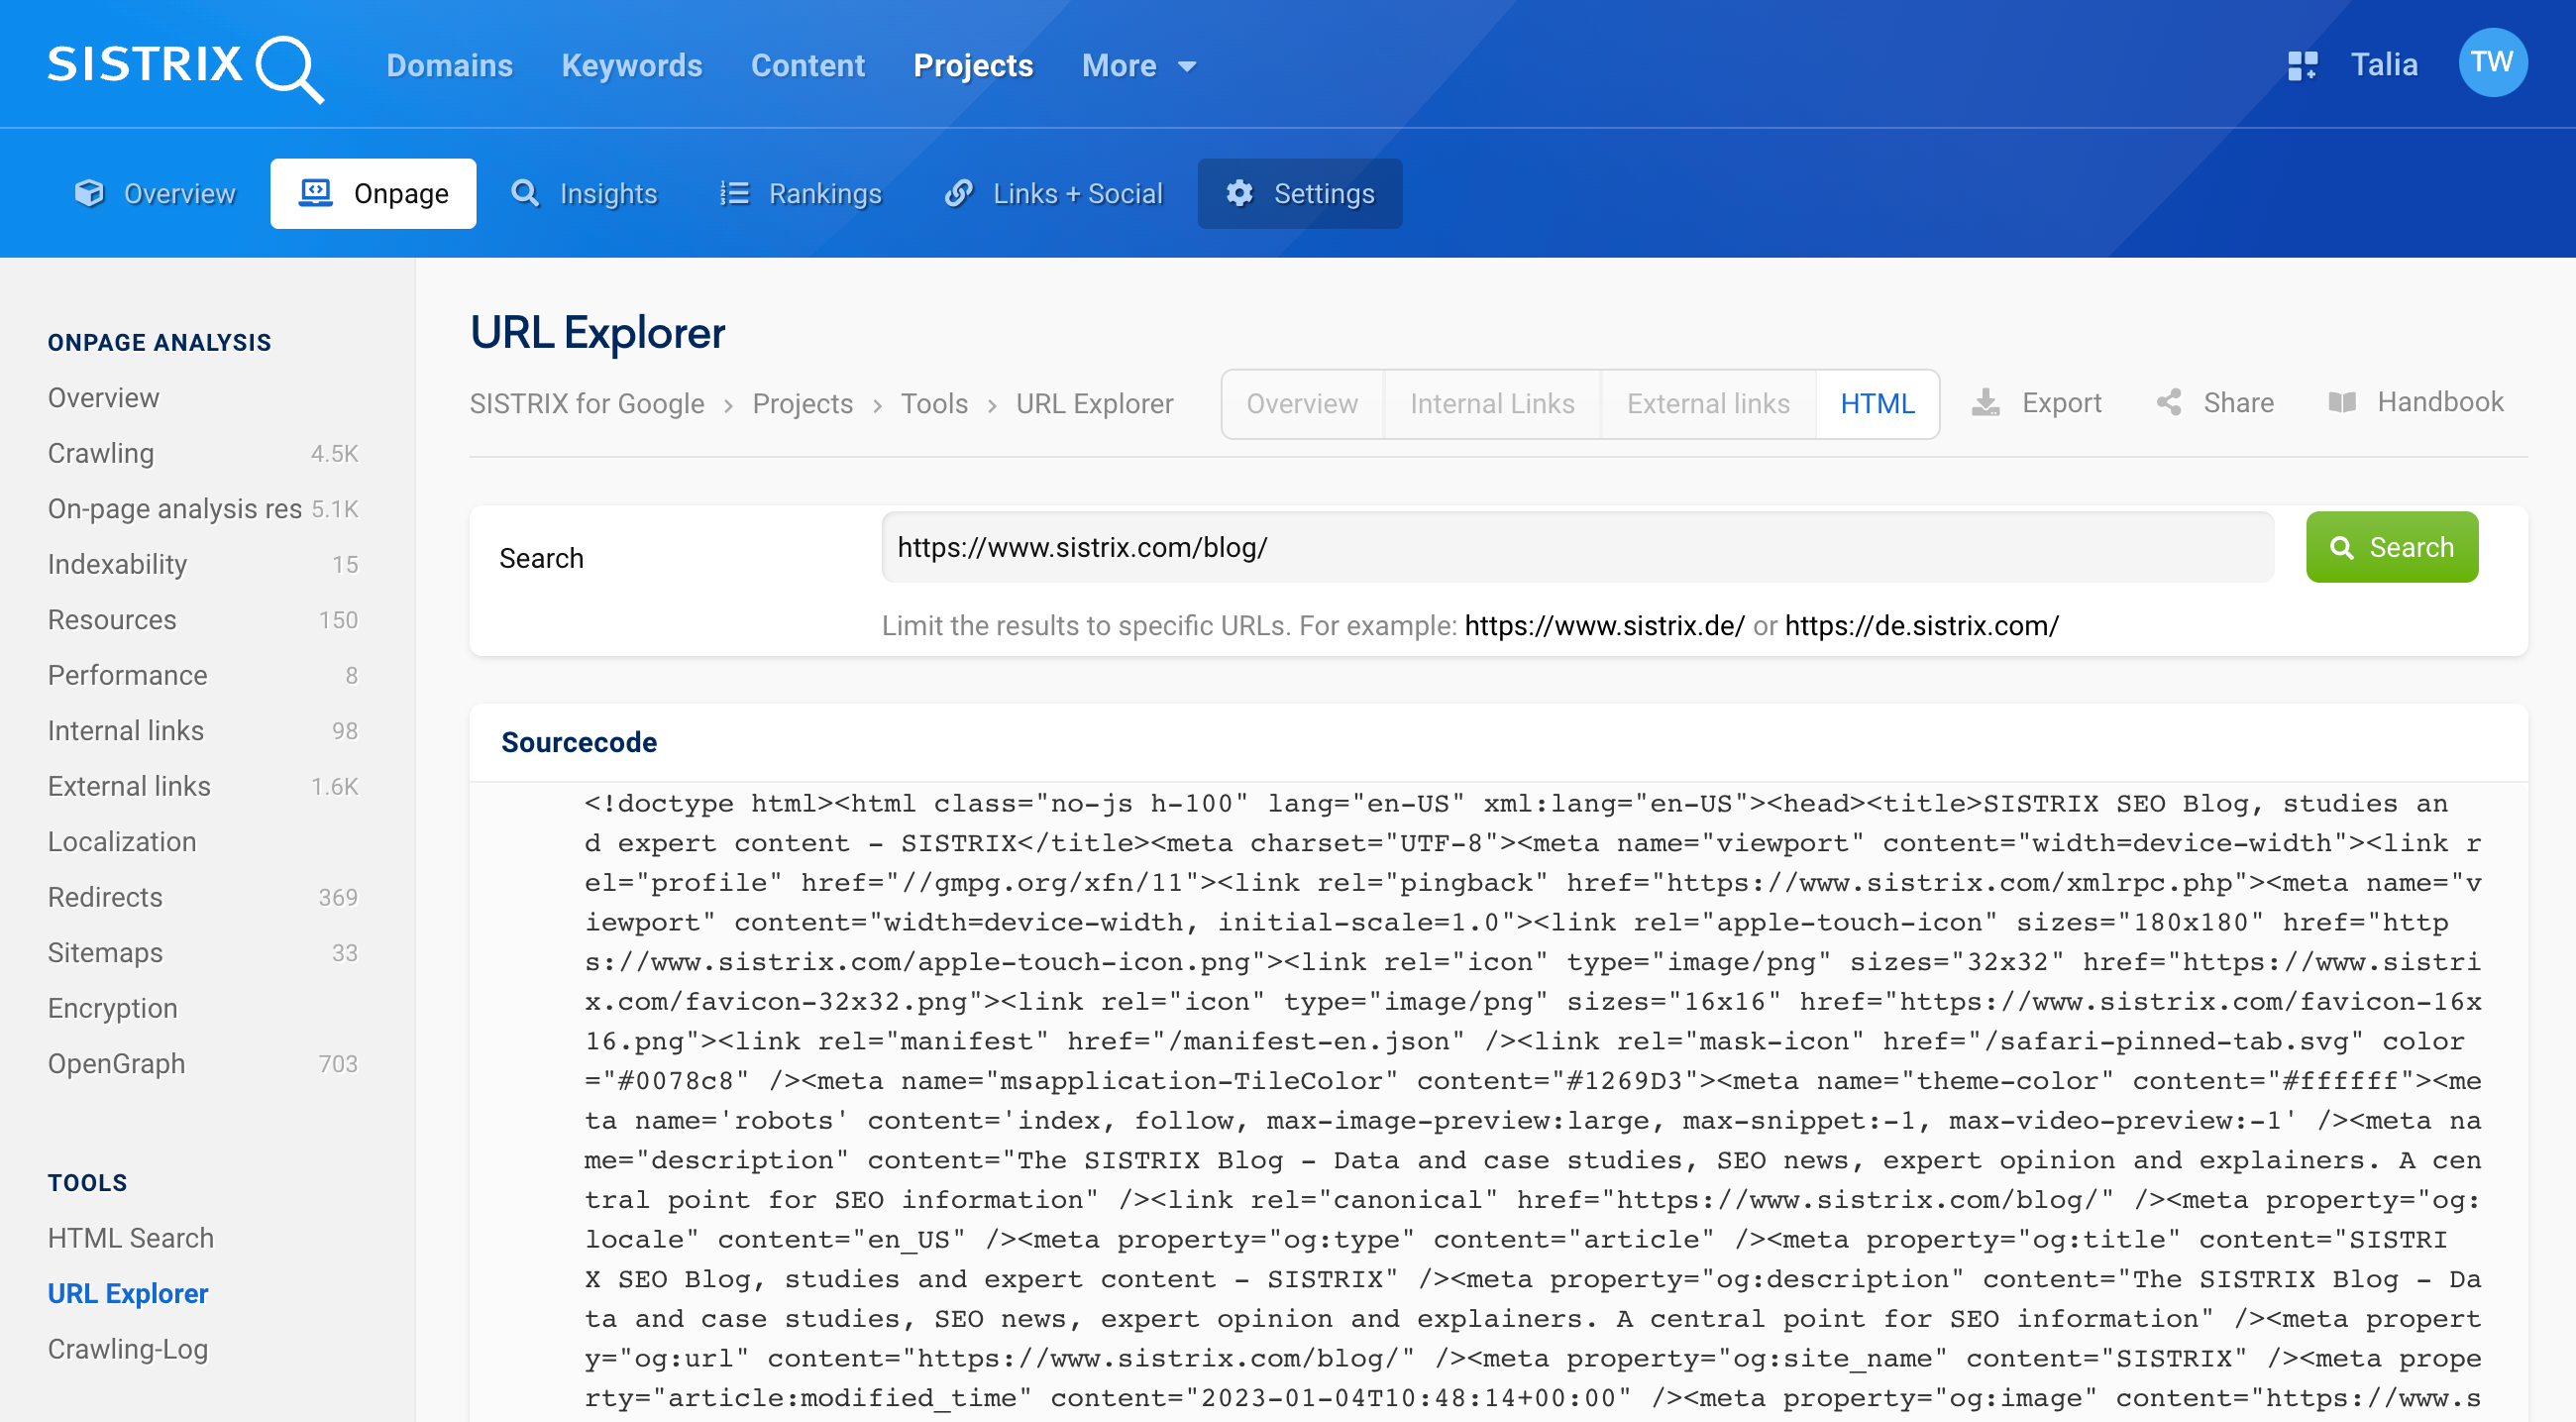
In the final section of the URL check, we will show you the complete HTML code that the SISTRIX crawler has captured from your project. You can verify any uncertainties from the first section (Robots, Title-Tags, etc.) by looking directly into the HTML code and also check where there may be a problem.
Conclusion
With SISTRIX Onpage projects, you can run a complete analysis of your website, including individual URLs. The URL check we just showed you allows you to analyse your subpages in detail.
This makes sense, for example, if only certain landing pages or other parts of your website have been revised and should now be checked.