To analyse the keyword data of a domain more precisely, SISTRIX offers you a number of predefined filters as well as the possibility of creating individual filters according to your needs.
- Keyword Table
- Default View
- Select Columns Individually
- Predefined Filters
- Country
- Data Source
- Specific Keyword
- Position
- Search Volume
- Competition
- SERP Features
- Result Features
- Show Keyword Cannibalization
- Individual Filters
- Example Filter 1: low hanging fruits
- Example Filter 2: Search Intent Do
- How are the monitored keywords chosen?
In this tutorial, you will find out which keyword data is available in SISTRIX and how you can filter it quickly and easily for your particular use case.
To do this, first enter a domain (or a host, directory etc.) into the SISTRIX search bar.
In the navigation on the left side, you will find the menu item “Keywords” 1. There you will find a table with all keywords for which the specified domain achieves rankings.
You can find general information on keyword research in our tutorial “Keyword Research Made Easy“.
Navigation Bar
Above the table, you will find a navigation bar with different options.
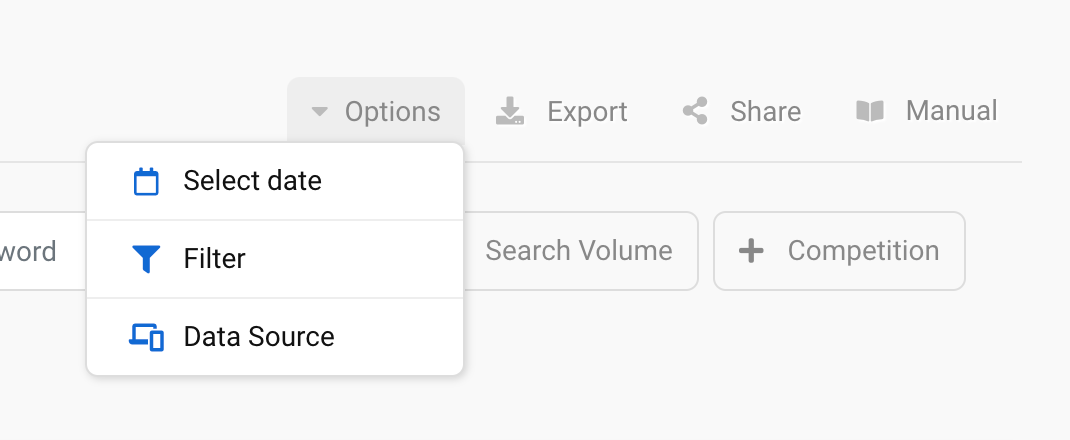
With a click on the Options button, you can adjust different settings that will then affect the entire keyword page:
- Select date: Select a specific date. Here, you can also switch between the daily and extended data. Once you have chosen a specific date, we will show you all the keywords for which the analysed domain ranked on that day. This is imperative for a solid controlling mechanism of your campaigns.
- Filter: Set different settings for the table and save filters, or load previously saved filters to use the same filters for any domain.
Here, you can also activate the Expert Filter to connect the available filters with the boolean operators AND and OR in order to map extensive analysis situations. By default (with the Expert Filter deactivated), filters of the same type are connected with AND, and filters of different types are connected by OR. - Data Source: Choose between the mobile or desktop data. We show the mobile data by default, as that is where most searches are done nowadays. However, the desktop data is only a click away. In addition to the mobile/desktop toggle, you can also display the data from the Optimizer and the Google Search Console as the source – provided that a keyword monitoring was created for the domain in the Optimizer and the Search Console for this domain was connected to the Toolbox.
To the right, you will find the buttons to export the table as a CSV file, to share it via a shortlink or to open the handbook for the page.
Keyword Table
In the keyword table, you will find all keywords for which we have found one or more rankings of the analysed domain. It can be interesting to approach the data in an exploratory way, but the greatest added value comes from pursuing a specific question with the help of filters.
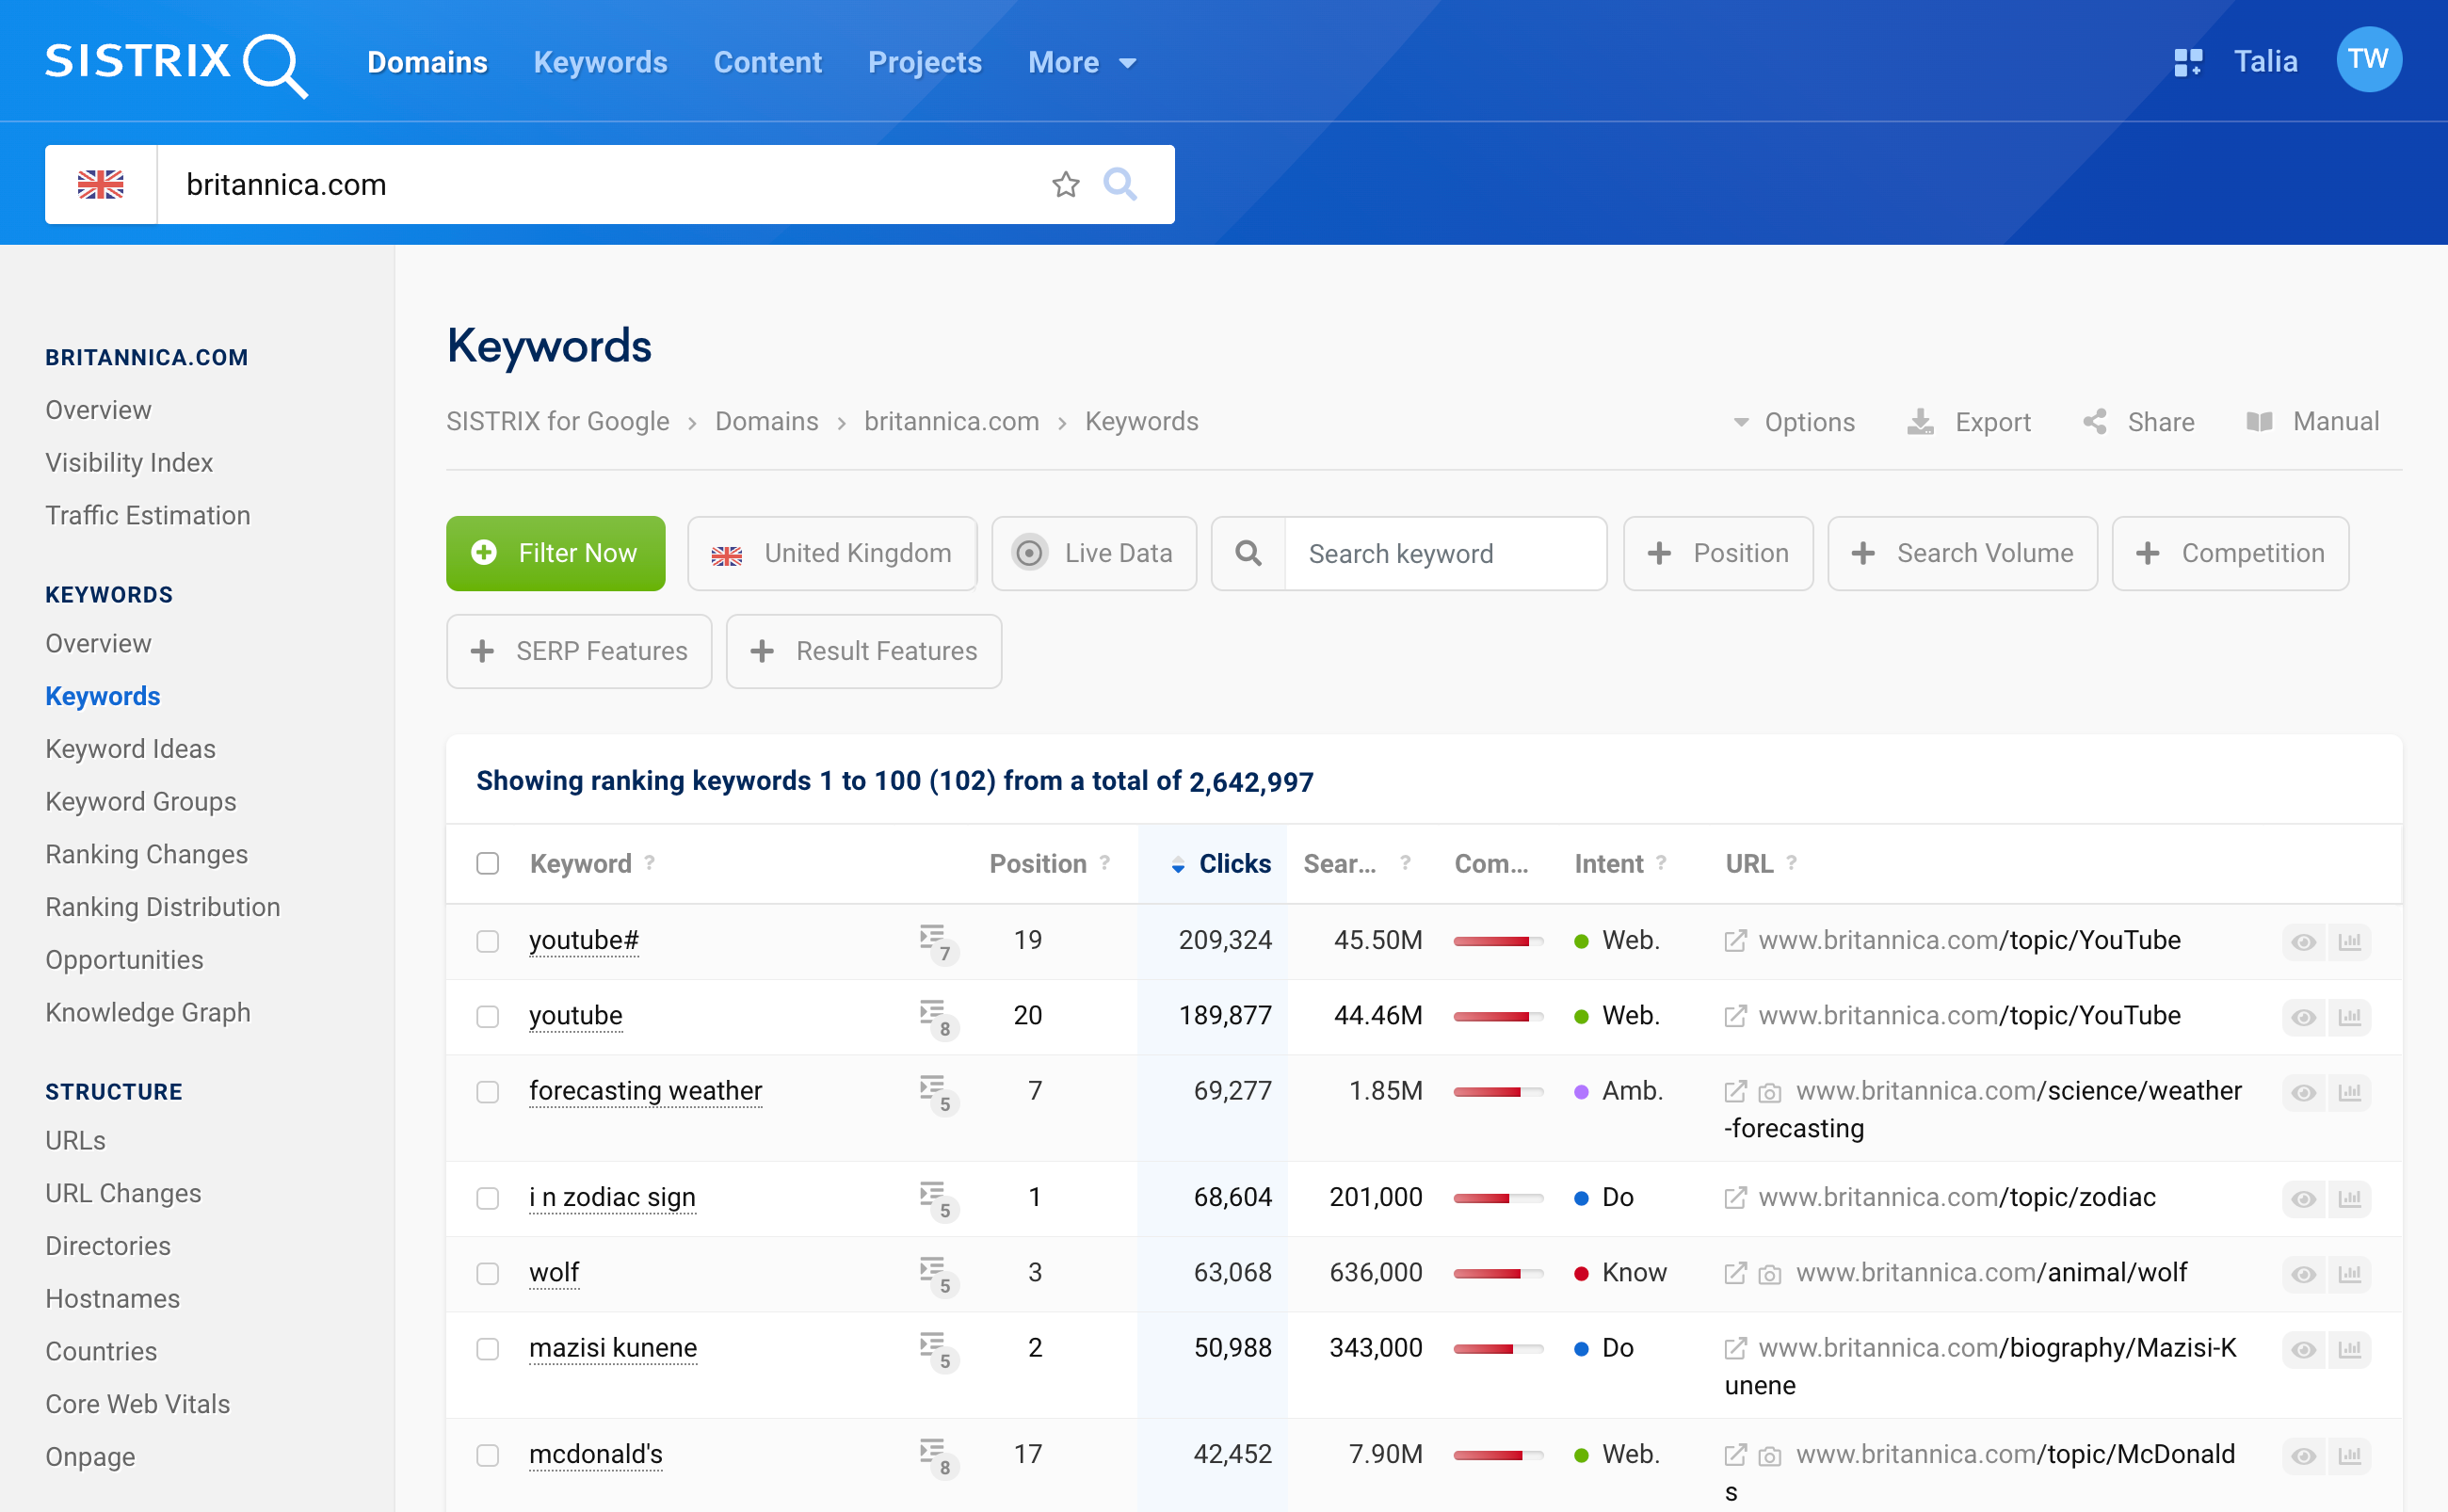
The keyword table has a default view in which we have pre-selected the columns to be displayed. You can also freely customise this view to fit your needs.
Default View
All data in the table refers to the respective country you have selected. By default, the table is sorted by the number of clicks. Click on another column heading to change the sorting.
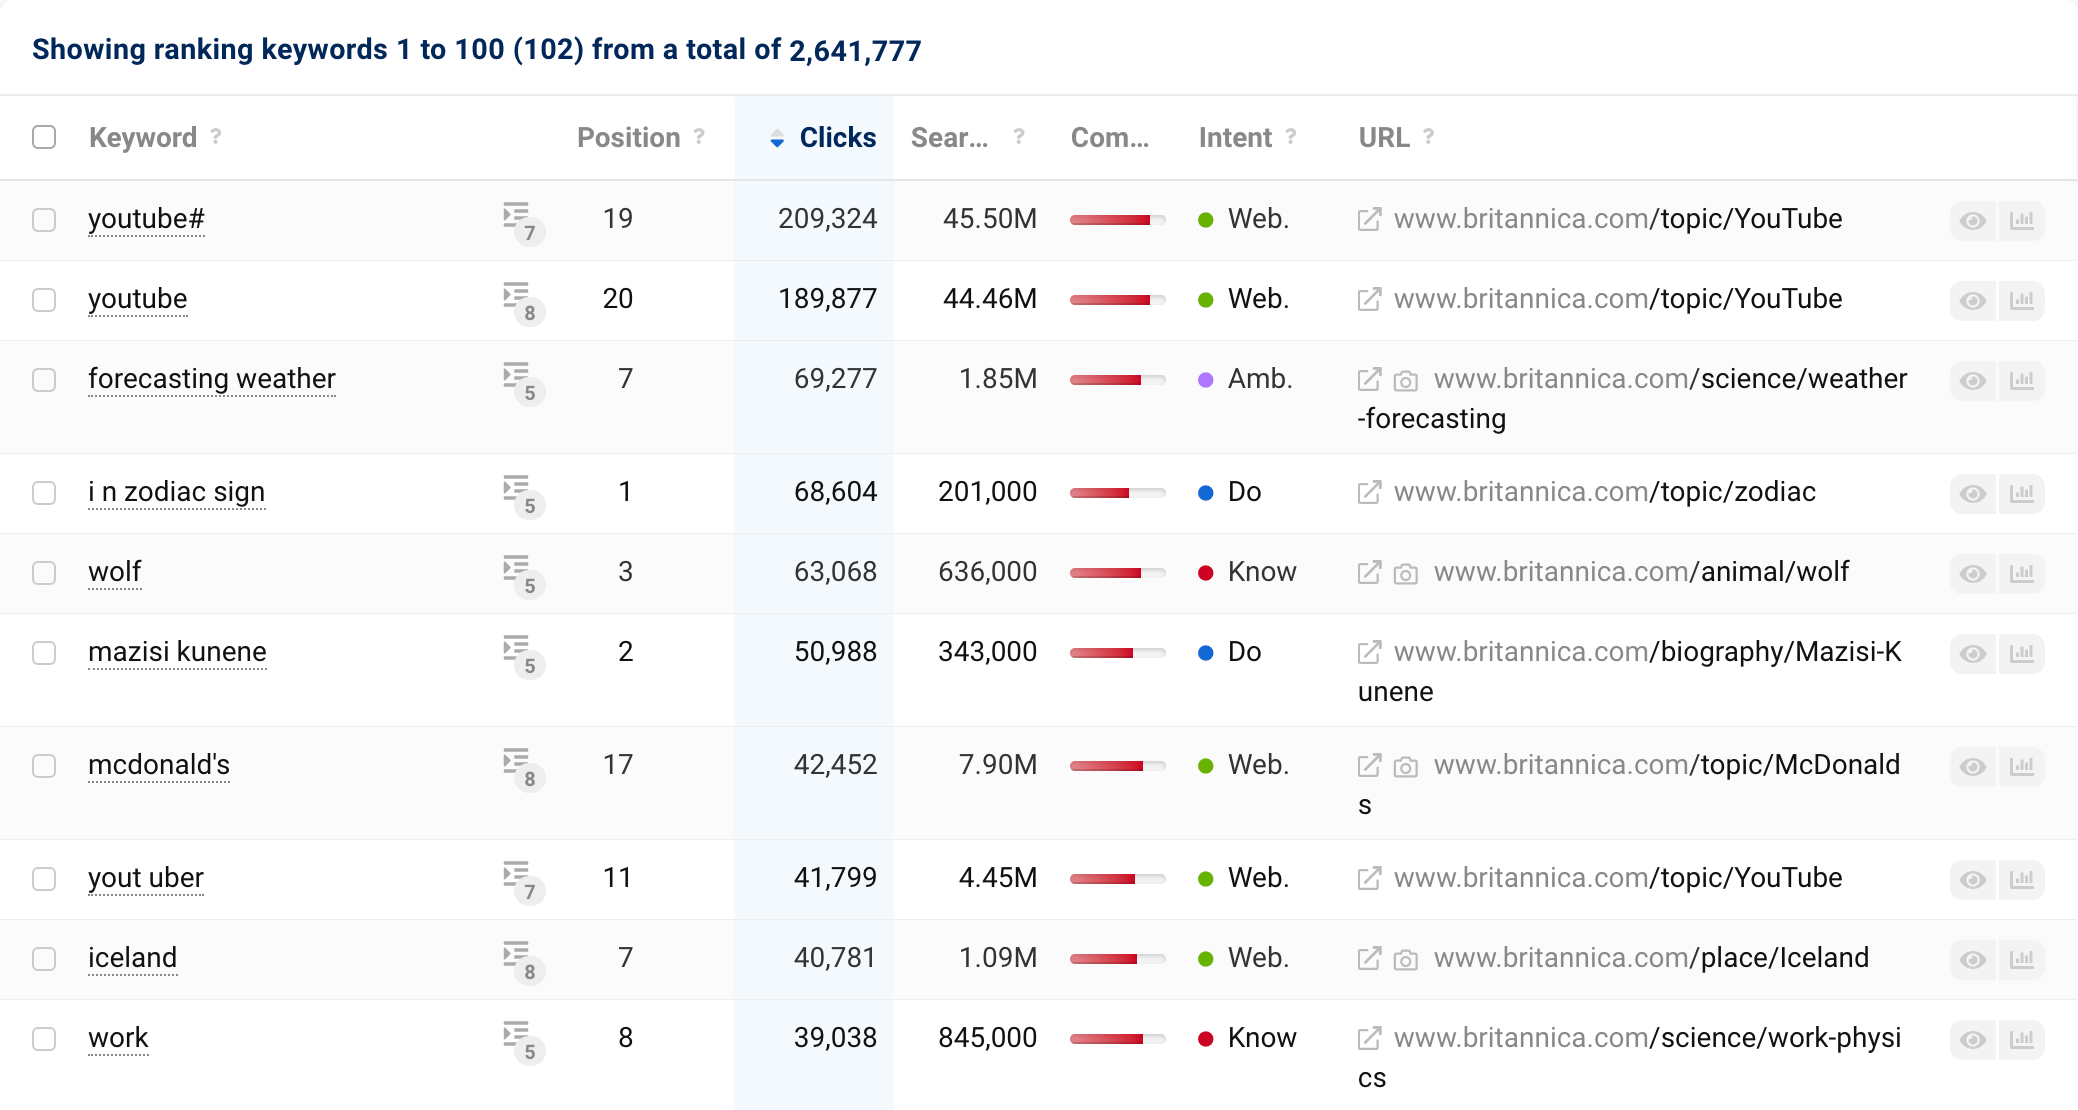
In the first column, you see the keyword that we queried on Google. If you click on a keyword, you will be taken directly to the corresponding keyword overview. There, you can analyse the keyword in detail.
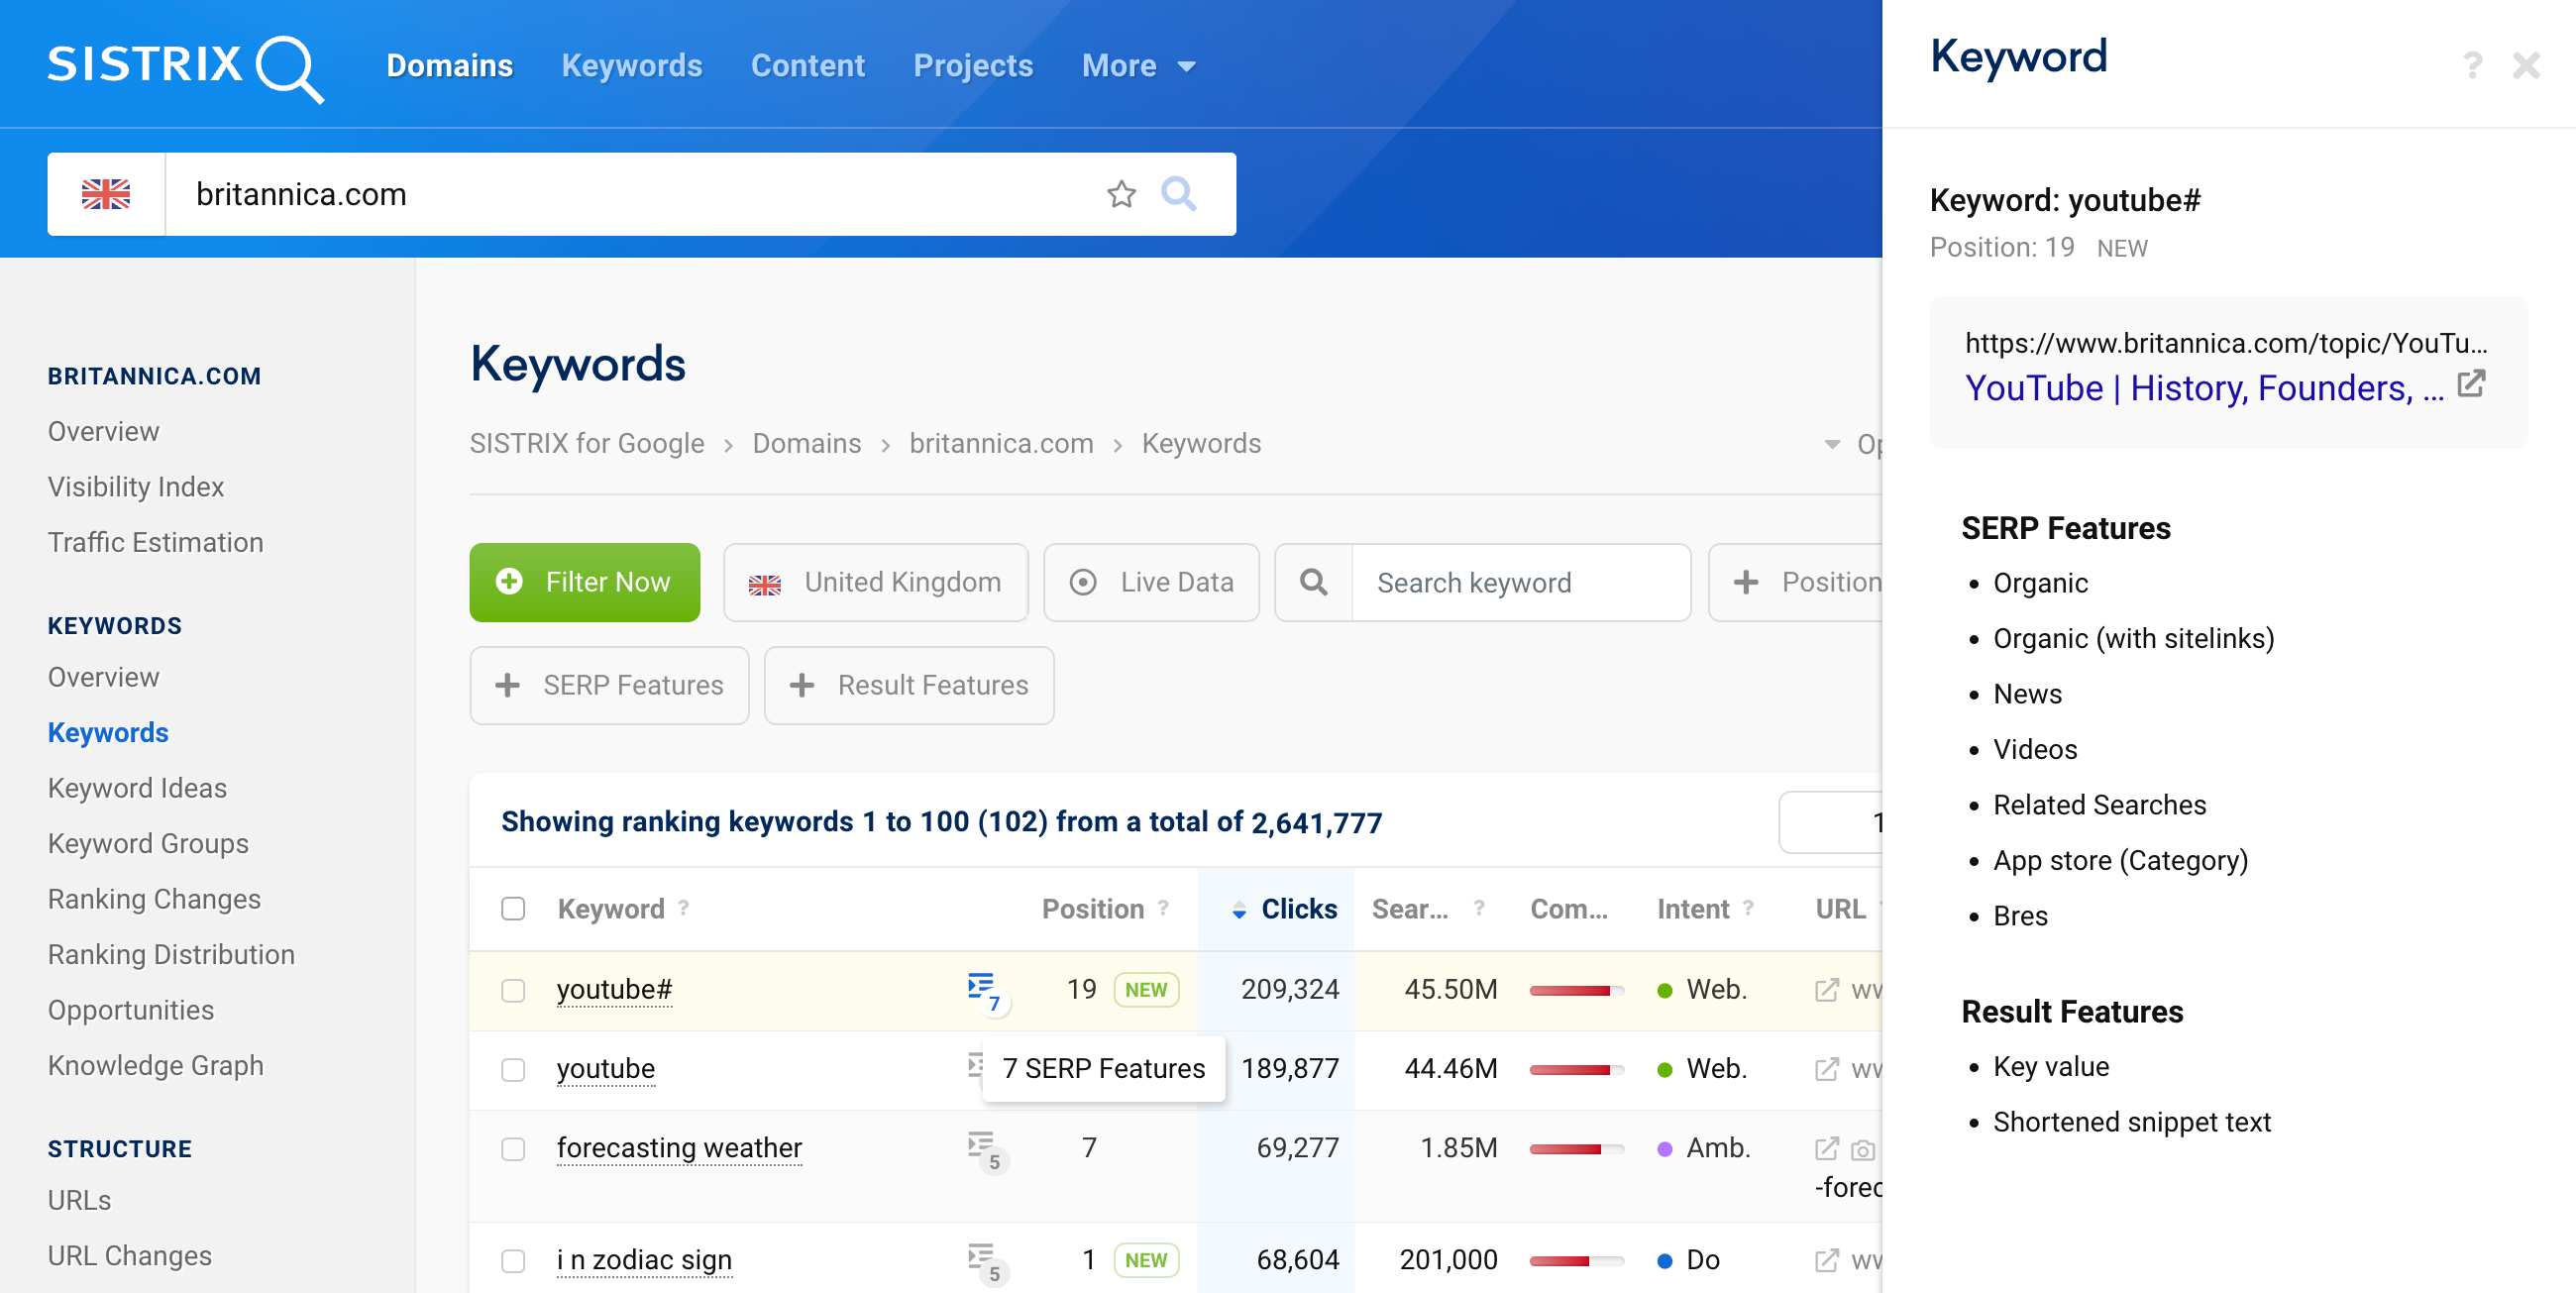
If you click on the button to the right of the keyword 1, you can see which SERP features and result features are displayed for this keyword 2. The small number in the button already shows you how many features there are in total.
In the next column, you can see the (organic) search result position of the entered domain on the SERP for the respective keyword. There you will also find (if available) the change in position compared to the last update. The update frequency depends on the specific keyword.
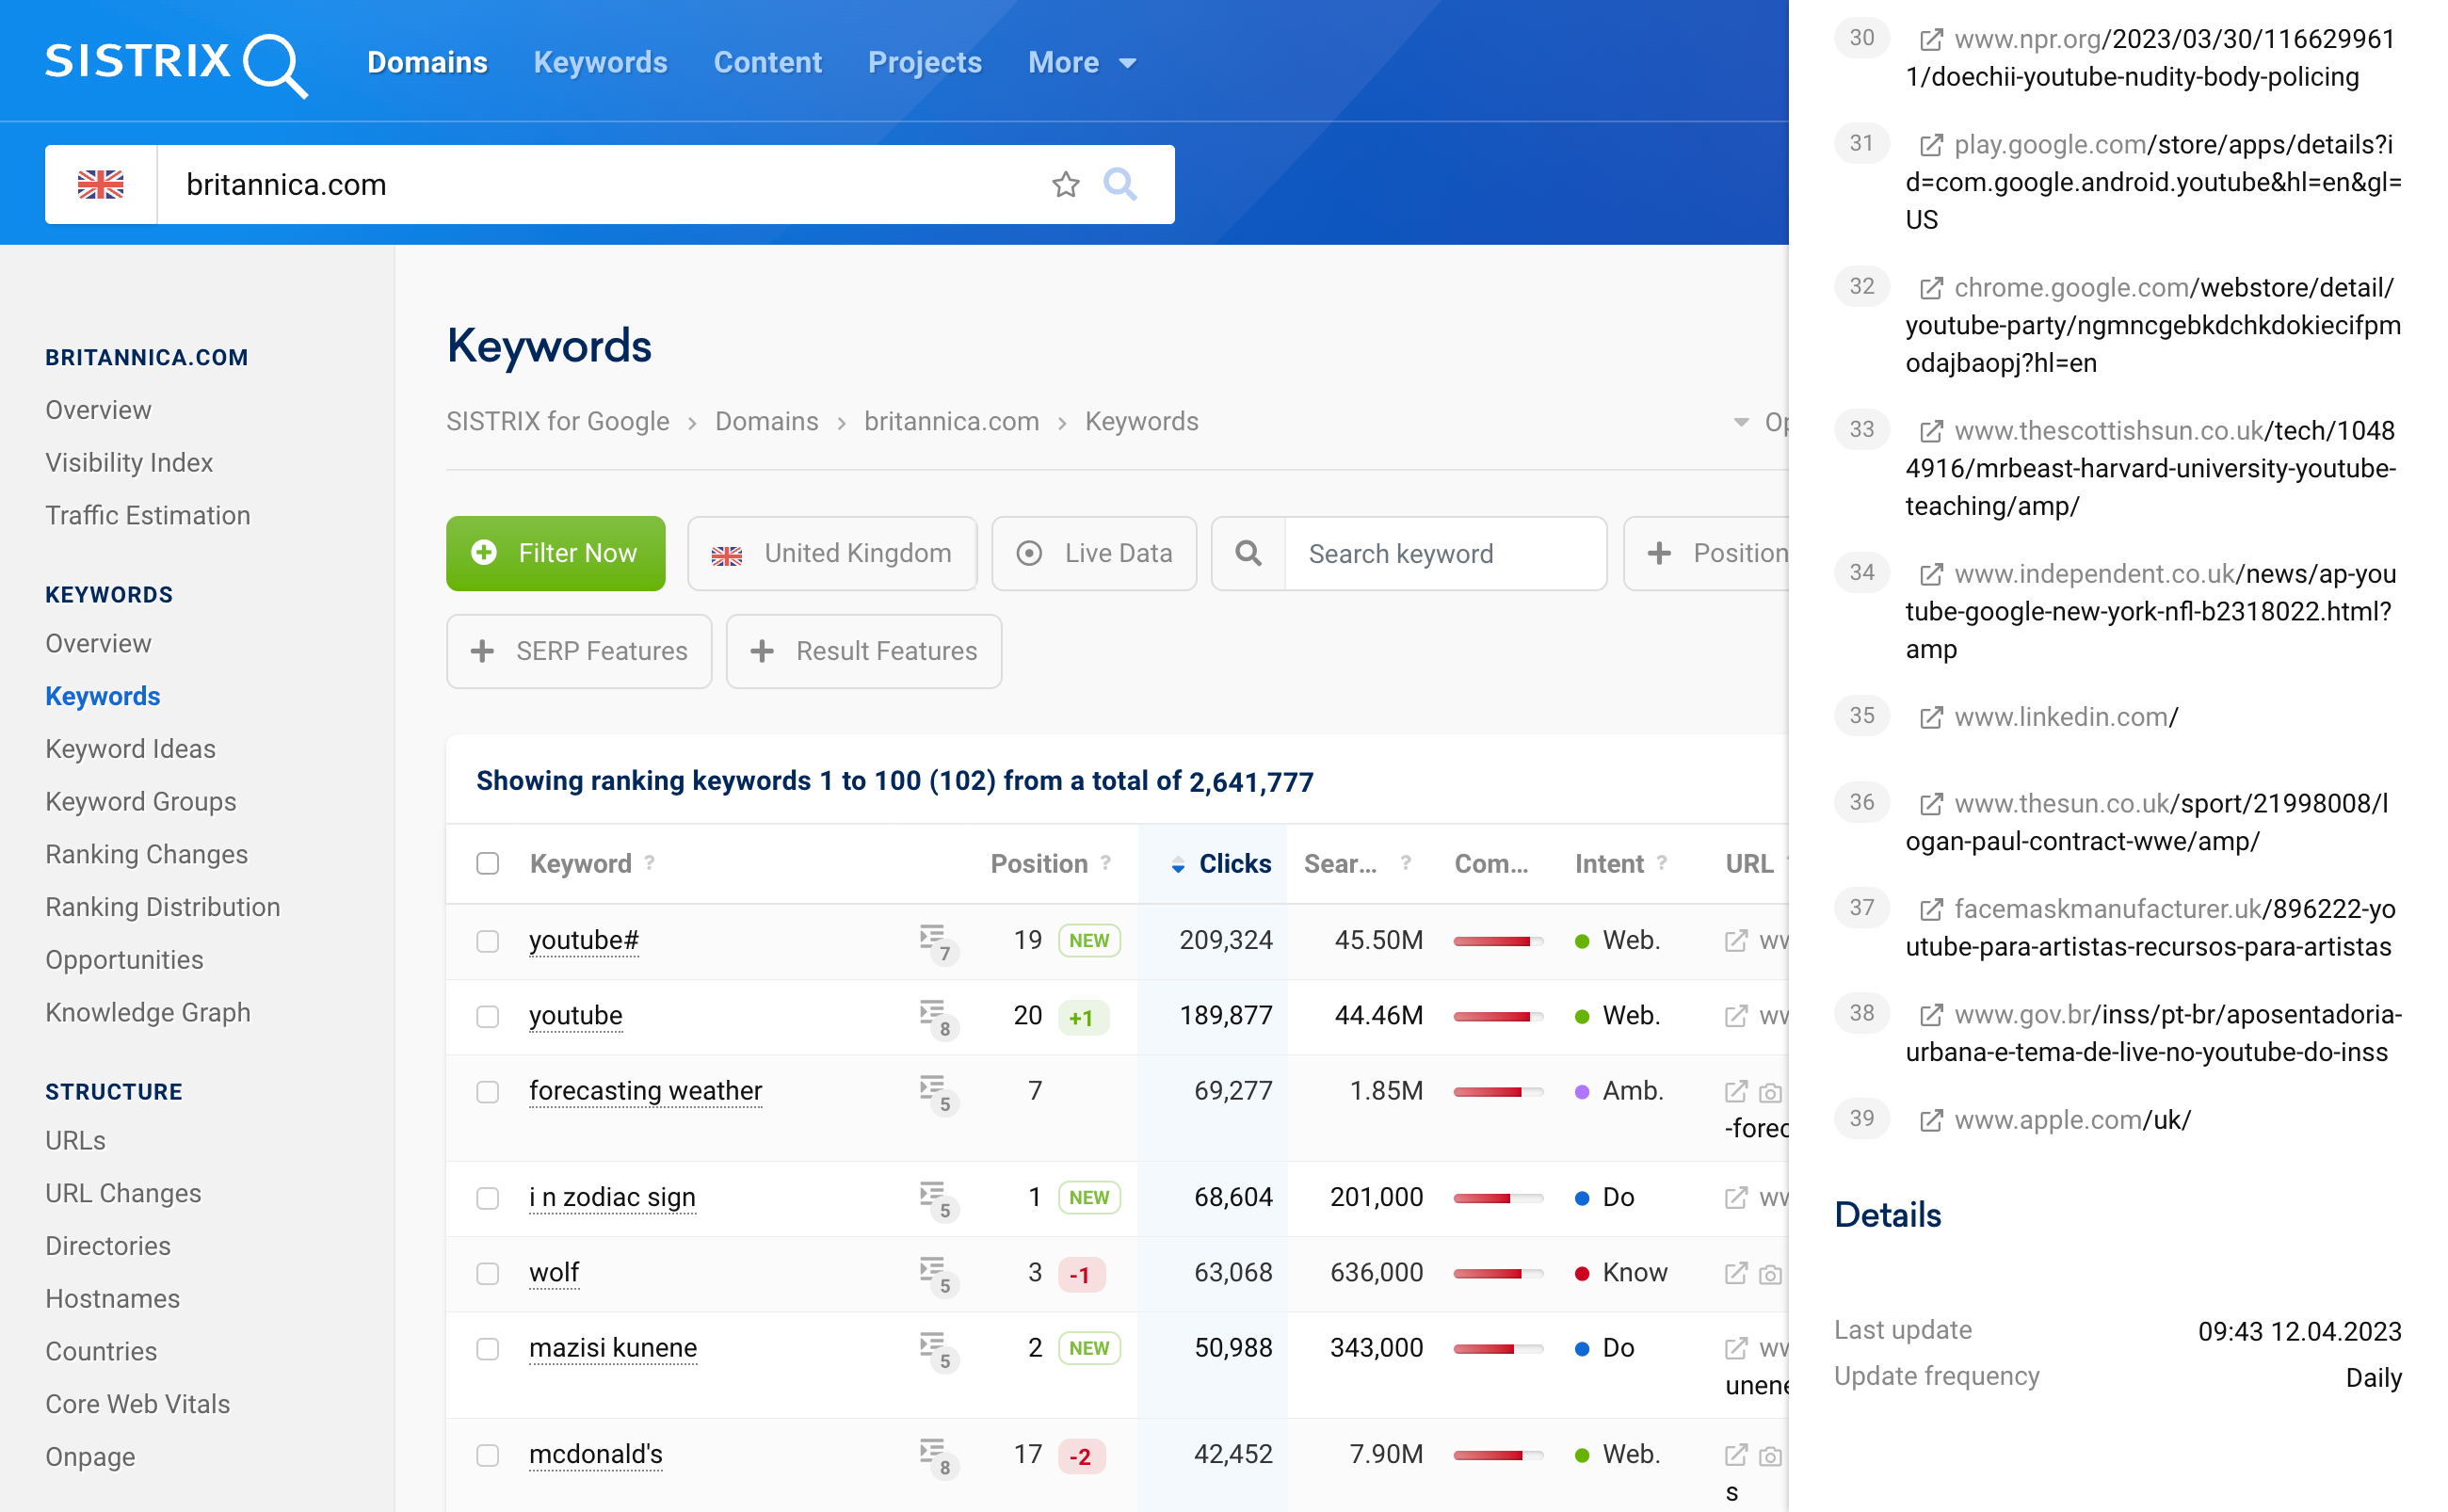
To see when the keyword details were last updated, click on the eye symbol (second to last symbol) in the table and scroll down to “Details” 3. There you will find the date and time of the last update, as well as the update frequency (daily or monthly).
The column to the right shows the number of clicks the domain generates with this keyword. This is because, depending on the search intent and thus the SERP layout, which organic result searchers click on differs. The number of clicks is an estimated monthly average.
The number of monthly search queries, i.e., the search volume of a keyword in Google, is shown in the column to the right of that.

In the column next to the search volume, you can see how strong the competition is for this particular keyword. 0 means a low level of competition in the organic Google index, and 100 means very strong competition.
You can find the respective search intent in the next column. Since there is rarely only one intent behind a search for a keyword on Google, you can look at the respective distribution of search intents in more detail.
Move the mouse over the intent “Web” for the keyword “youtube#” 1, for example, and you will see the corresponding distribution.
By default, you will also see the Cost Per Click (CPC) in the following column, not shown in the image above. This refers to the price that advertisers have to pay to buy a click. In SISTRIX, this value corresponds to the click price for Google Ads.
In the last column, you will find the URL of the domain that ranks for this keyword in the indicated position. You can also simply click on the URL to analyse it in more detail.
A click on the small symbol with the box and the arrow in front of the URL will open the address directly in a new browser tab (you will then leave SISTRIX).
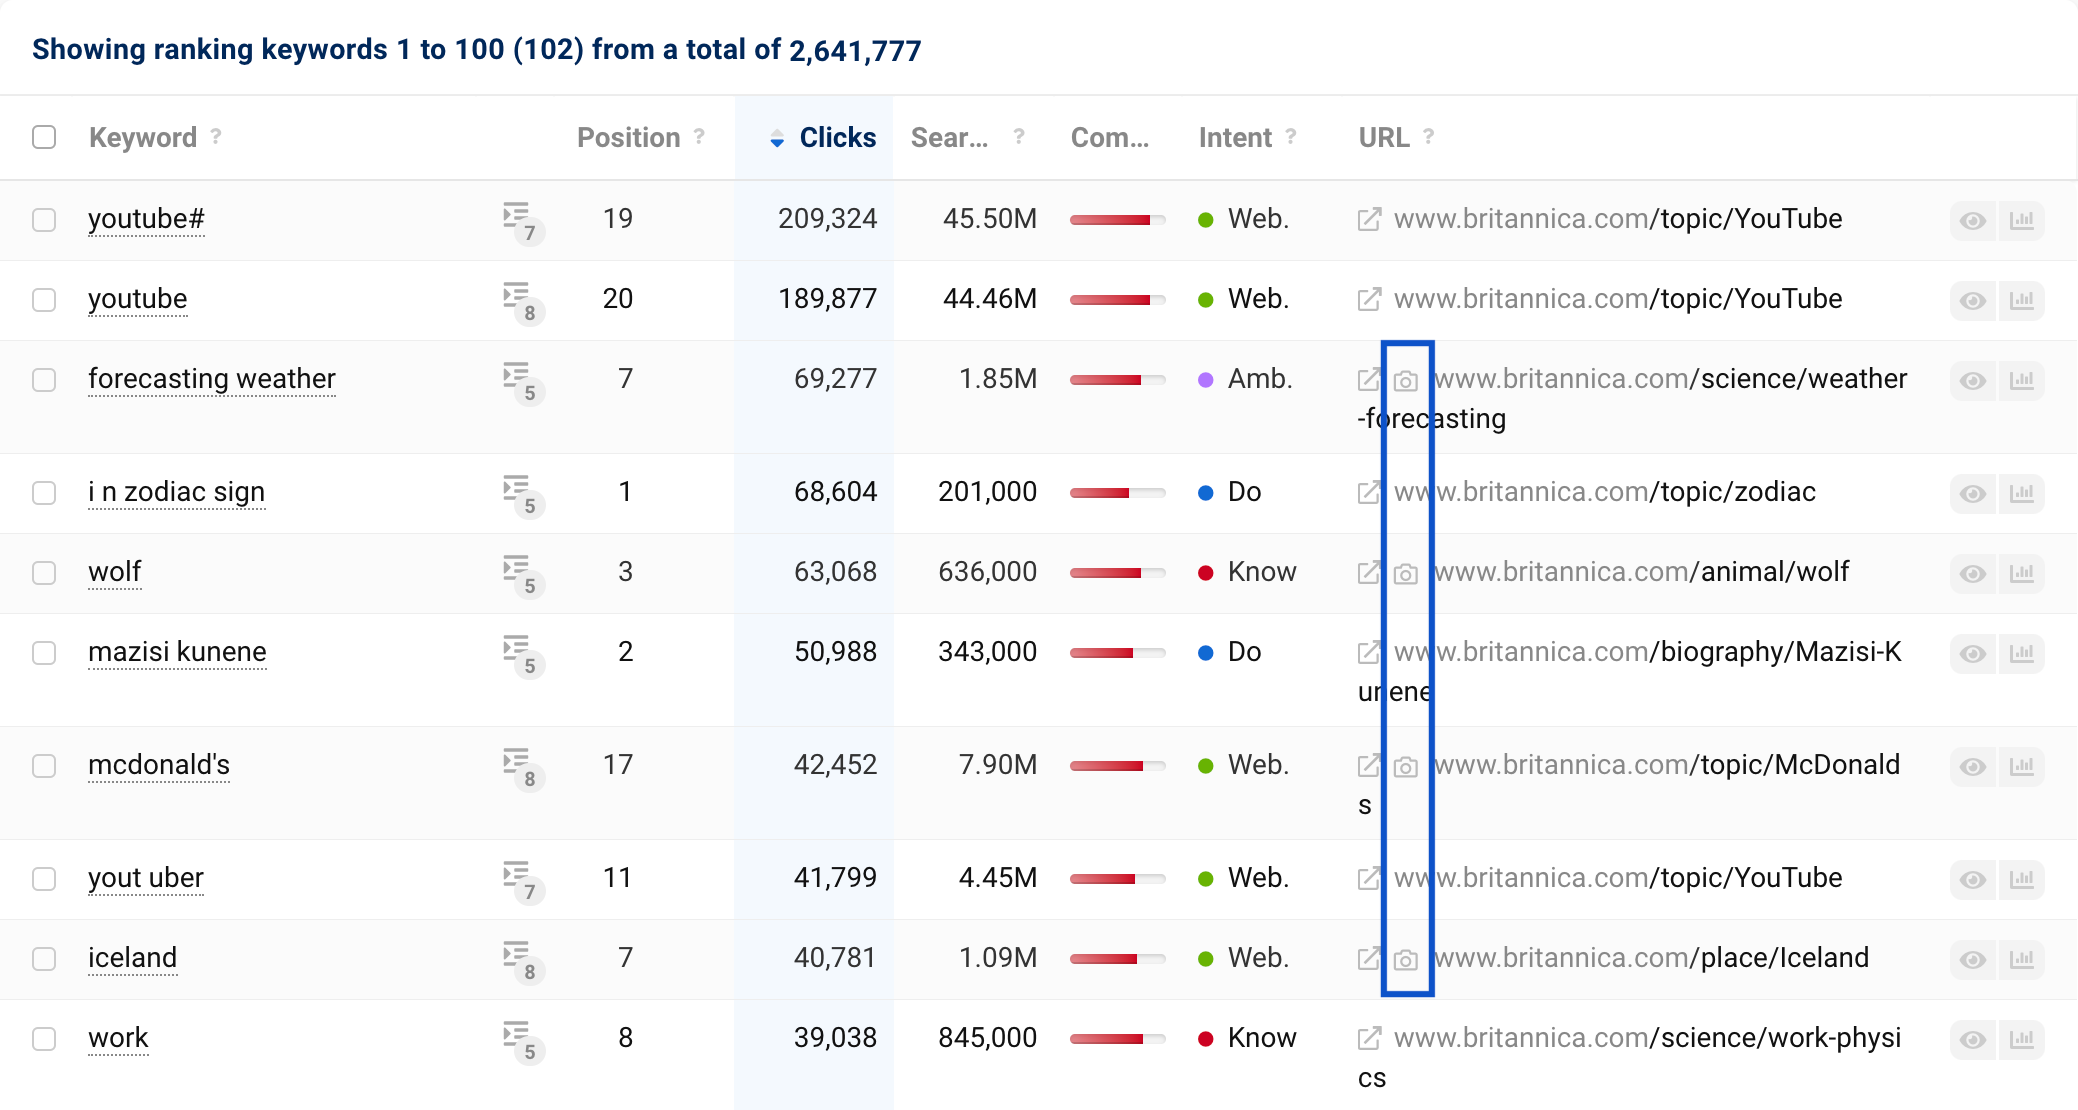
Sometimes there is an additional symbol in front of the URL. This gives you a hint about the result feature of this search result. The camera symbol, for example, stands for an image next to the search result, a question mark for the FAQ extension:

Click on one of these symbols to filter directly for this result feature.
The three buttons in each row:
In each row, you will also find three buttons:
- Checkbox: At the beginning of each row, you will find a checkbox. Use this to select the keywords that are relevant to you and add them to lists, for example.
- Eye: With this button, you can get an overview of the respective keyword directly in the table and view the last crawled SERP. In addition, you can find information here about when we last updated the keyword.
- Chart: The last button in the row leads you to the keyword history. Take a look at how the ranking of your domain for this keyword developed historically. This is especially helpful when analysing strong fluctuations in the Visibility Index.
Select Columns Individually
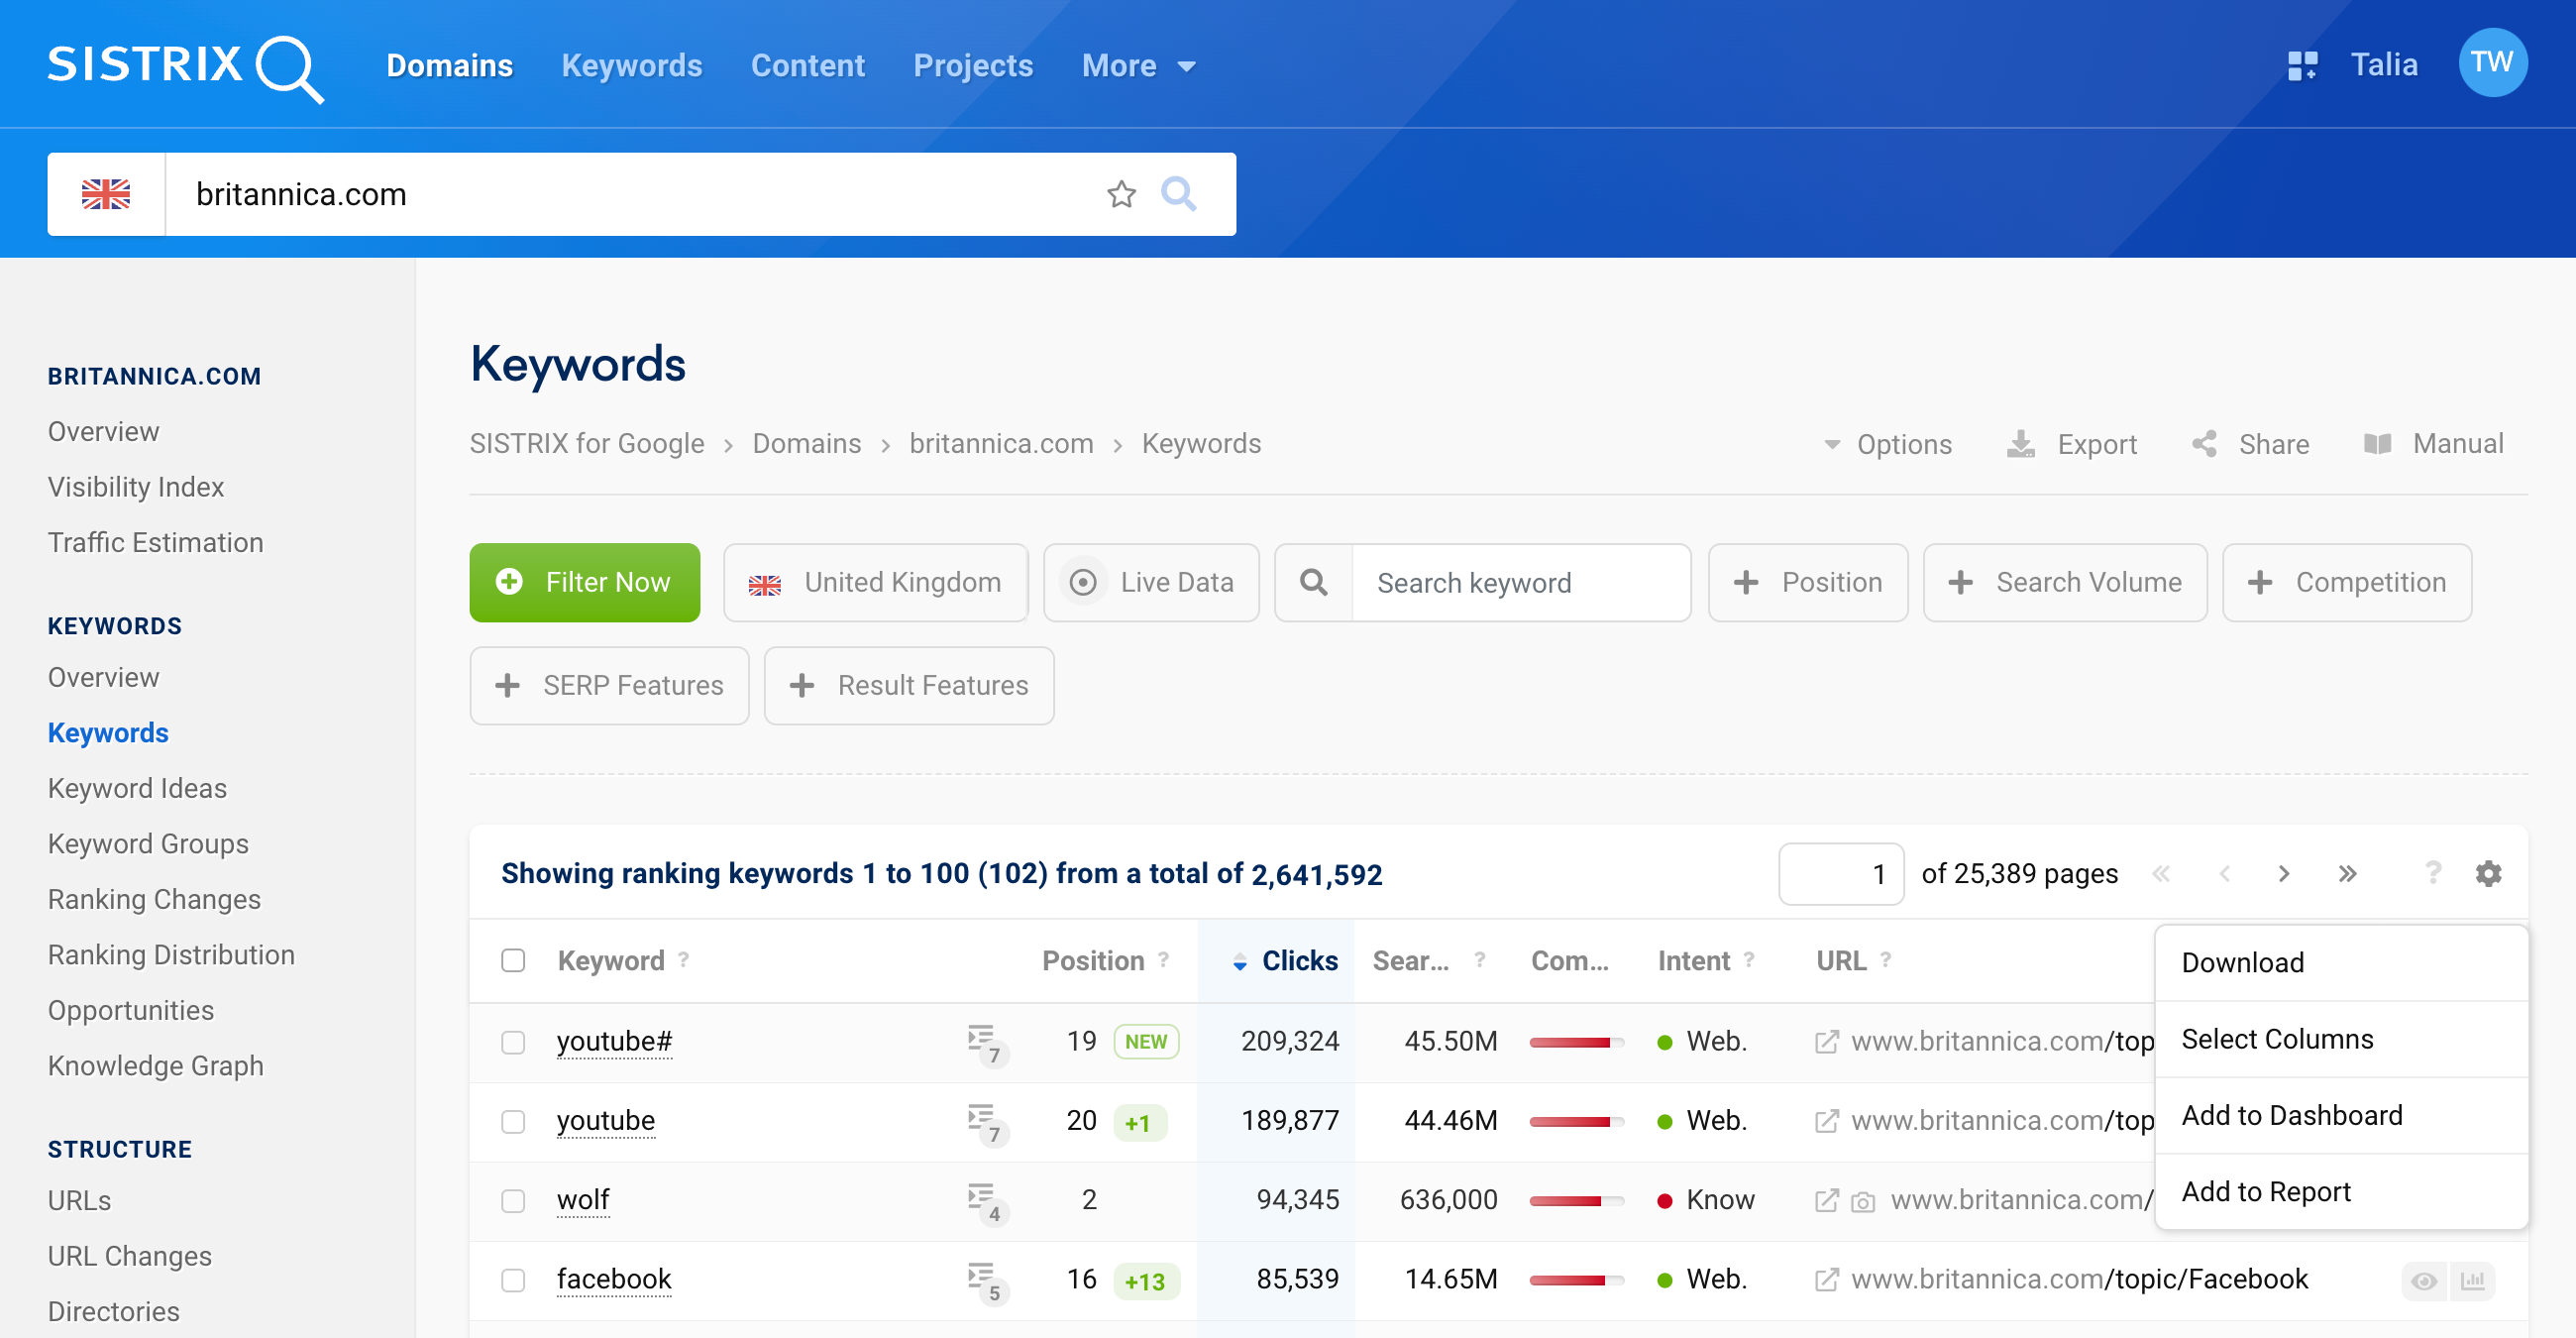
To do this, click on the cogwheel at the top right of the table 1 and select “Select Columns” 2.
This way, you can determine which data you wish to see in the table and select the columns that are important for your analysis or exports. You can still filter for values whose columns you have hidden.
Predefined Filters
Above the table, you can find a number of predefined filter that can help you with many common questions:
Country
The first filter allows you to change the country for which the keyword data should be displayed.
Data Source
With the second filter in the row, you have various setting options for the data source of the keyword data. For example, you can choose whether you want to use mobile, desktop, Optimizer, Search Console or live data. There, you can also select a different date as the data basis for the keywords.
Specific Keyword
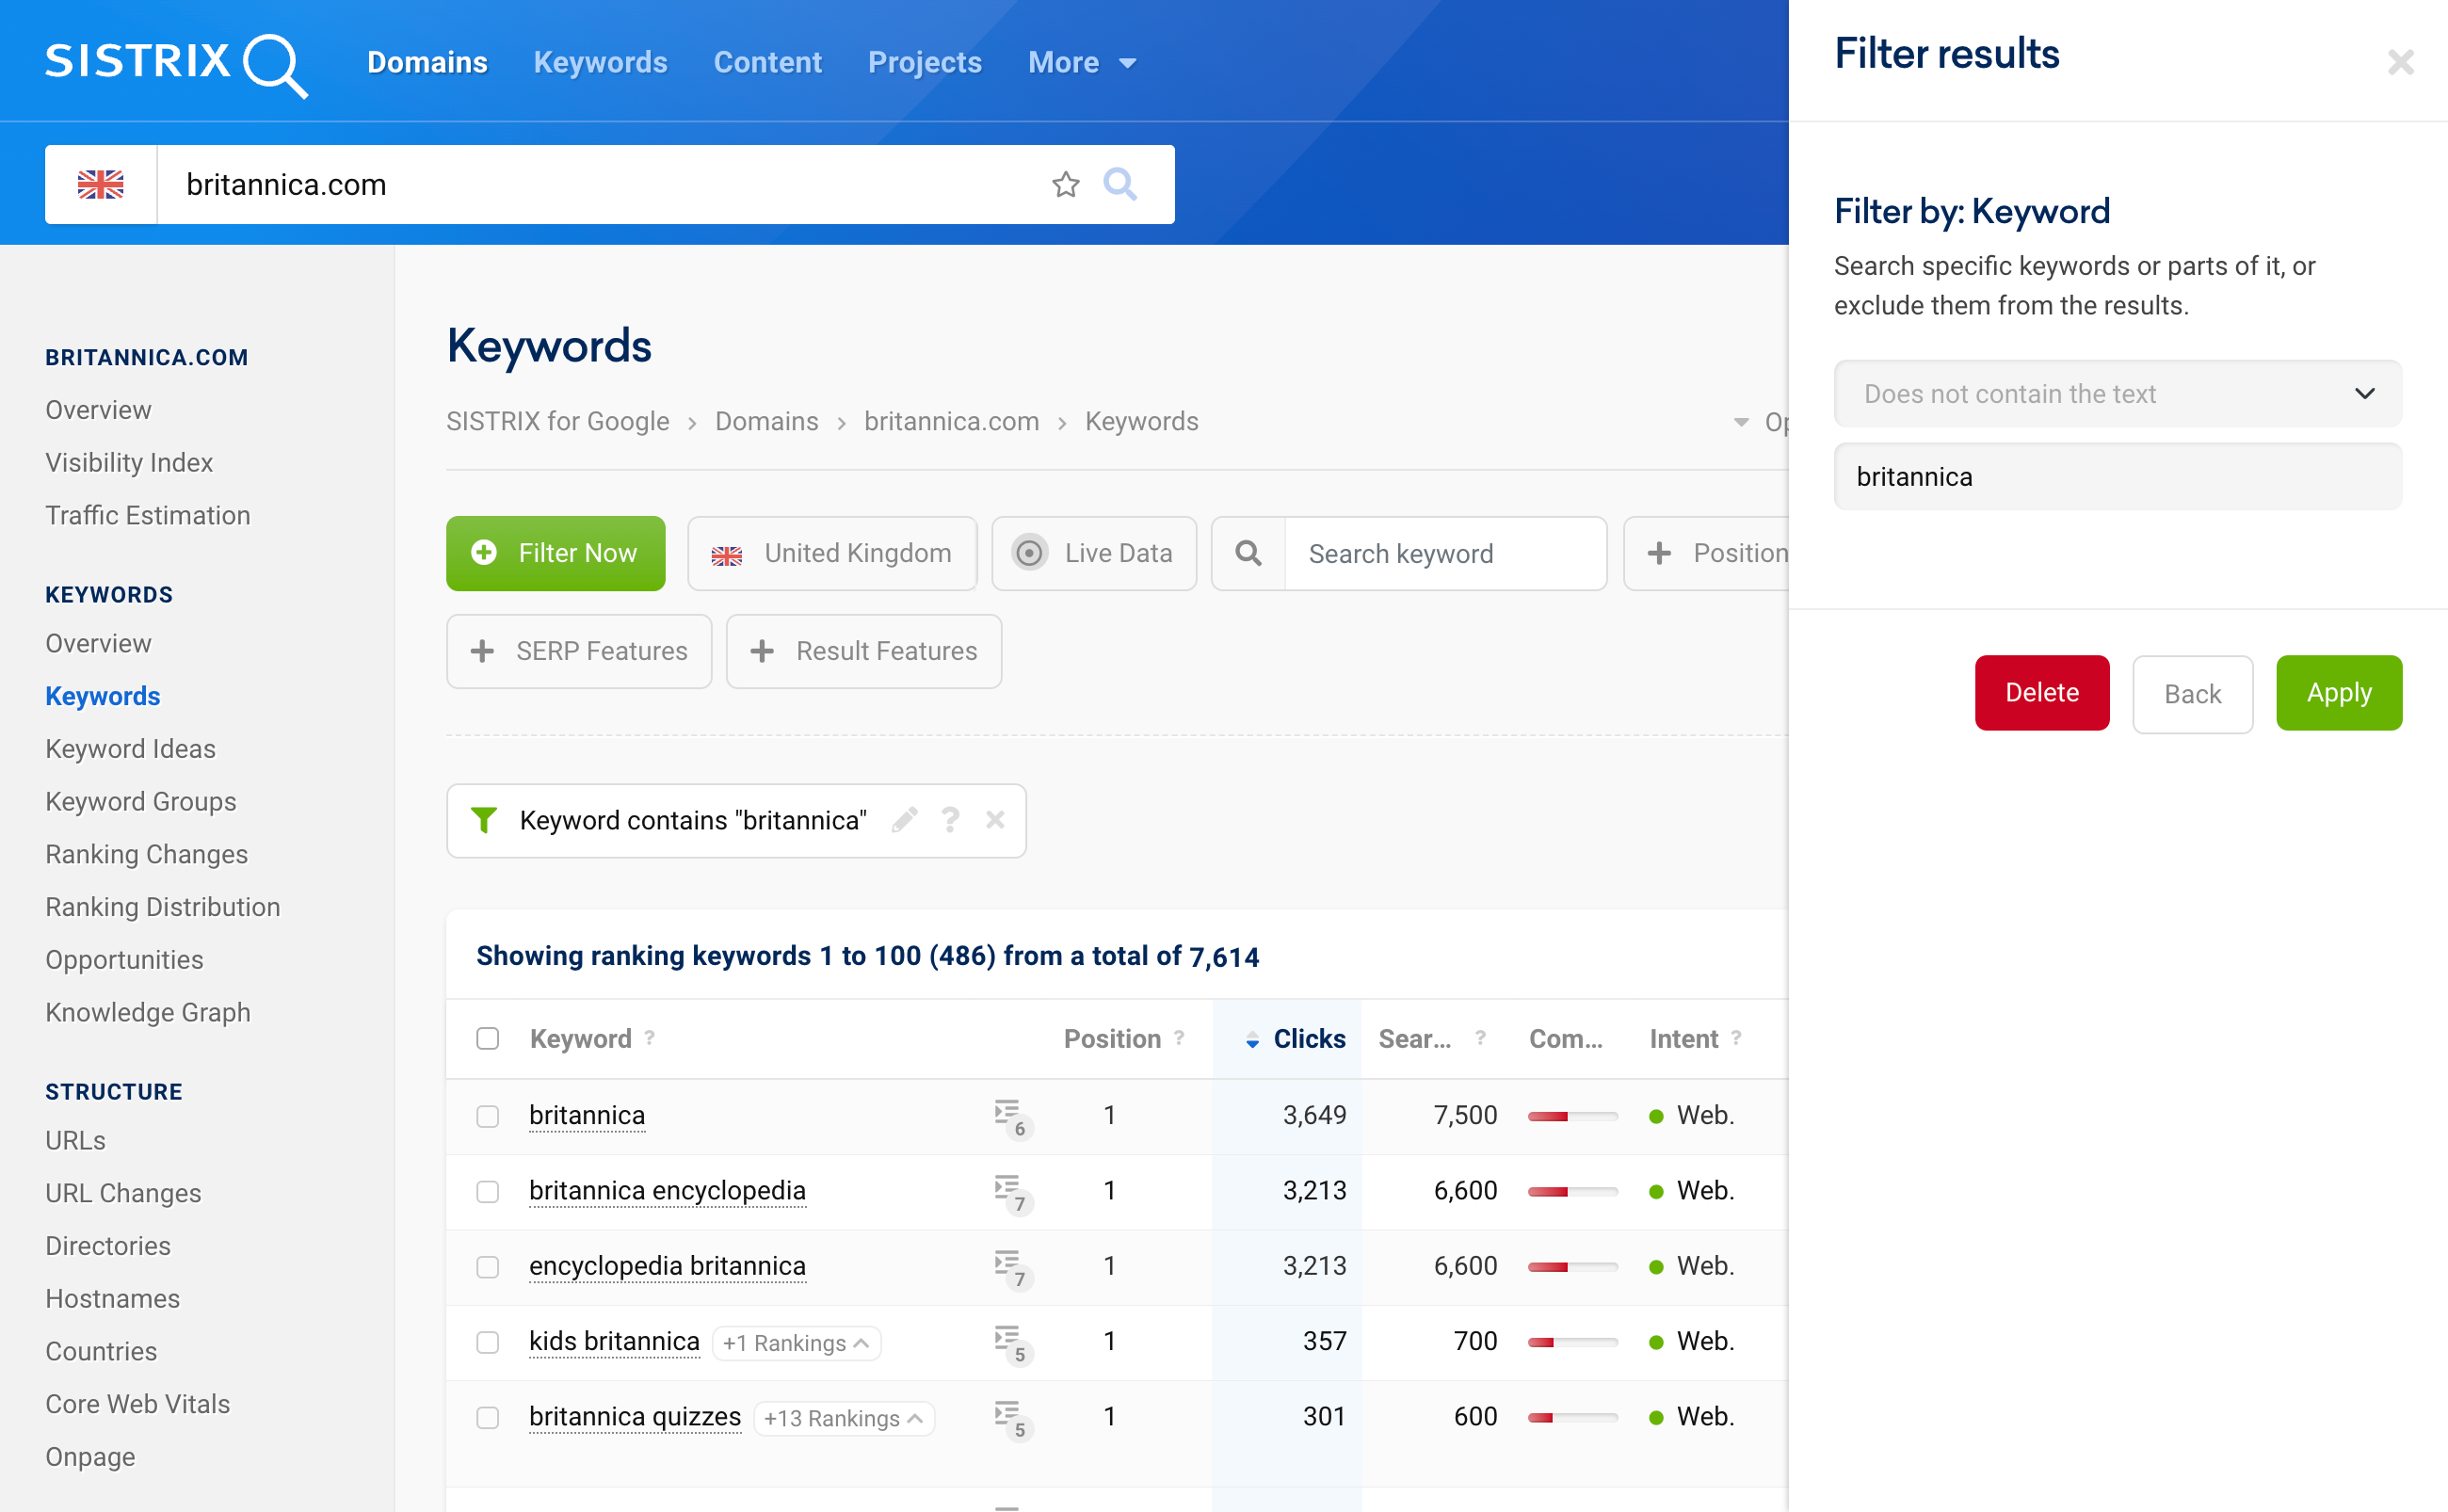
Here, you can enter a keyword or a keyword combination, and the table will only show you results that contain this word. However, sometimes it makes more sense to exclude keywords, for example keywords with the brand name.
To do this, click on the pencil 1 after entering the brand name into the text field of the filter to edit the filter. In the window that opens on the right-hand side, you can then select the option “Does not contain the text” in the drop-down menu 2, for example.
Position
With the position filter, you can only display keyword that are in certain ranking positions. With the help of this filter, you can identify “low hanging fruits”, for example. More about this later.
Search Volume
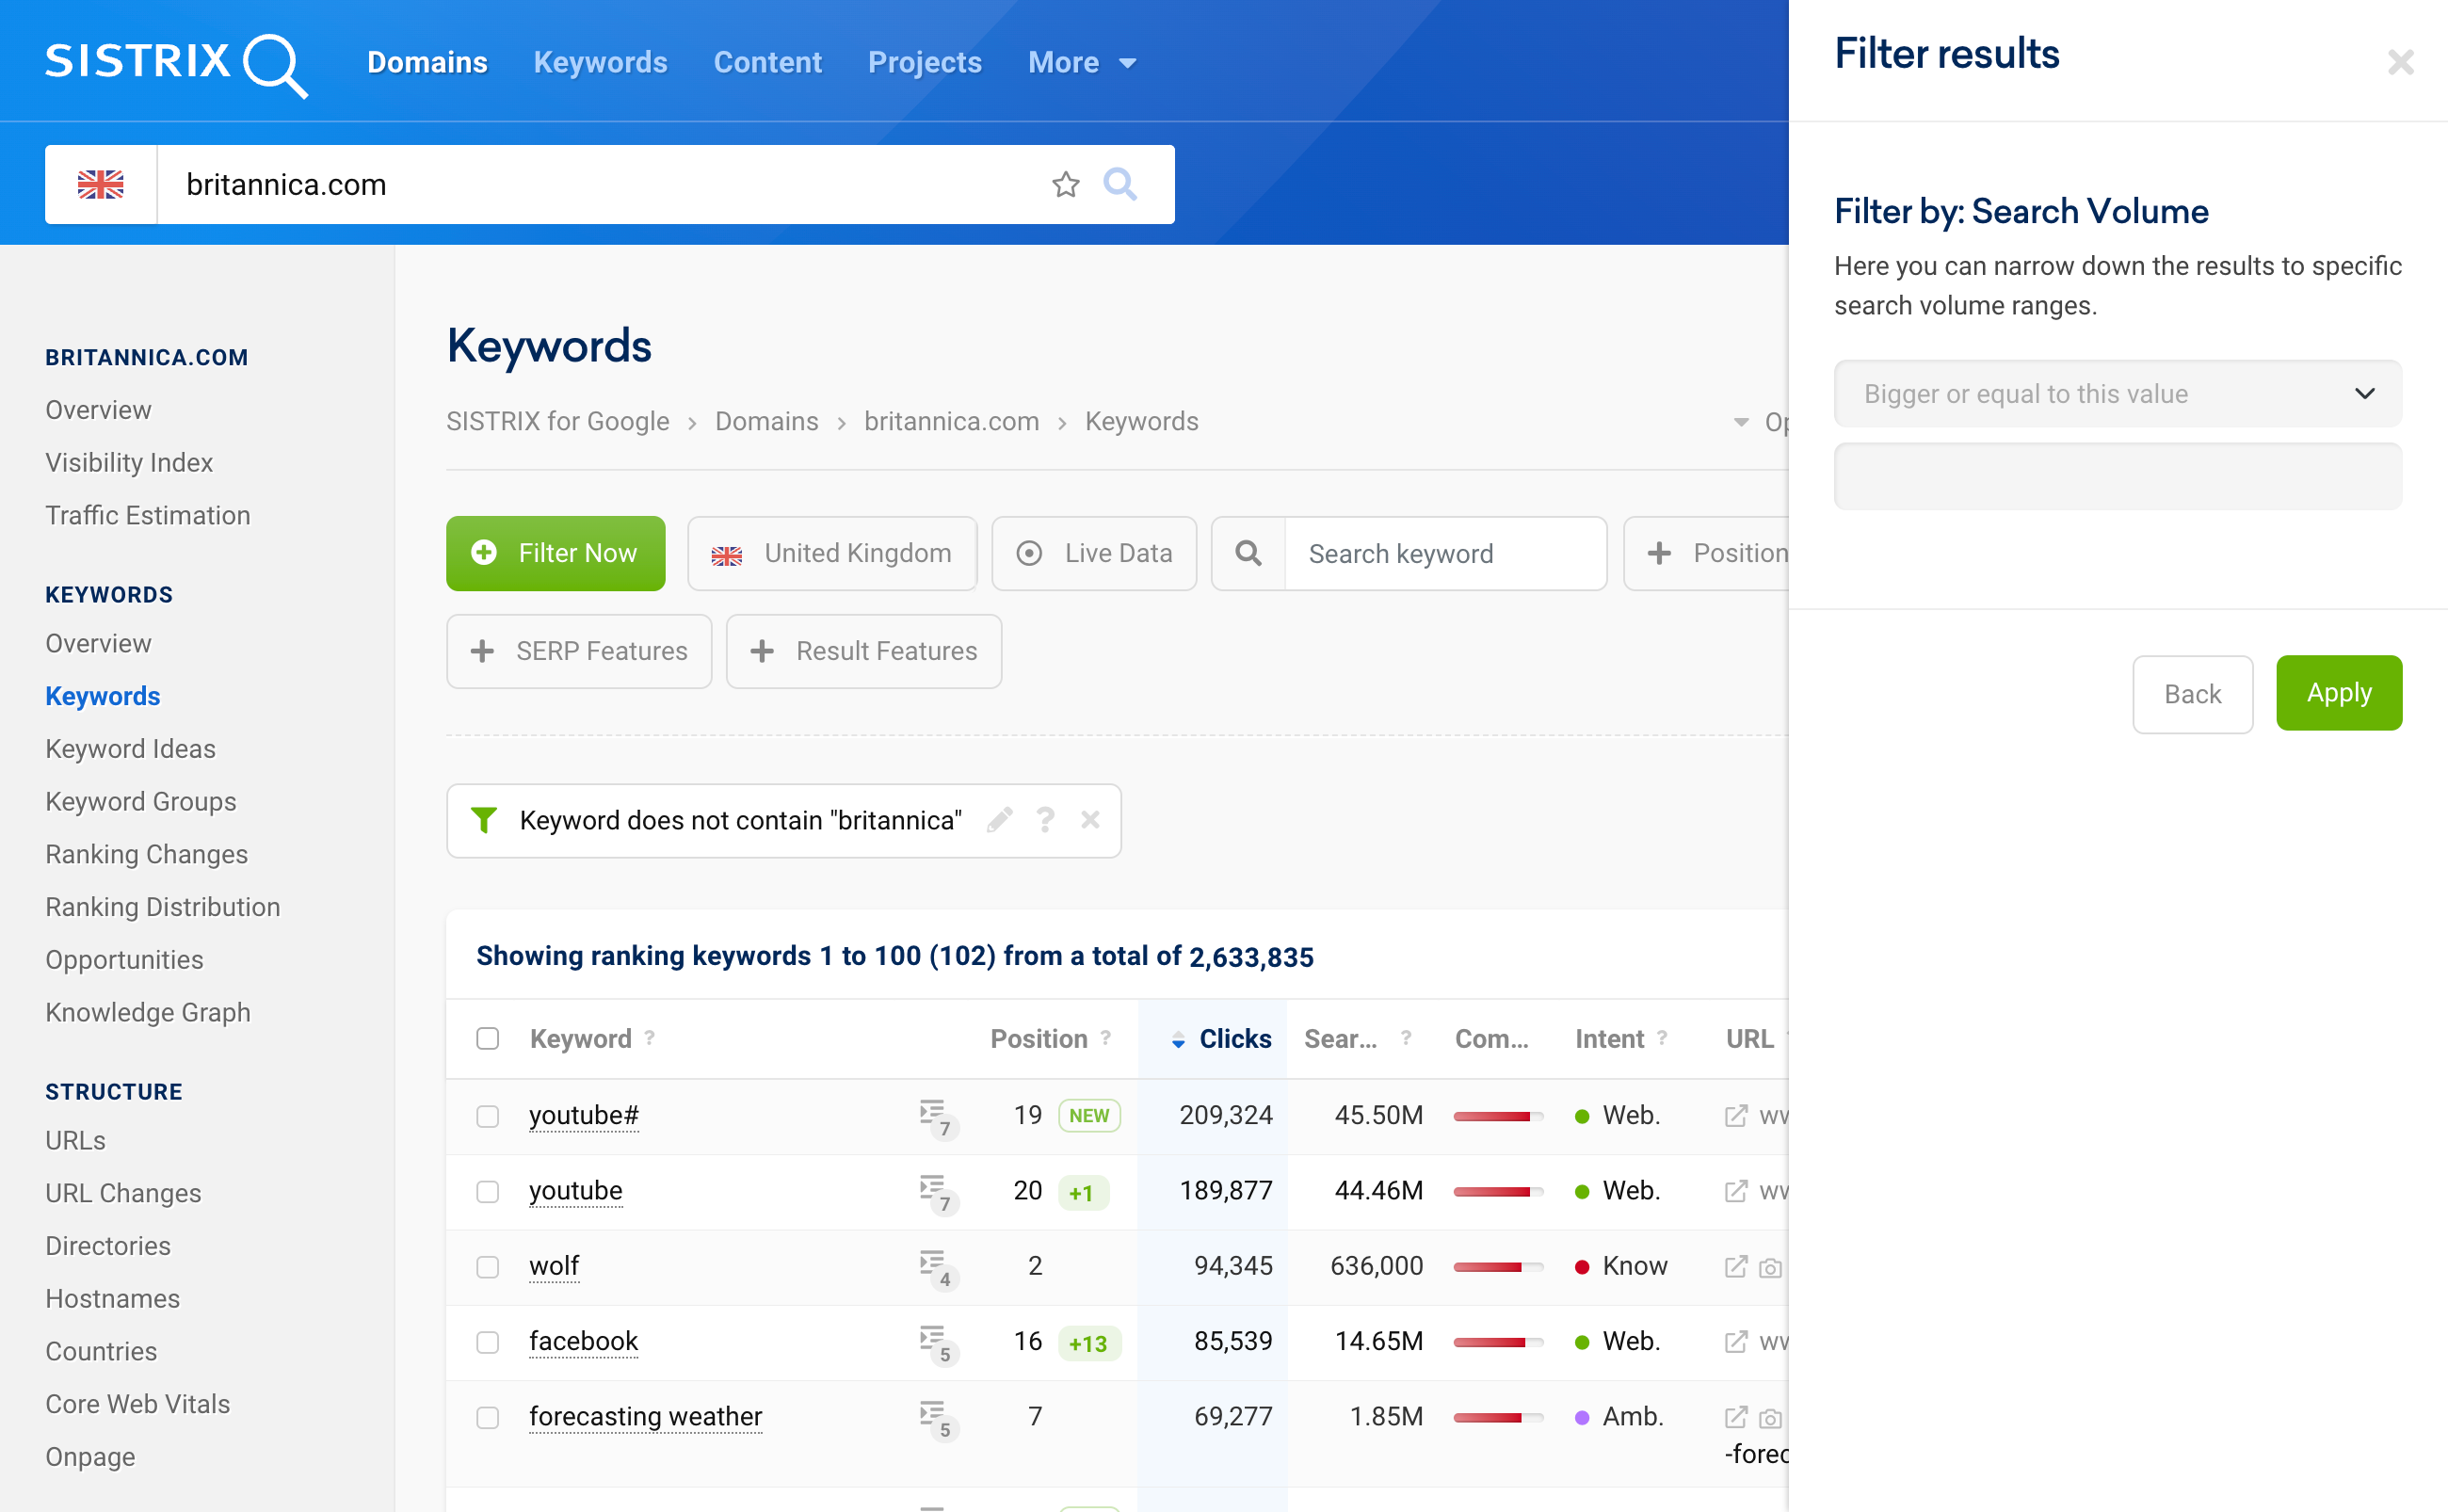
Display keywords that have a certain monthly search volume.
Here, too, you can set various setting using the drop-down menu 1, for example, that the search volume of the keyword should lie between two specified values or be greater than a certain value.
Competition
Filter the keywords by the intensity of competition. Here, you can set a range between 1 and 100.
SERP Features
With the next filter, you can only display keywords where one or more specified features appear on the SERPs. It doesn’t matter which domain the Featured Snippet comes from, it only matters that it appears on the search results page.
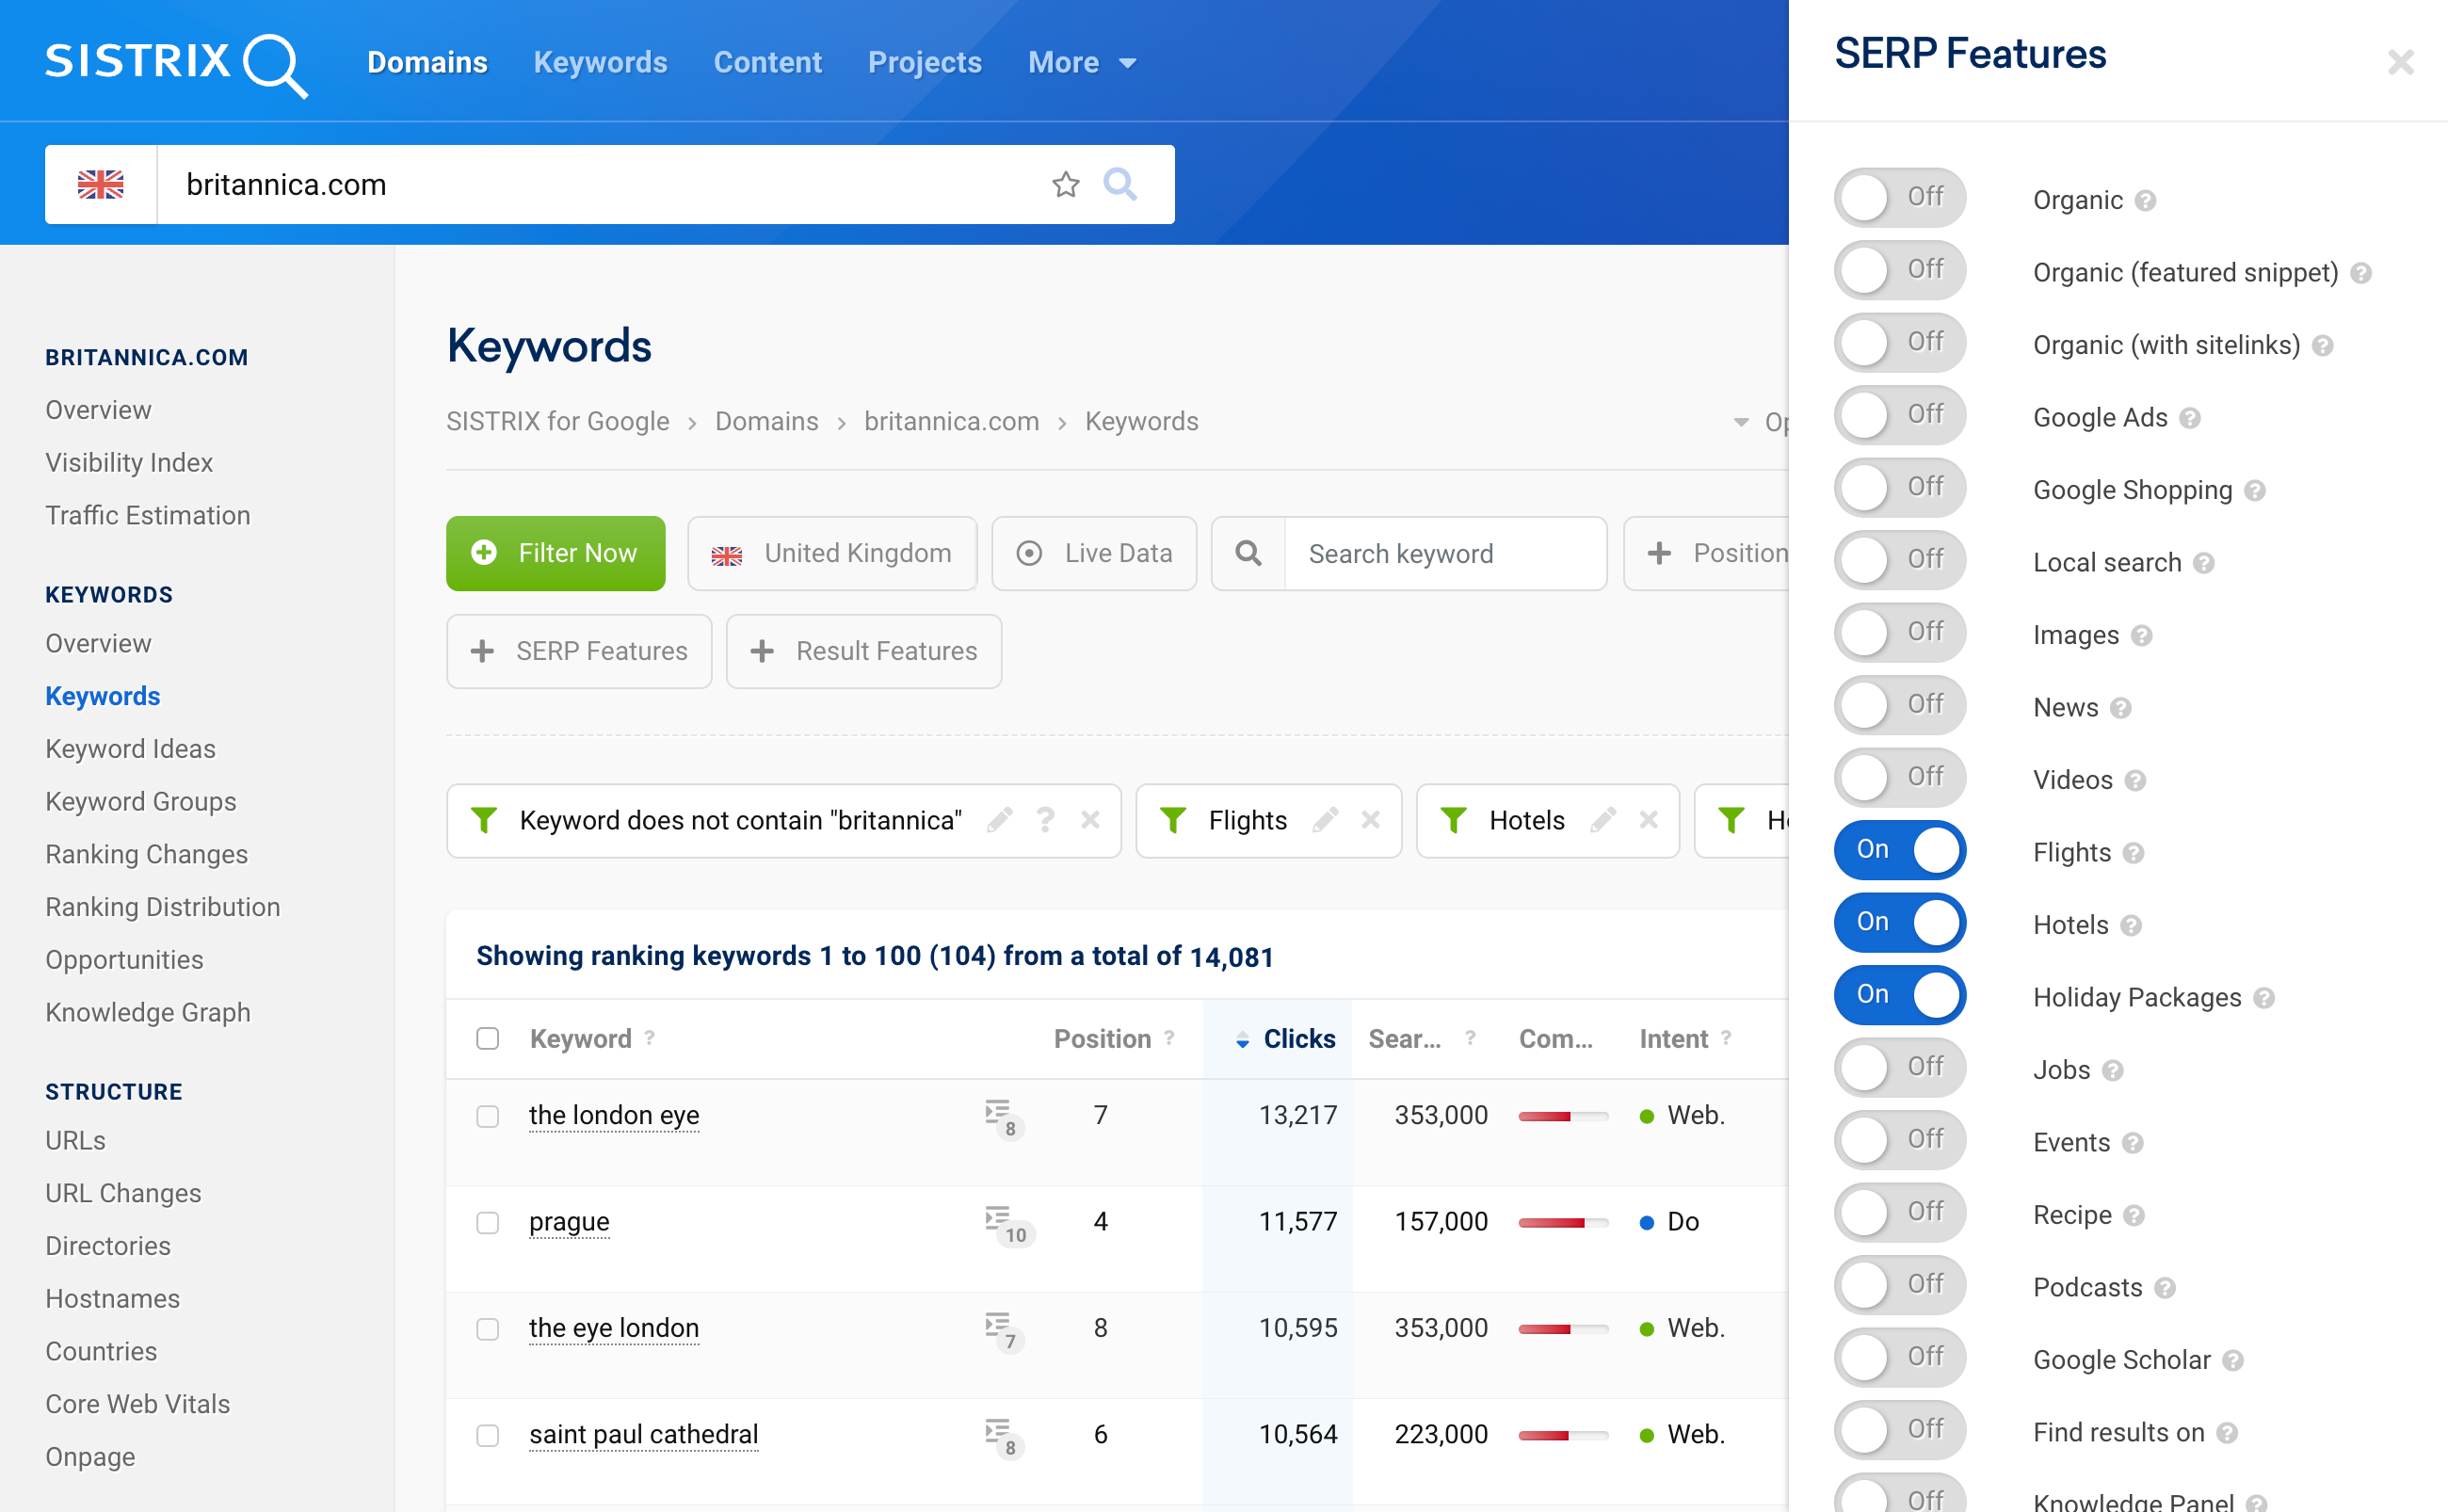
Simply activate the features that the keywords should include using the sliders in front of the feature names. A separate filter will be created for each feature so that you can deactivate them as you wish.
With these keywords, you can then check, for example, whether the Featured Snippet comes from your domain, so you can defend it, or whether a competitor was able to win it over, in which case you could seize it – depending on your strategy.
Result Features
In principle, the filter for the result features works in the same way. Here, too, you have a long list of features that you can select and deselect with sliders.
Use the question marks next to the feature names to see exactly what the feature looks like.
Show Keyword Cannibalization
The last filter in the row is the “Show Keyword Cannibalization” filter.
This filter is not shown for larger domains with a lot of keywords, as the amount of data is too large. In this case, try to find a specific area of the domain – for example, a specific directory or a host – and examine it for keyword cannibalisation.
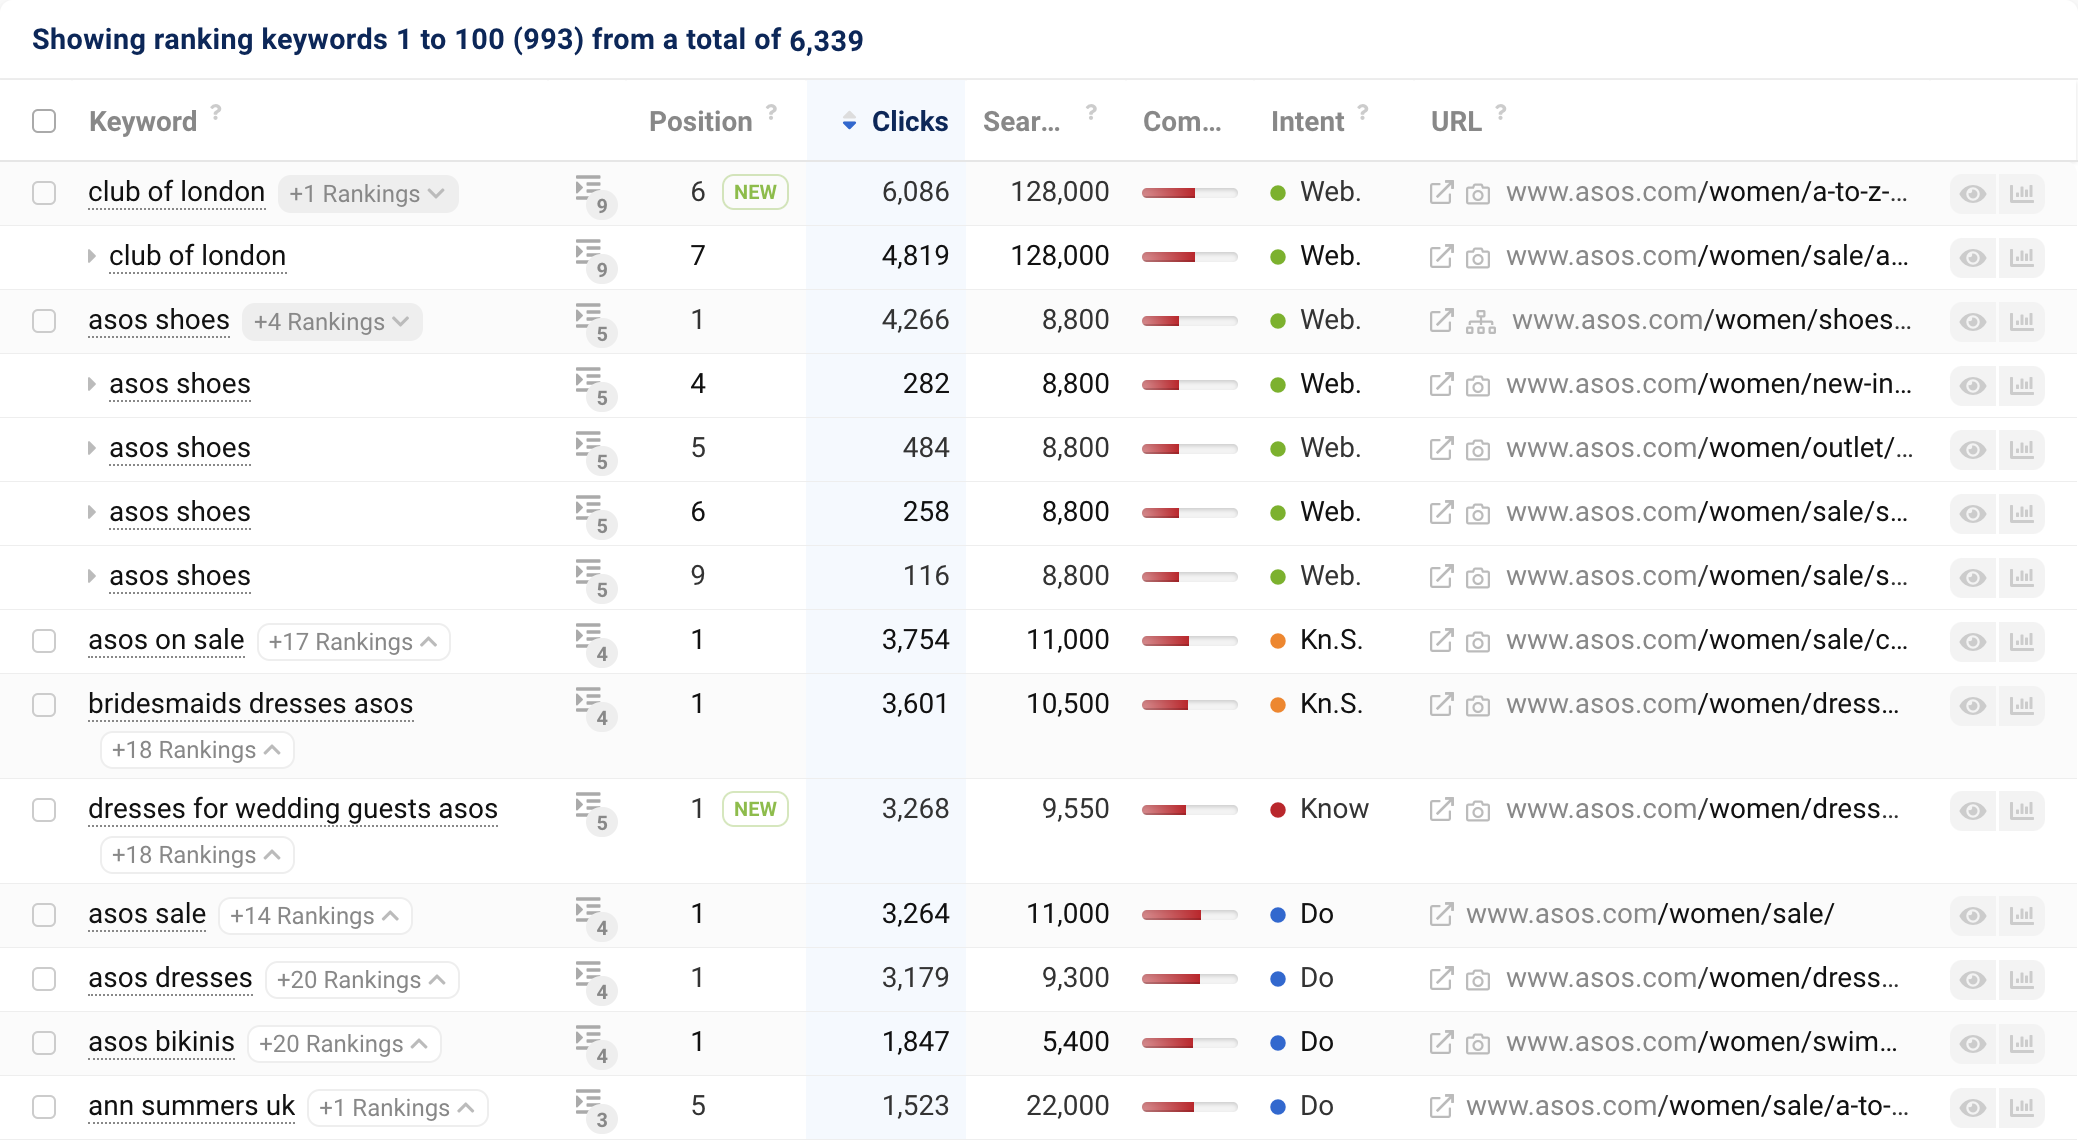
When you select the filter Show Keyword Cannibalization, you will see how many different URLs of the domain can be found for each keyword.
Click on the number of other rankings found 1 next to a keyword to display the other URLs that also rank for this keyword.
In our tutorial “How to Analyse Keyword and URL Cannibalisation” you can find further information on the cannibalisation workflow and the answer to the question of what you should do with the results found.
Individual Filters
Aside from the predefined filters, you also have the option of filtering each individual column of the table. To do this, use the green “Filter Now” button above the table.
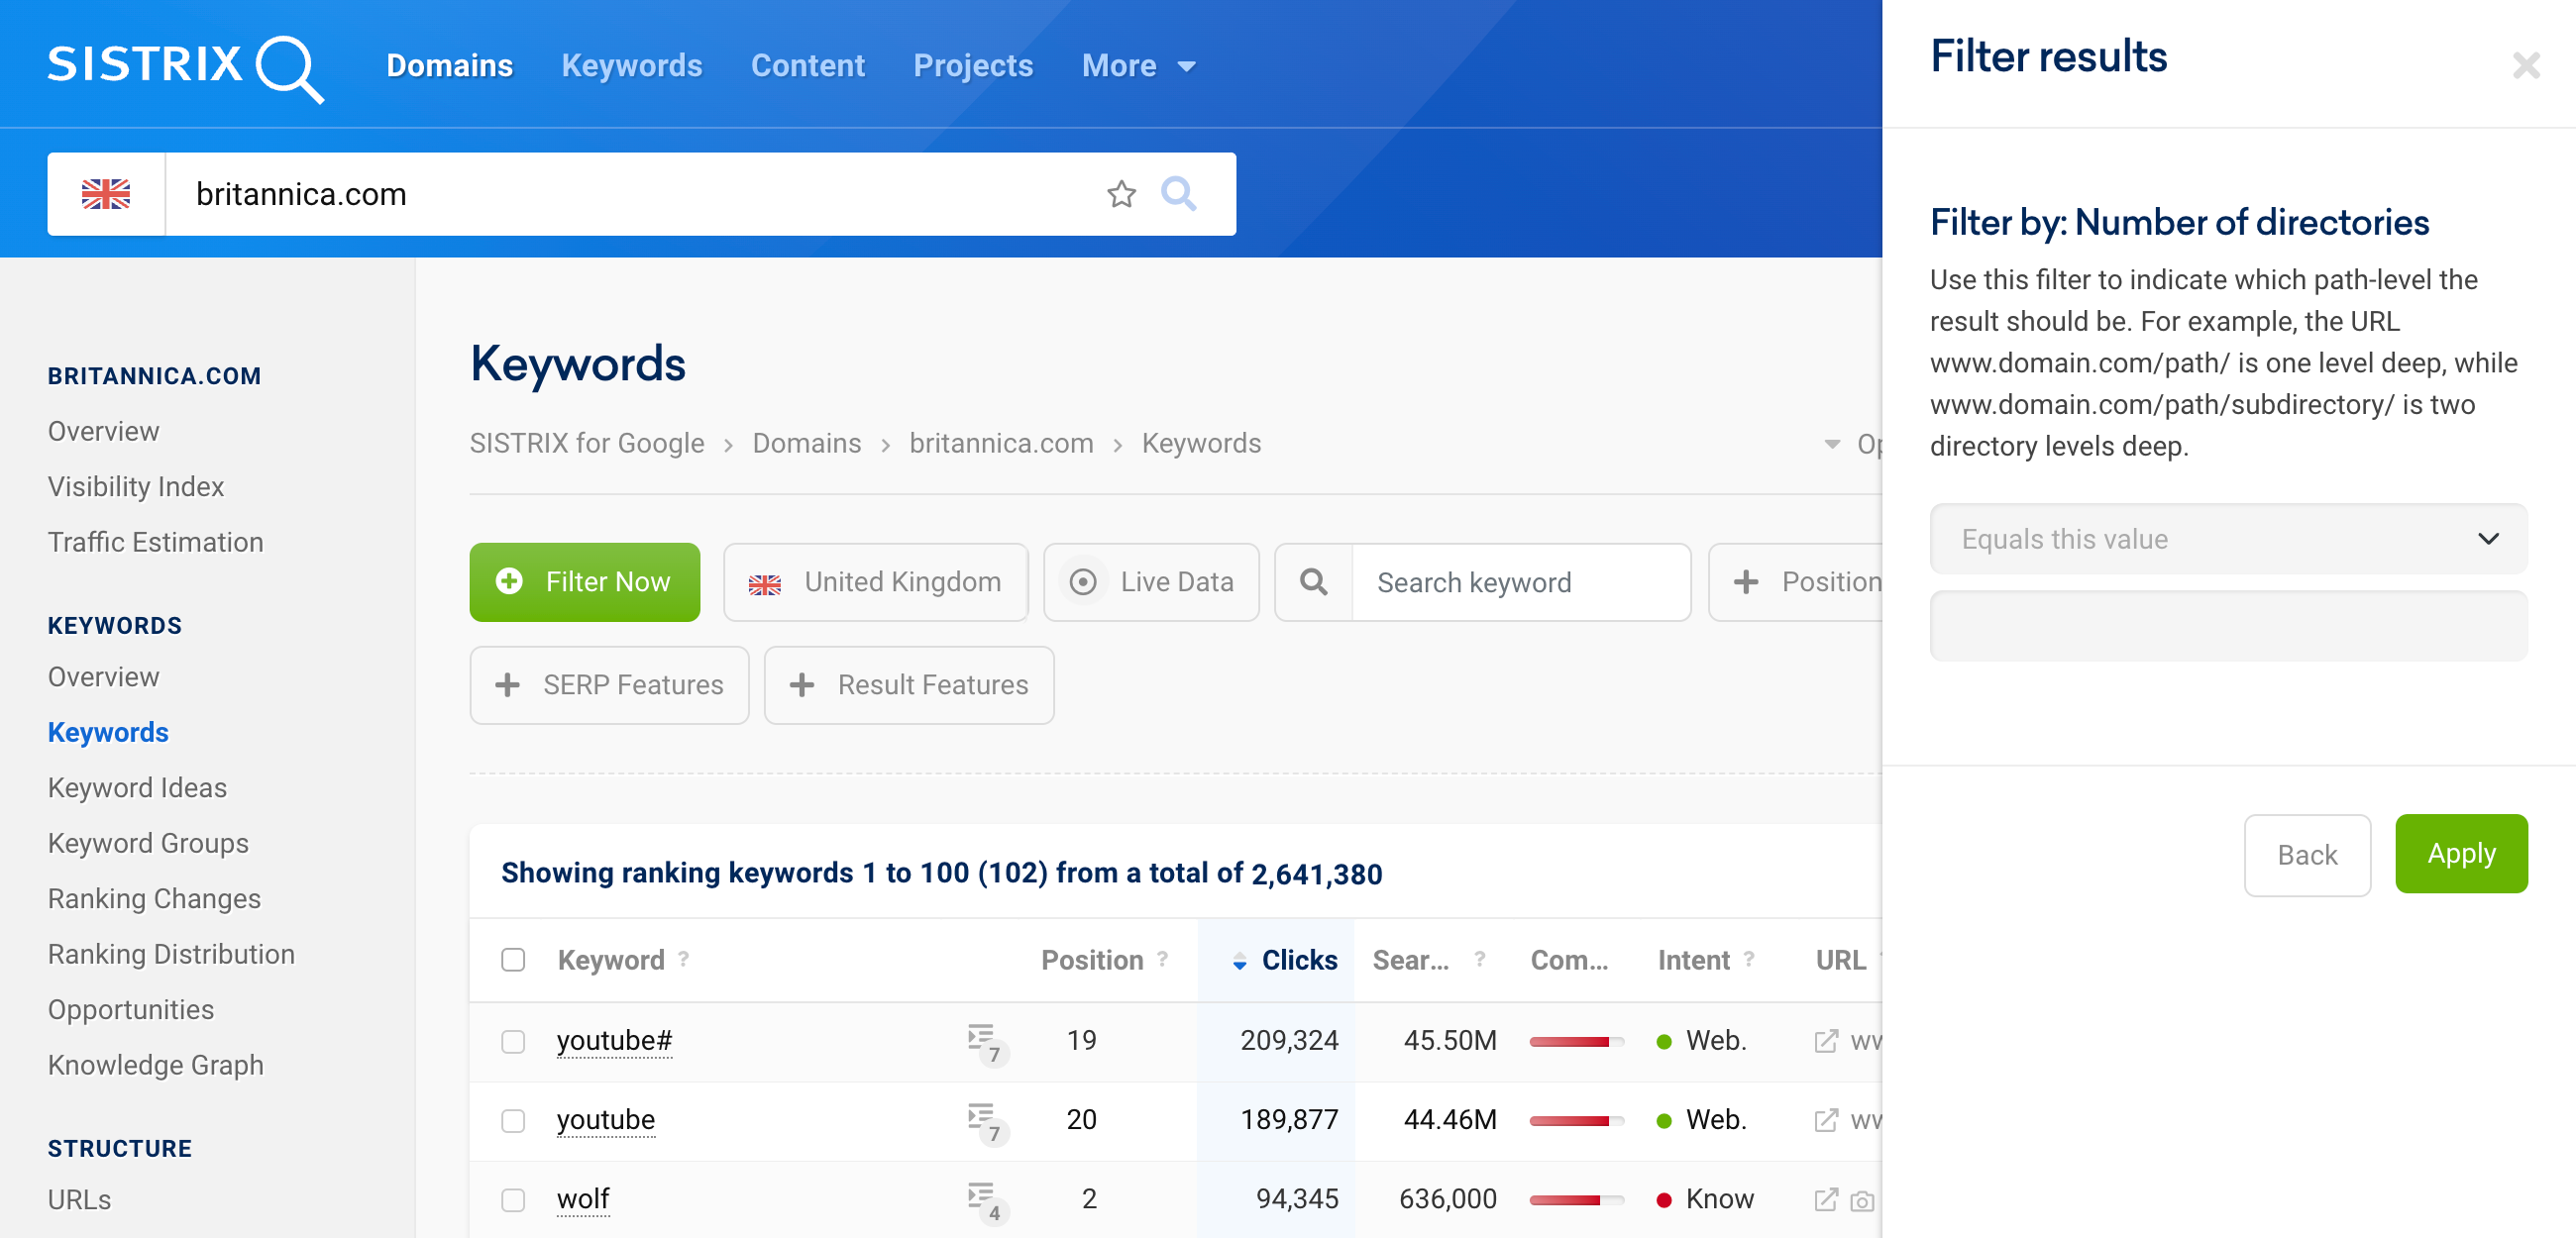
A bar will open on the side where you can select the desired column and then set the filter setting.
By clicking on the filter, you will receive further information on how this filter works 1. Click on the Back button 2 to return to the overview of all filters and select another filter.
With the help of the filters, you can, for example, also break down large keyword sets to a smaller size and continue to work with them.
In the next step, we would like to give you a few examples of helpful filters for your SEO work:
Example Filter 1: low hanging fruits
Over 99% of all clicks stay on the first Google results page. Only a tiny percentage of users makes the effort to take a closer look at the results of the second page. Therefore, you should try to achieve as many rankings as possible on positions 1–10.
Rankings that are achieved on positions 11–20 are called “low hanging fruits”. For these keywords, Google has determined that there is a good contextual correlation between the page and the keyword. However, the page may not yet be good enough to rank on the first results page.
The effort to improve these rankings and to rank on the first SERP for the keywords is, however, small. After all, there is not much left to get there.
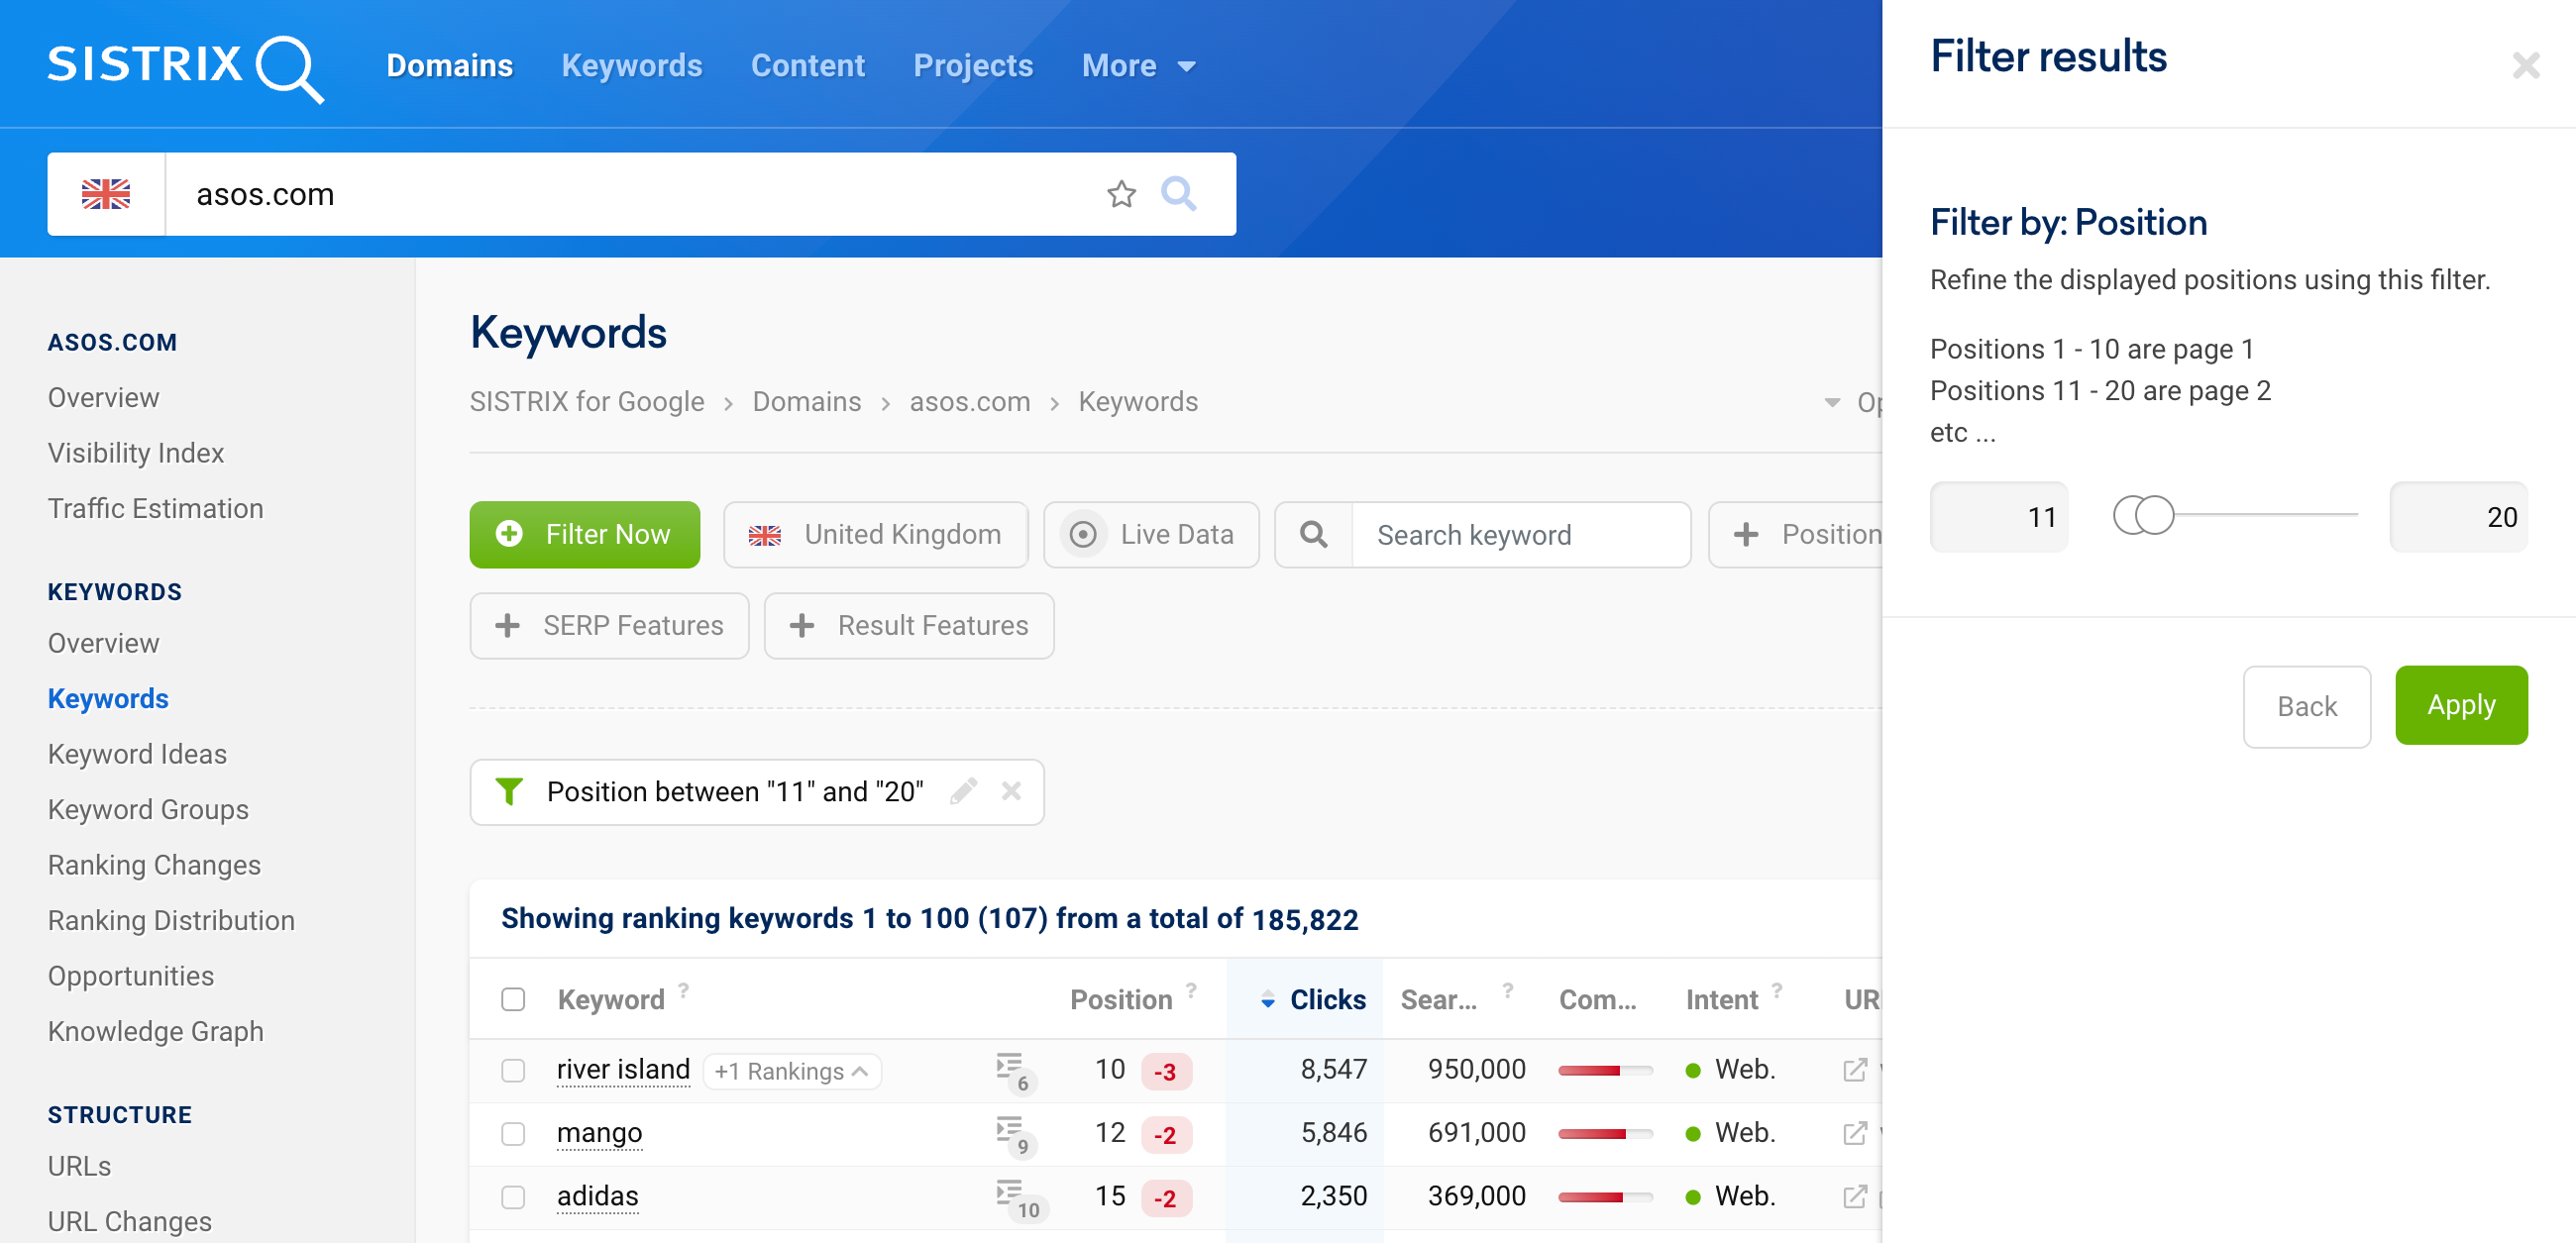
In order to identify the low hanging fruits, add a “position” filter for the positions 11–20. This shows you only the keywords for which the domain ranks on the first organic position up to the last organic position of the second results page.
You can find out more on this in our tutorial on discovering keyword opportunities.
Example Filter 2: Search Intent Do
Google’s classification of the “Do” user intent includes all searches in which searchers want to do something. For example, when someone wants to purchase something. Thus, these keywords are almost always commercially interesting keywords.
Now, you can set an individual filter for the search intent “Do” and take a look at the keywords.
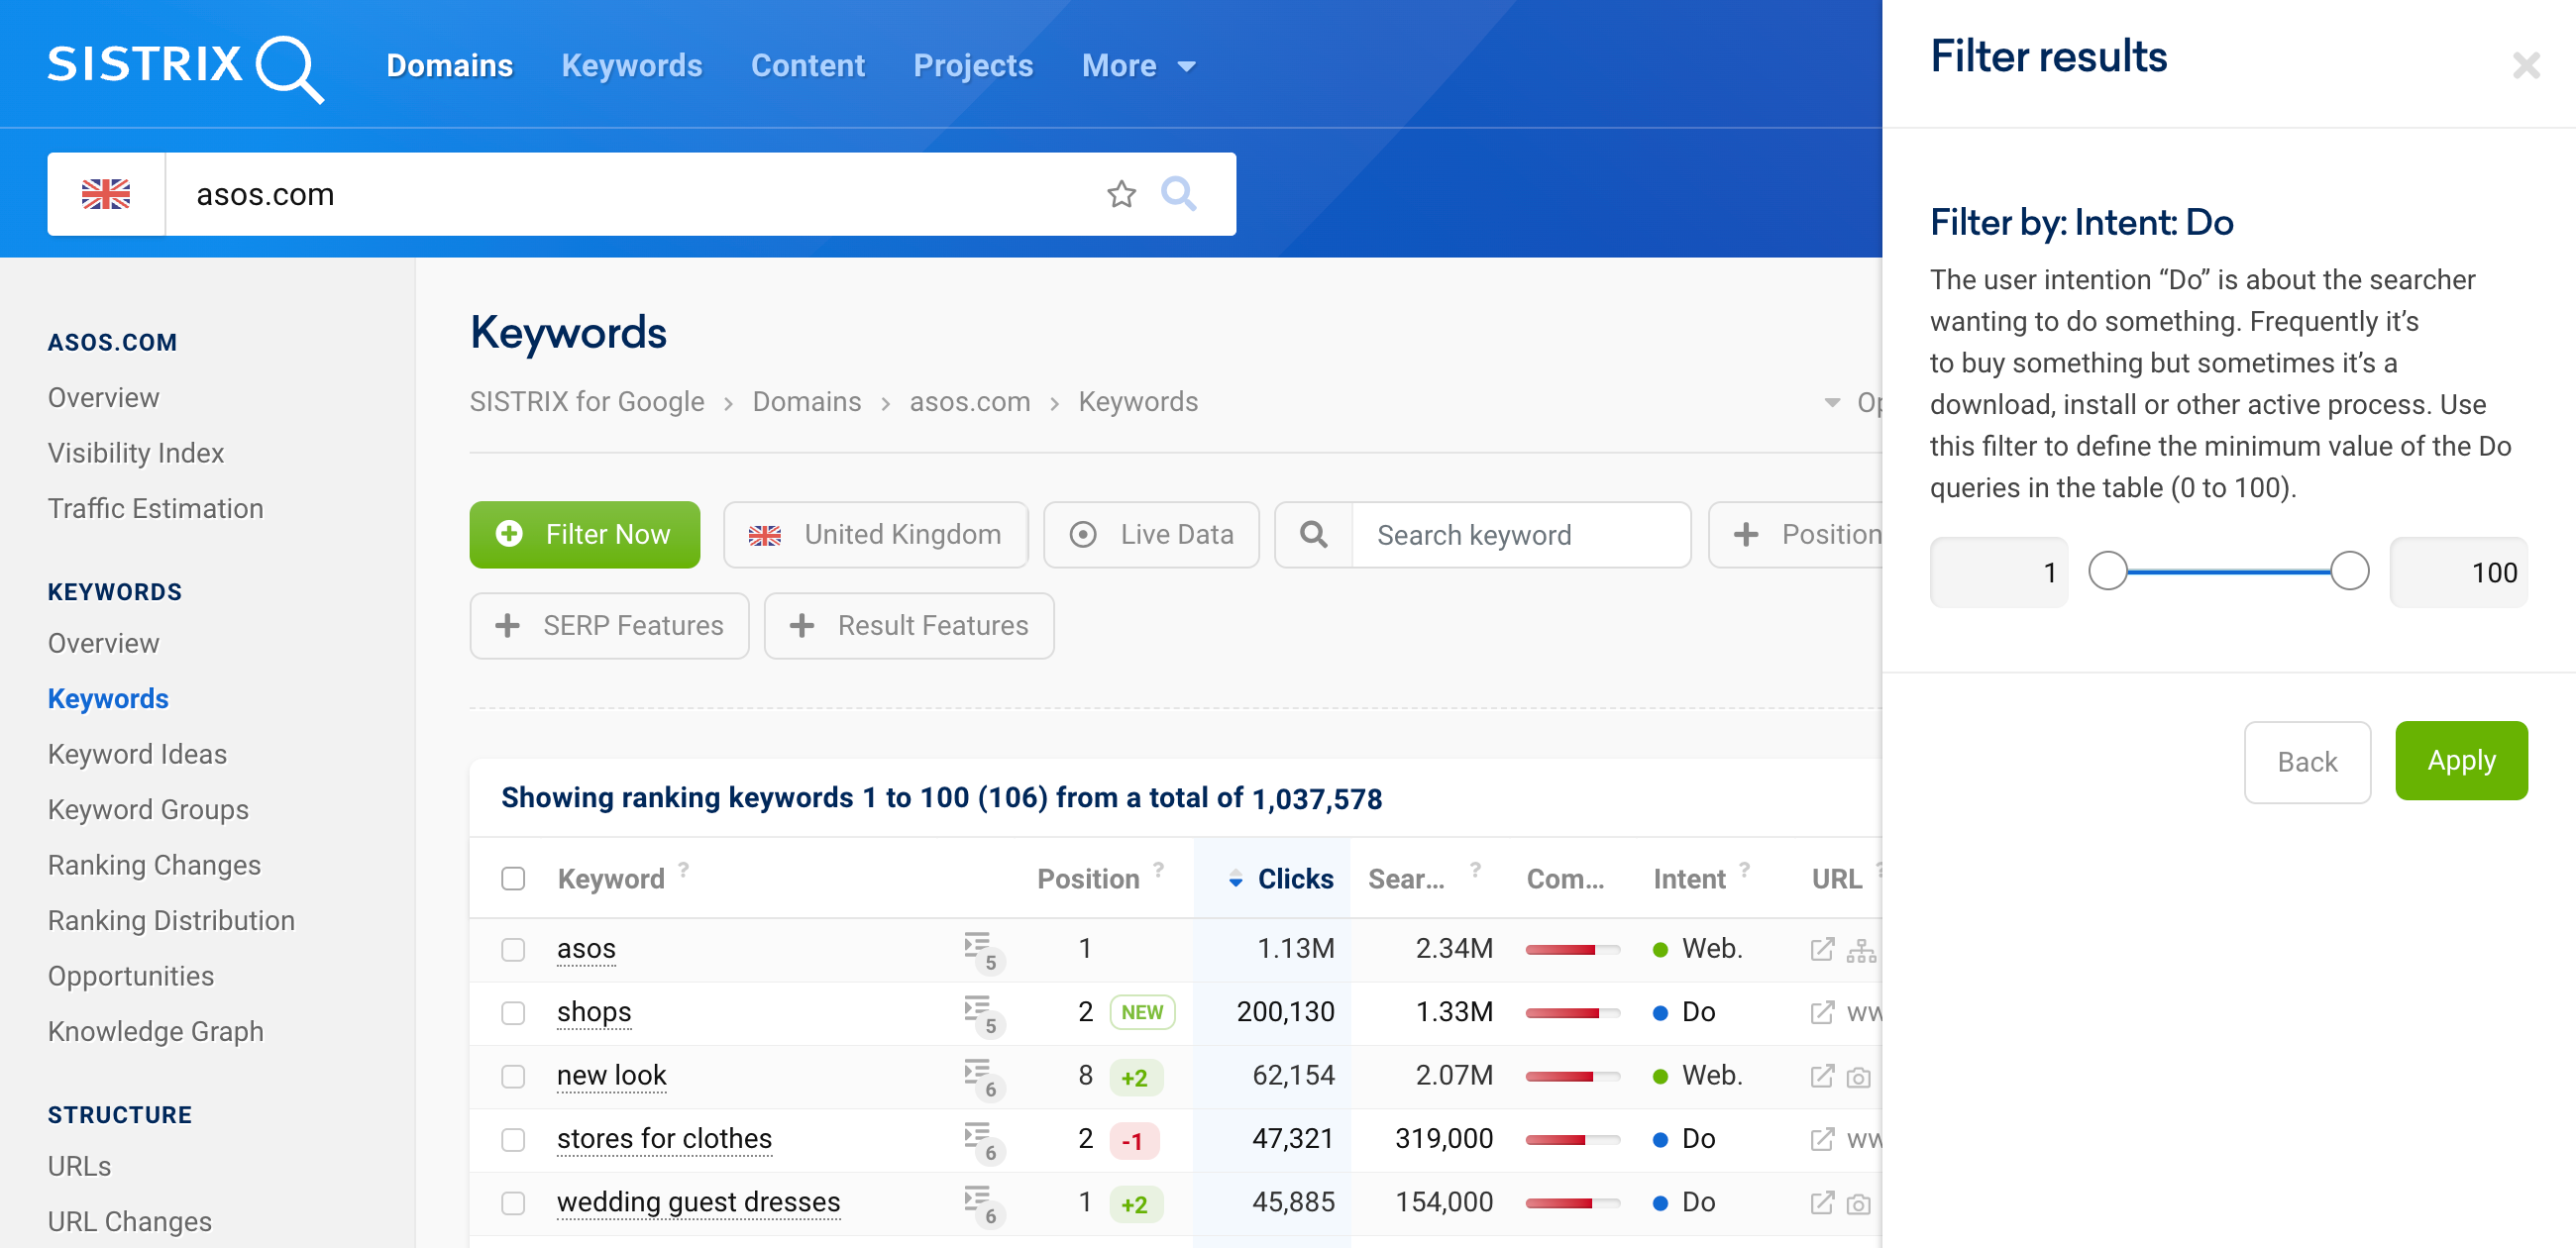
With the slider, you can set the specific value of the search intent, i.e., how strong the “Do” intent is.
These keywords are also interesting for Google, of course, as that is where Ads can be displayed. We can take advantage of this by setting a filter for search results where ads are displayed.
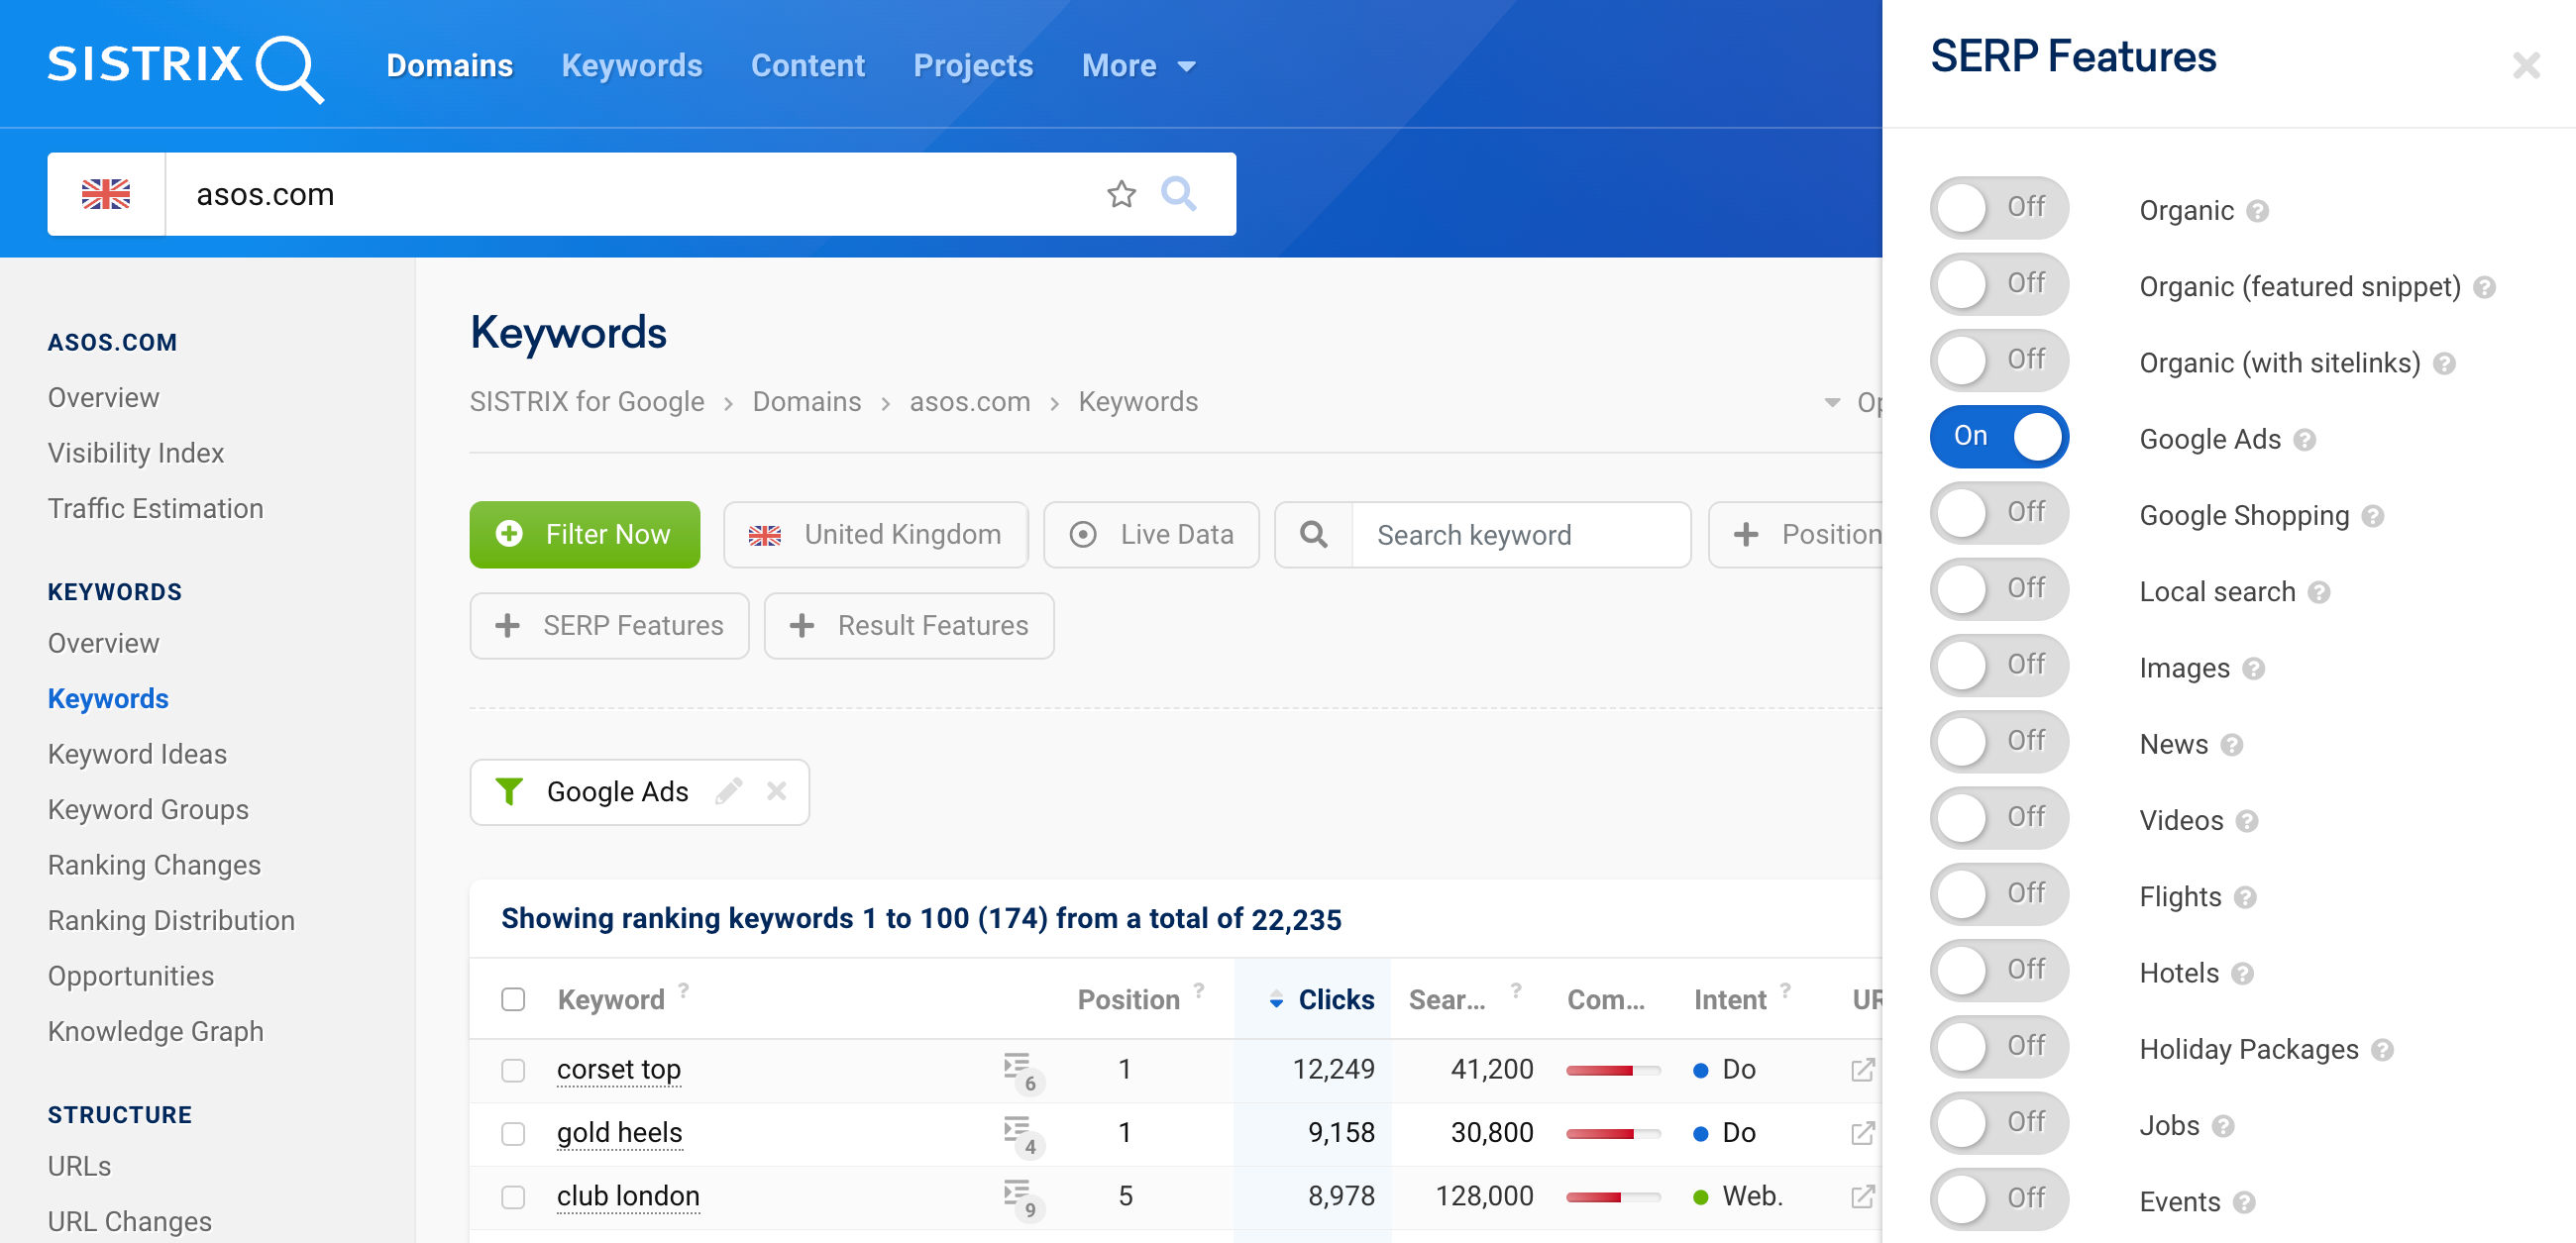
After activating the slider for “Google Ads” in the SERP Features filter, you will see all keywords that have exactly this feature on their SERP in the table.
How are the monitored keywords chosen?
For all countries, we monitor a selection of keywords that adequately cover the search behaviour of the respective country. This, of course, includes most of the short queries as well as a multitude of long-tail keywords.
Thanks to this extremely large database, you can quickly and easily start ad-hoc analyses for almost any domain, even without knowing in advance that you will one day need data for this domain.
In a separate article, you can find all the information about which countries and how many keywords SISTRIX covers.
