The SISTRIX Toolbox enables you to use different filters in the link module – a comfortable tool to quickly analyse links for any website. For your own domains filters become useful and important when you are searching for inferior links. This tutorial will show you how to use filters to your advantage in your professional practice.
Filters as part of your research
It is recommended that you use filters when analysing vast link data. These filters make it possible to accurately evaluate even thousands of links, to get to the few links you are looking for. Link profiles that have grown over time due to clean strategies and organic influences, probably only have very few bad links. Finding these without filtering and sorting can be a very tiresome task.
Filters can be saved directly and are ready to be used with the push of a button for every new analysis (mostly independent from the domain you are looking at).
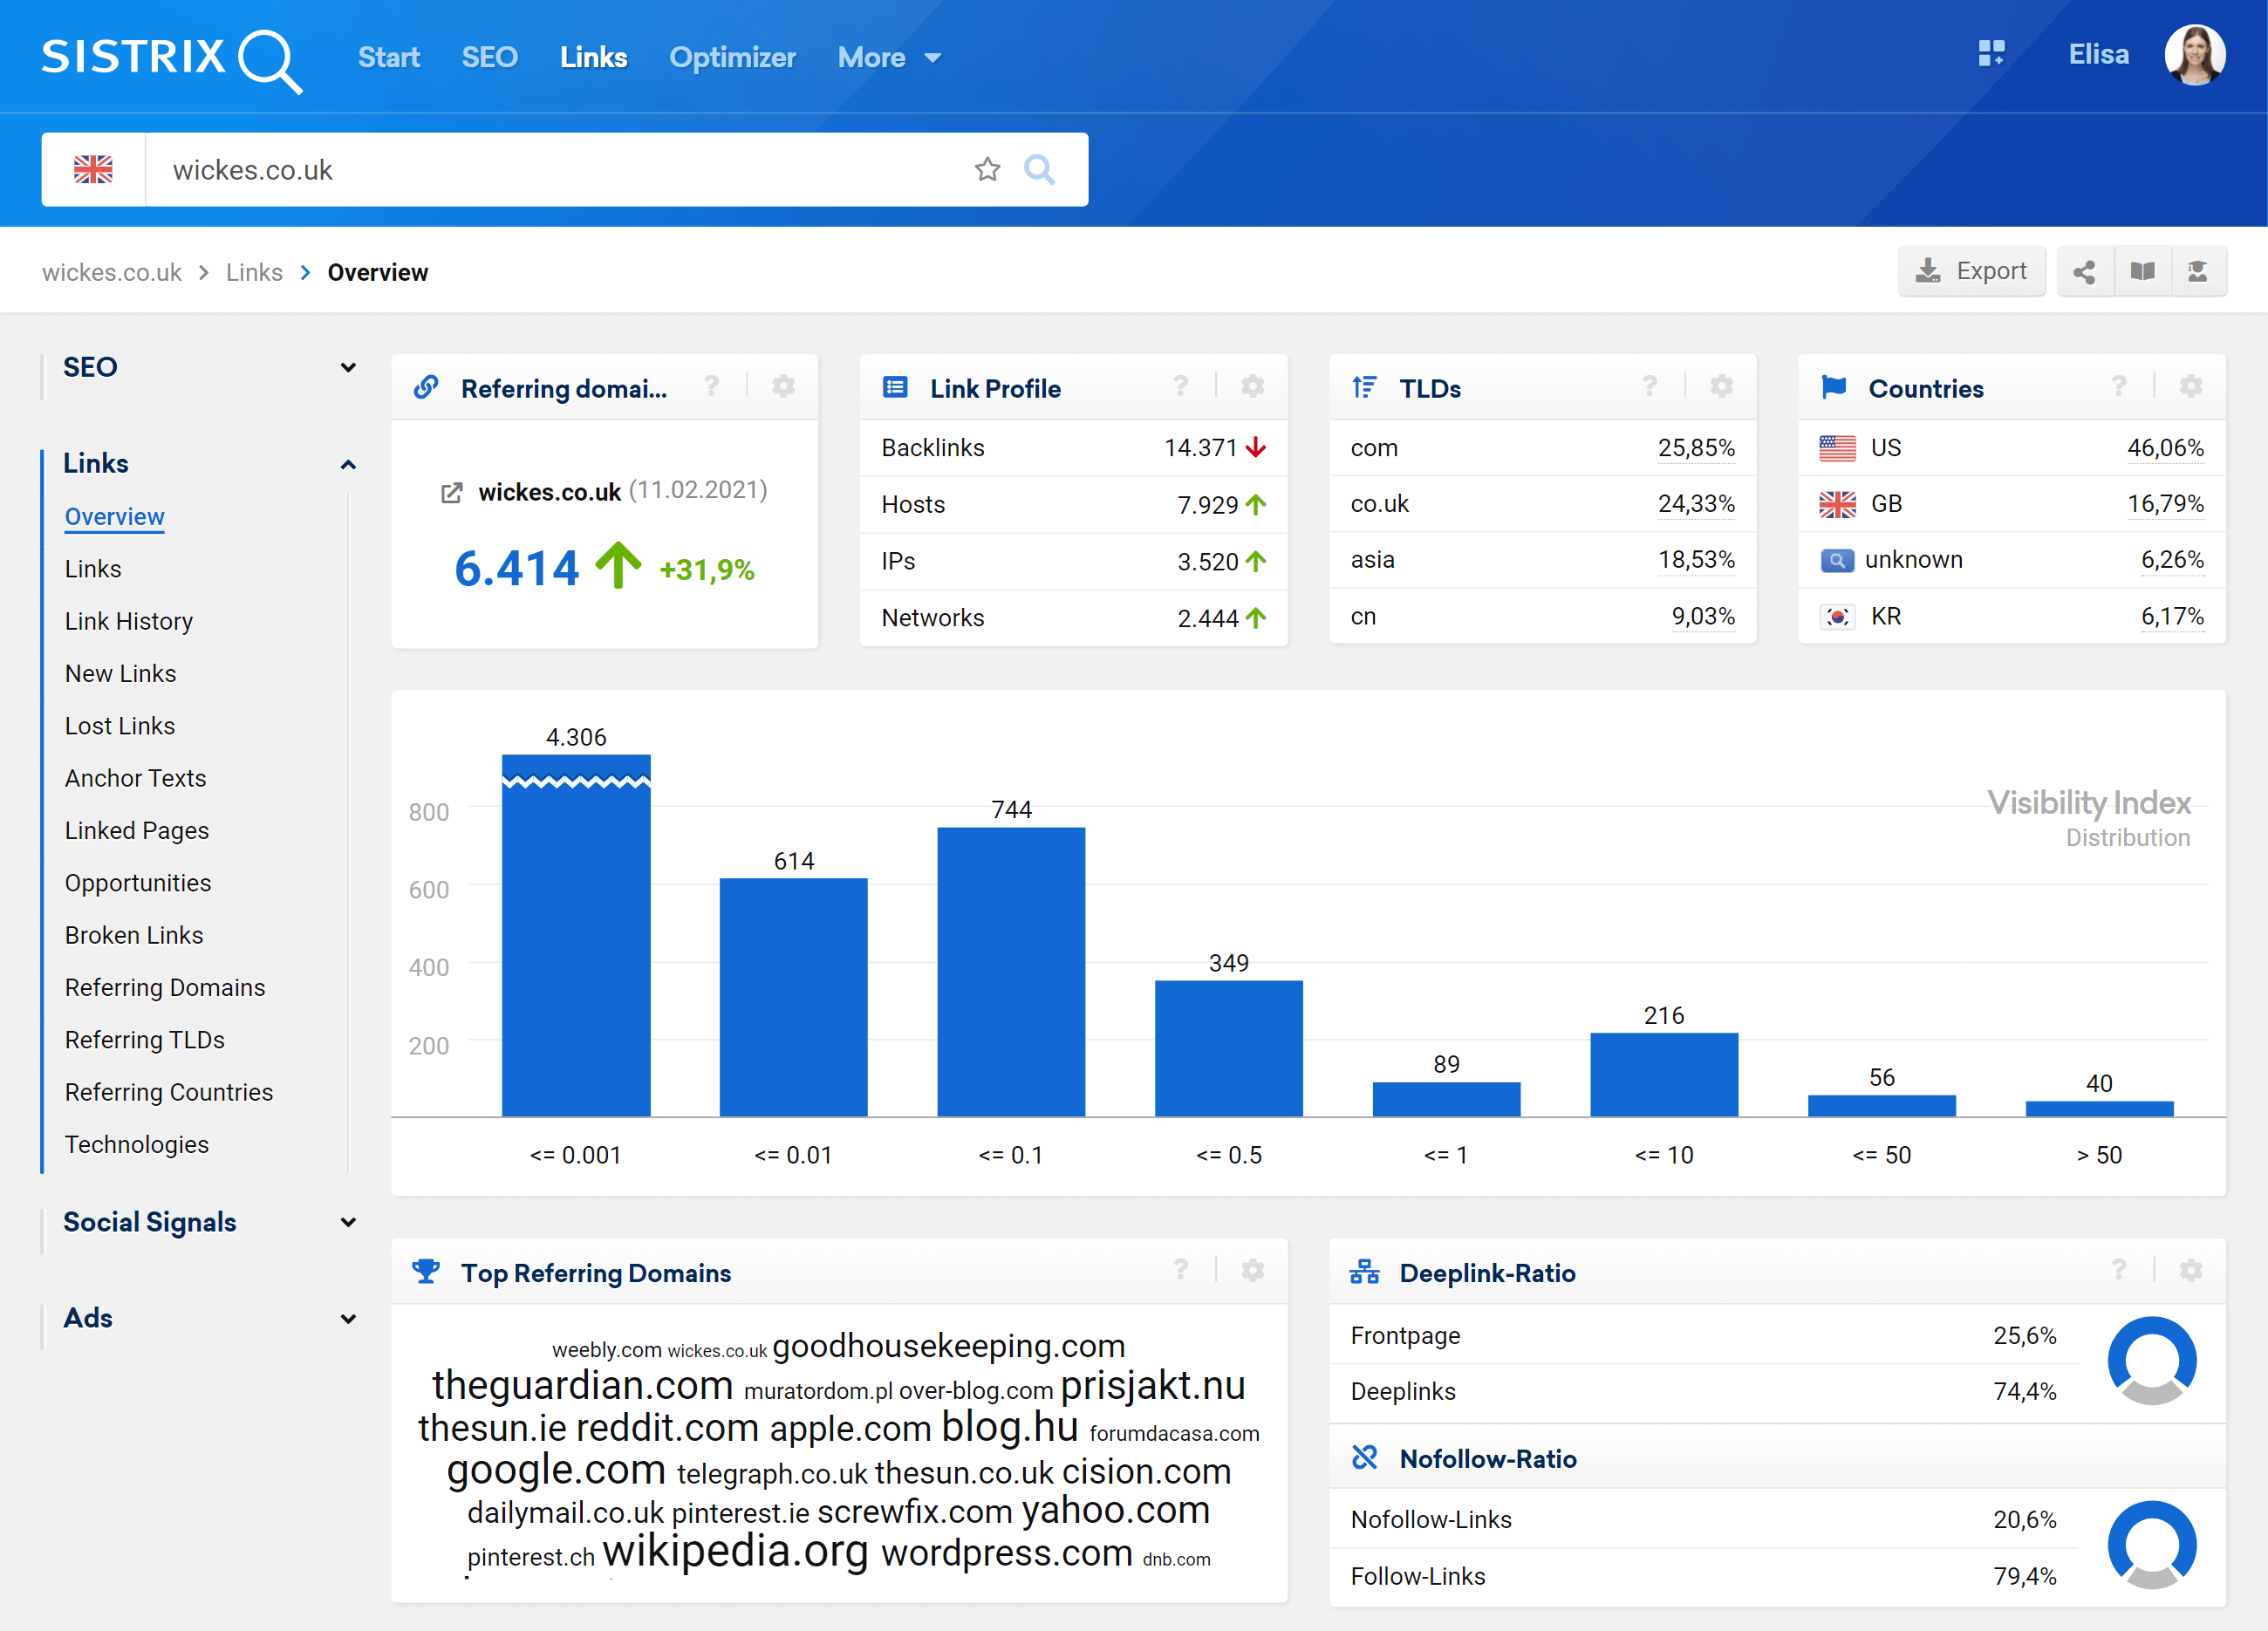
Before creating a filter, however, you should think about which information you want to use filters for, as the sheer amount of different filter options may seem overwhelming at times. One way of dealing with this is to open the data from the link module overview (“Links > Overview”) in a different browser tab. There, you can find ideas for filters.
Setting up filters
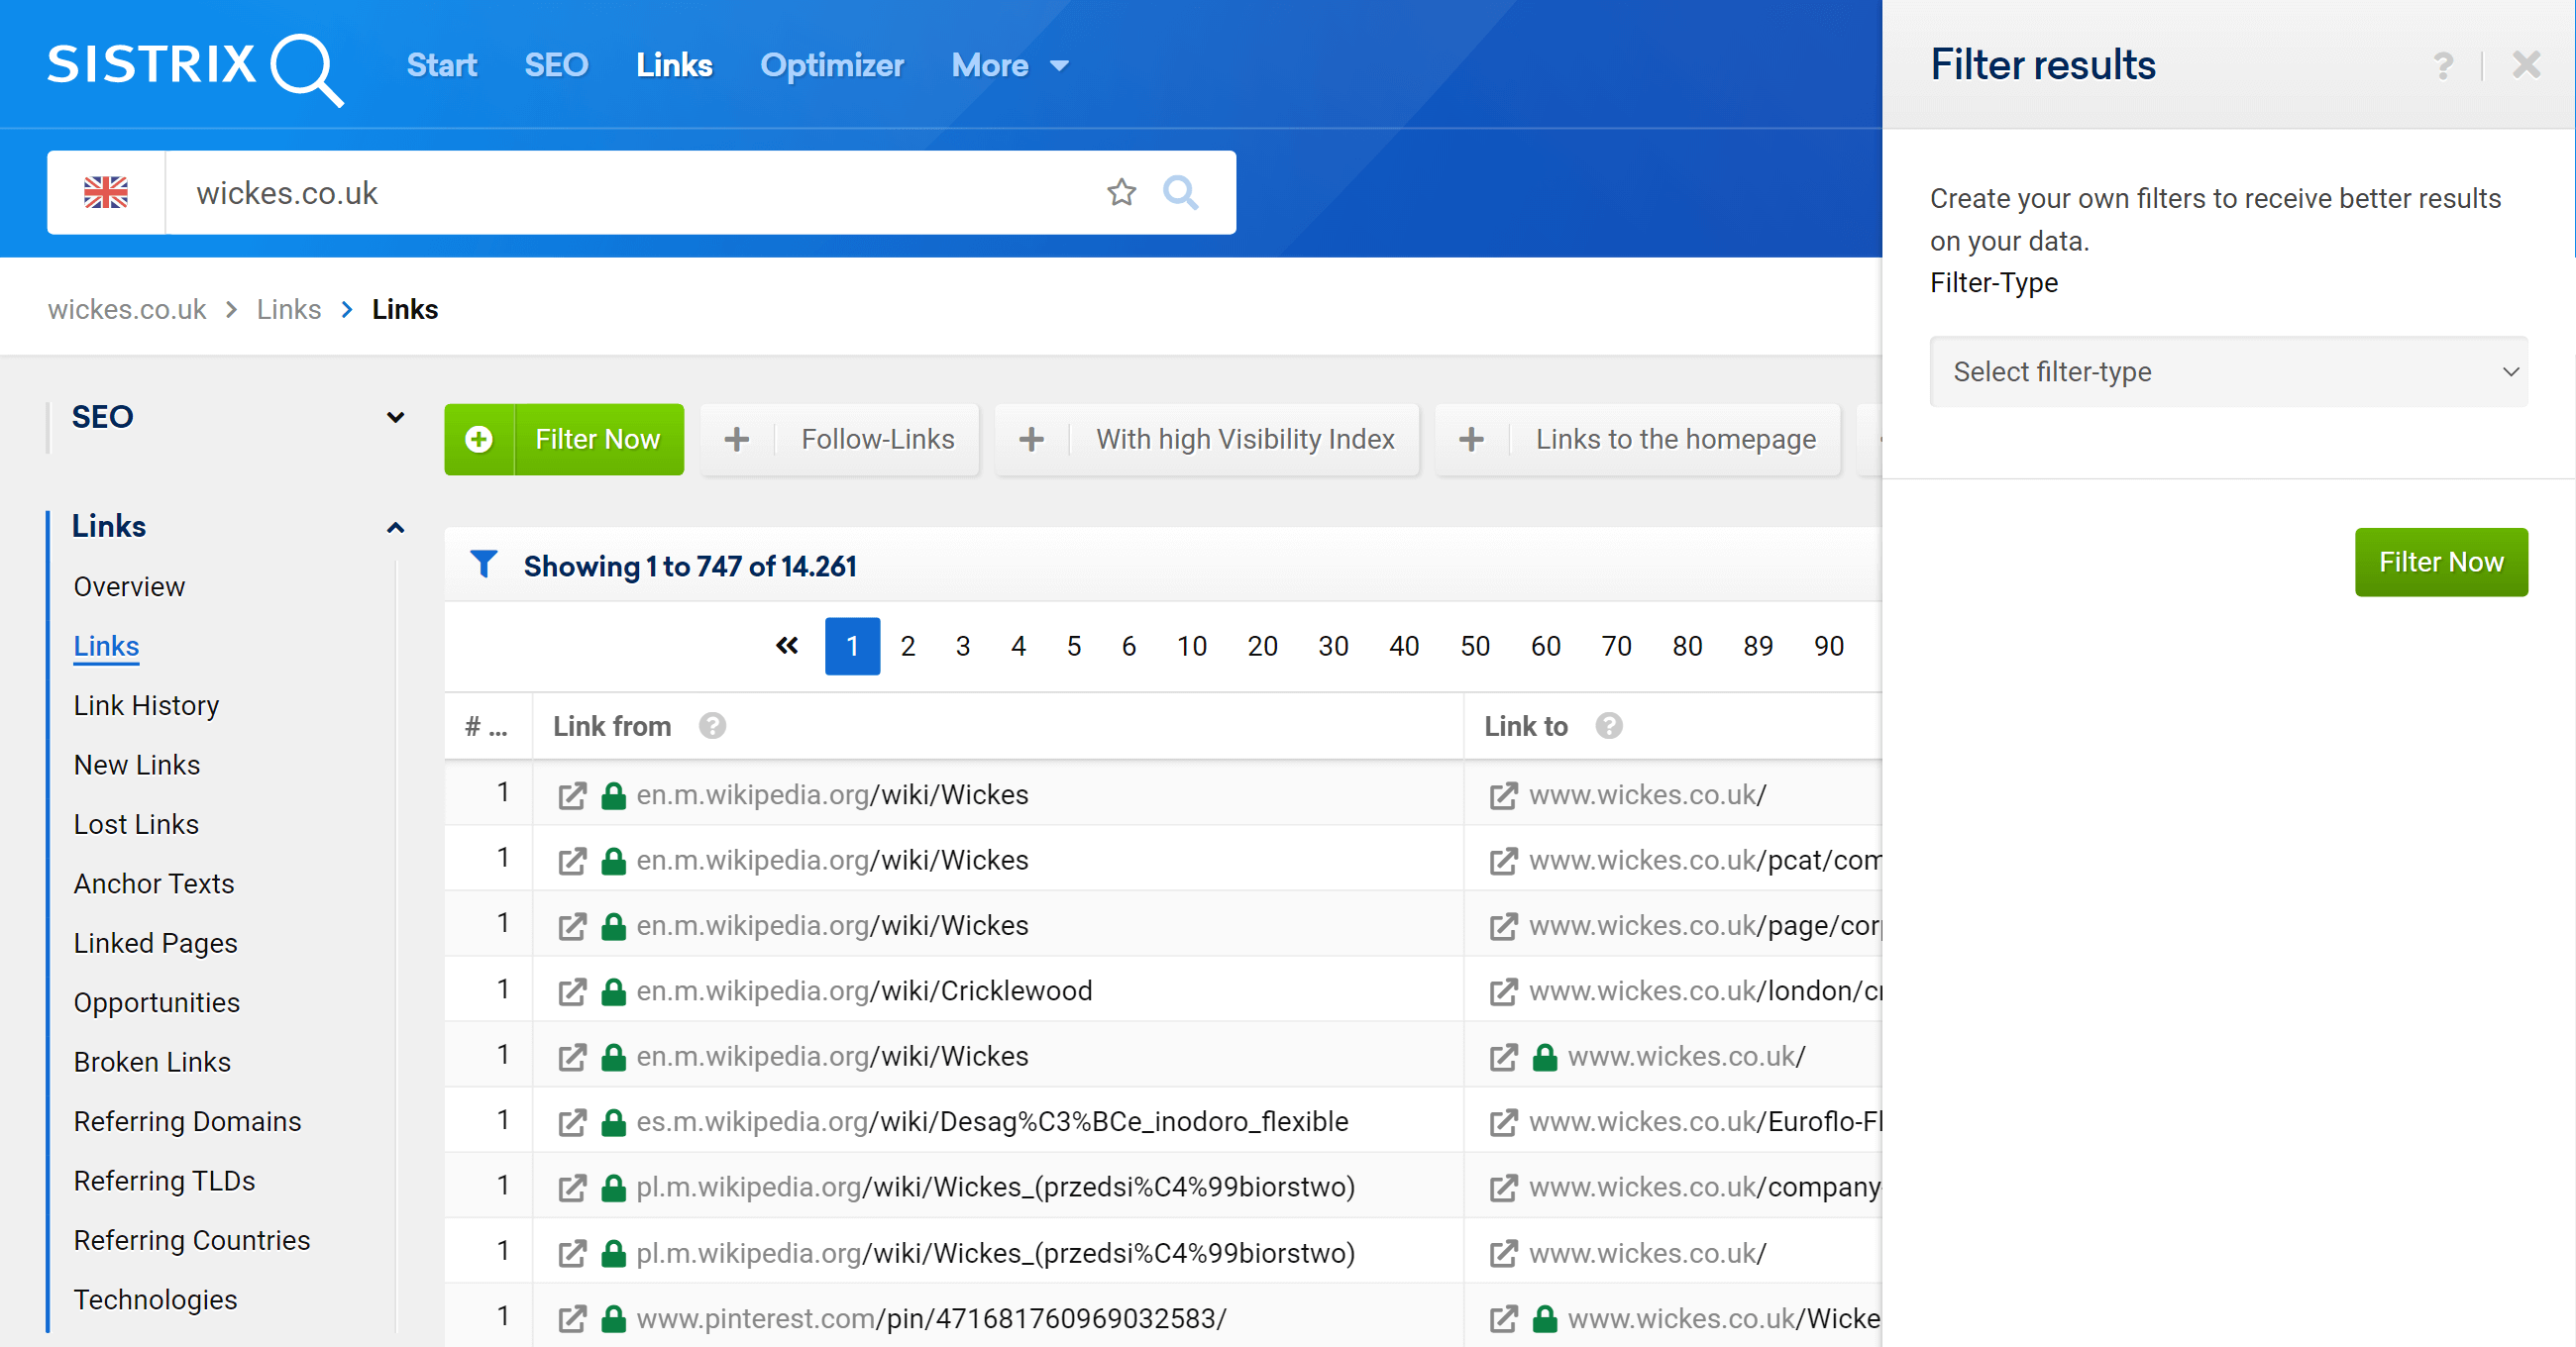
Since the SISTRIX Toolbox gives us the ability to combine multiple filters, I am deliberately talking about the filter “set-up”. First of all click on the “Filter now” button above the table.
Country = India
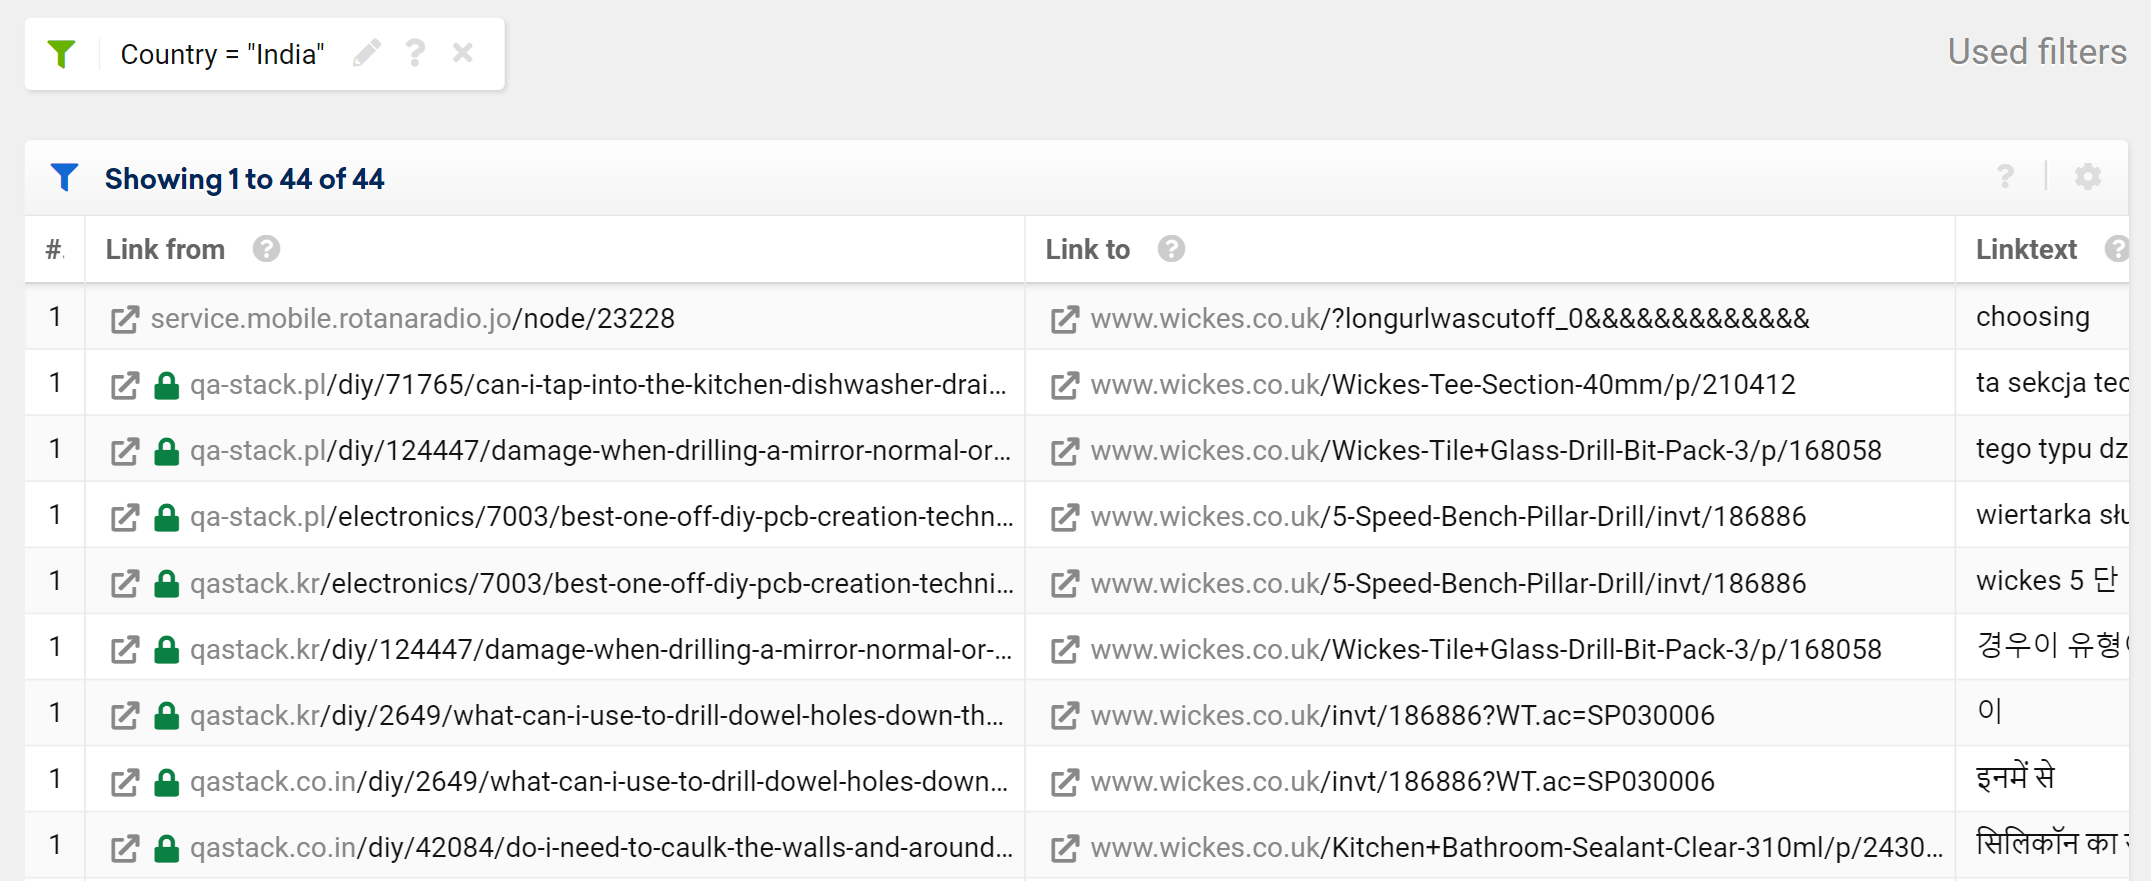
Now we will choose the filter for “Country” and then exclude all countries except India. To do so, first click on the “Filter now” button. Then choose “Country” in the drop-down menu. Afterwards choose “India” in the next drop-down menu and click on the green “Add” button, which will activate the filter.
After saving the filter the link table is refreshed. For the currently requested domain this table is now much emptier. There are only 44 links remaining that can be analysed. With a filter like this, you do not need to add another filter.
The last test to see if a link “seems natural”, or rather “placed in a meaningful fashion” will always have to come from you. For that, just click on the arrow-box before the “URL”.

As you can see in the picture above, the page is not relevant at all to the topic of DIY and home improvement, and even the kind of link placement is chosen rather poorly for visitors.
Sorting link sources by countries is often an effective solution if truly inferior linkbuilding was used.
Taking into consideration that you will usually use these filters on a hunch or with the help of information from the link overview page, it is not really necessary to save these filters.
Next let us set up a filter that can always be used, no matter the domain. Our example domain has 6,414 links – almost impossible to check manually.
Network = IP address
Saving an IP-address of a network can also be a useful filter. Many website operators liked to buy links from several link-networks in the past, independent of the domain. The domains of these linking websites were often on the identical IP-Adresses (Class C). Even though a network address does not make for a universally useful filter, it does come in handy if you come across an IP address multiple times during your evaluation. In that case you should set up a filter to see all the results from this IP-Address.
Top-keyword linktext-filter
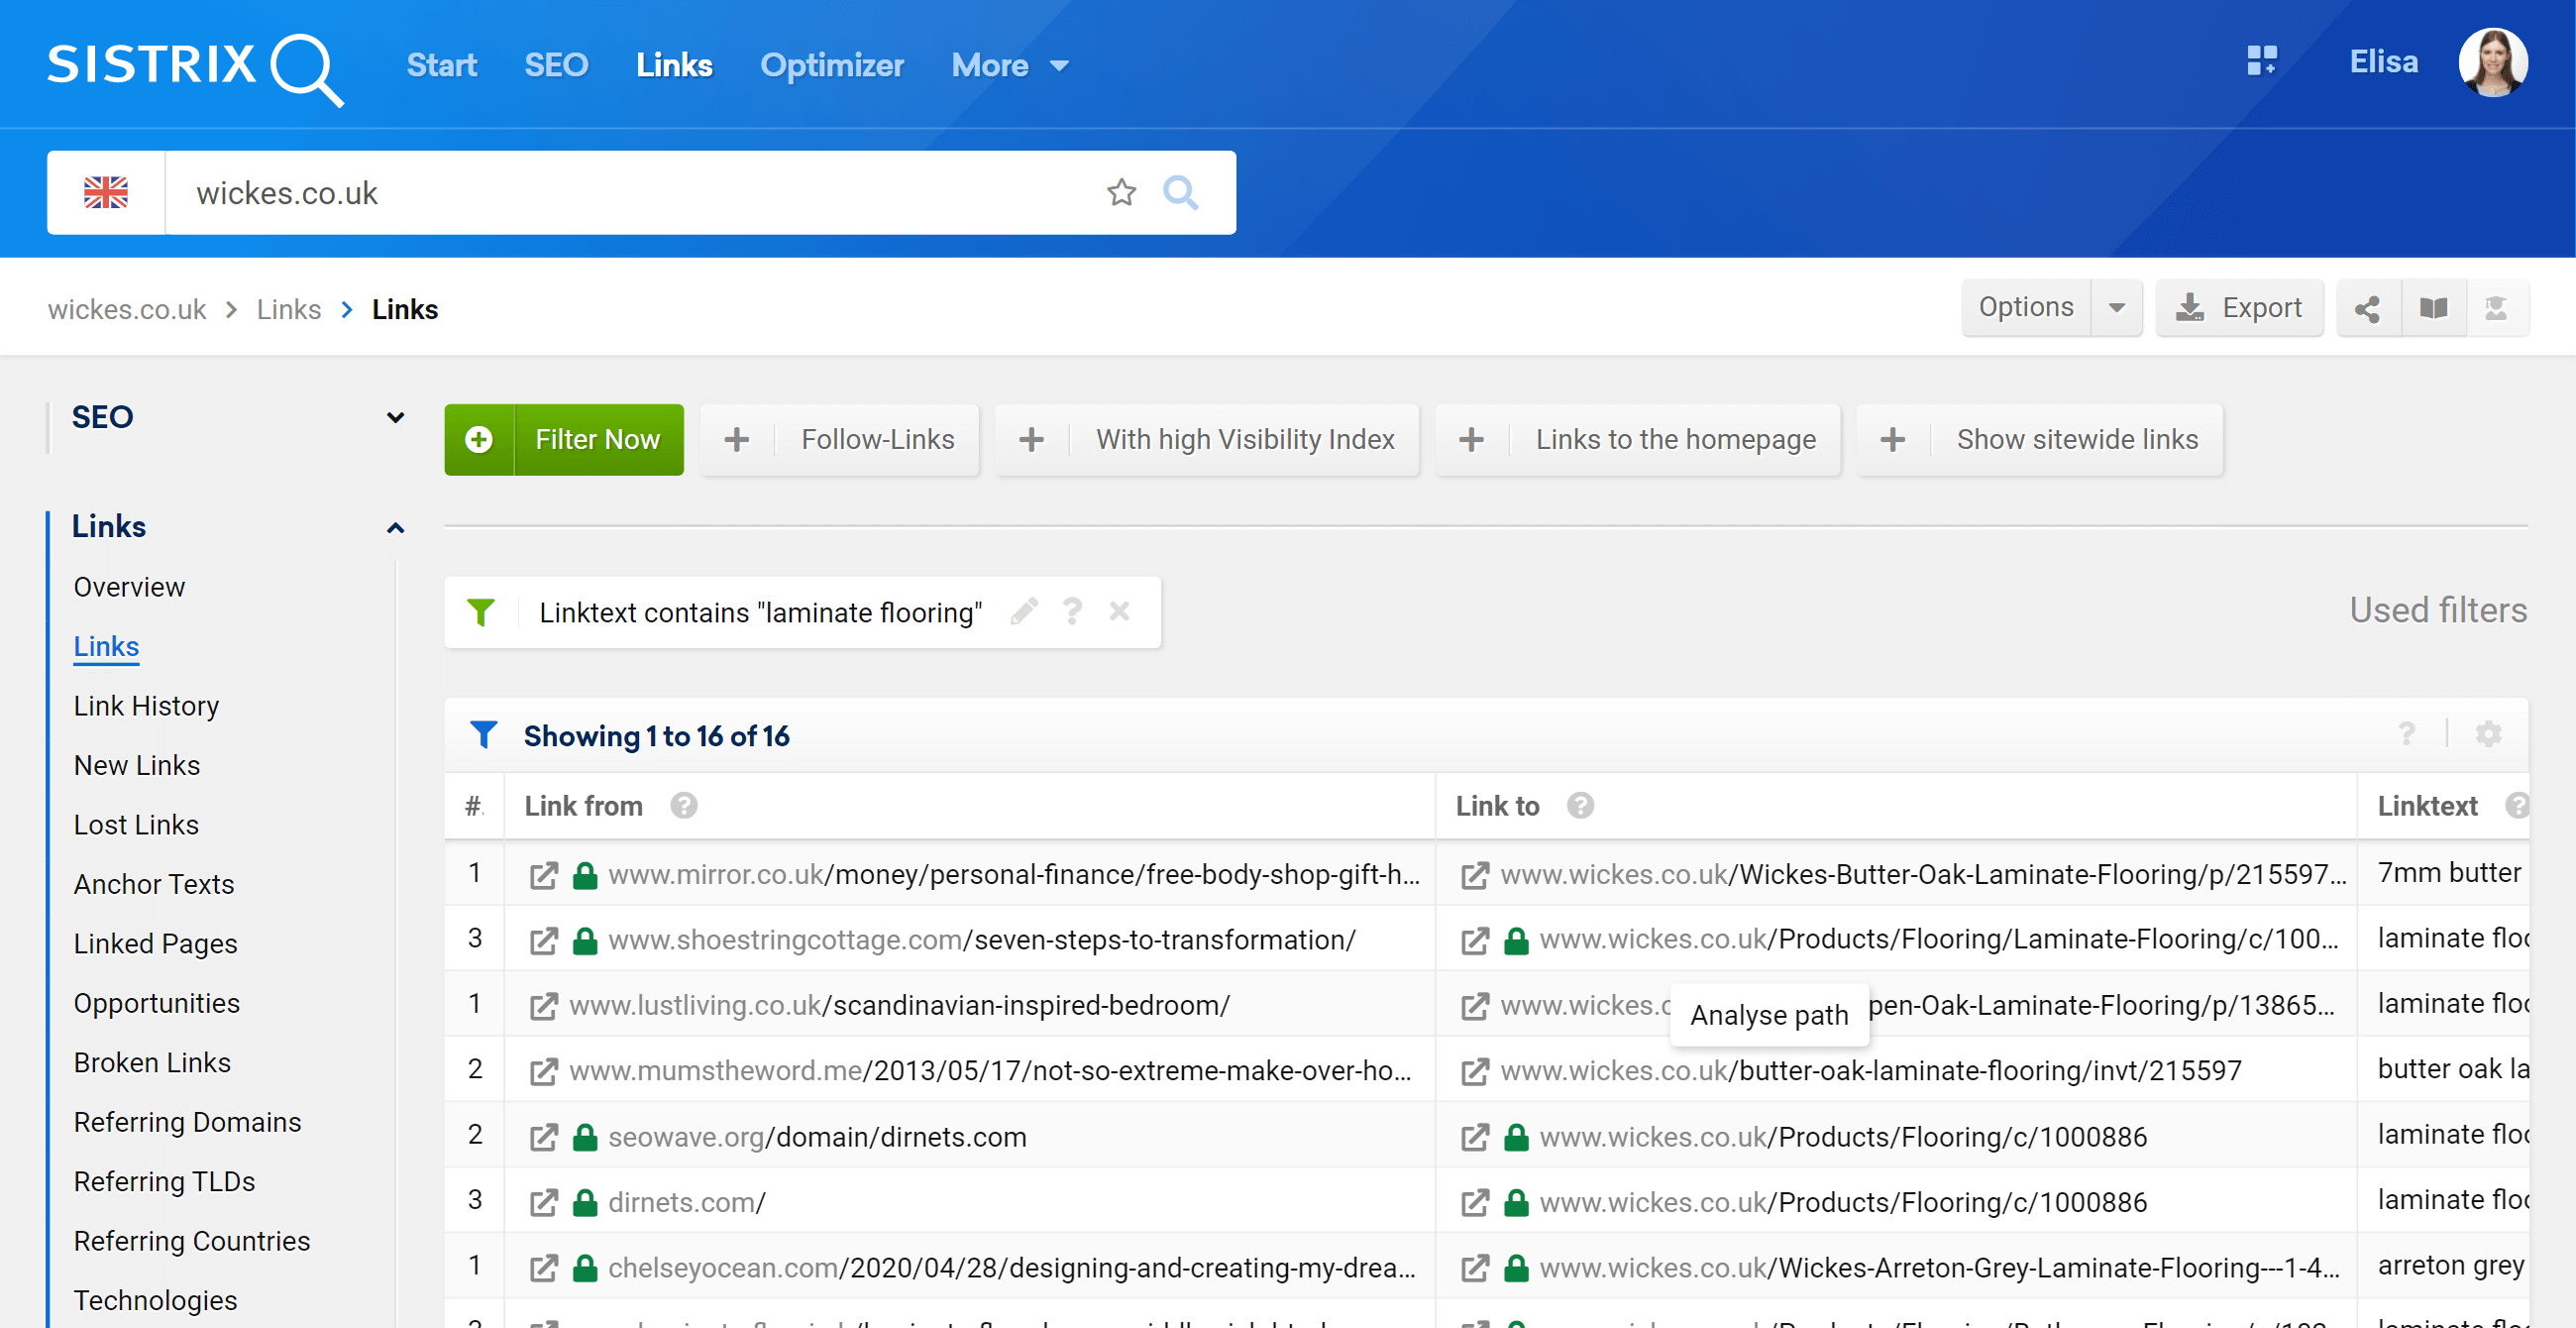
The distribution of link texts can sometimes reveal quite a lot about a link profile. That is why link texts should always be analysed on an individual level. Most important are the link texts that do not directly refer to the domain (for our above example anything that does not have “wickes.co.uk” as part of the linktext) and link texts that only contain a specific keyword (“laminate flooring” for example) or a combination of keywords (“wickes laminate flooring”).
Ever since the Penguin-Update (Google Updates Overview) many page owners have tried to switch their link profiles to “natural link profiles”. Links that, until that time, only had a keyword as the linktext should now spot the brand name at the beginning. That is why such combinations should catch your eye and become part of your analysis.
Combining filters
Now we will combine two filters which we can then use for almost any domain you want. Domains with a small visibility, which are only linked to by very few other domains are very interesting.
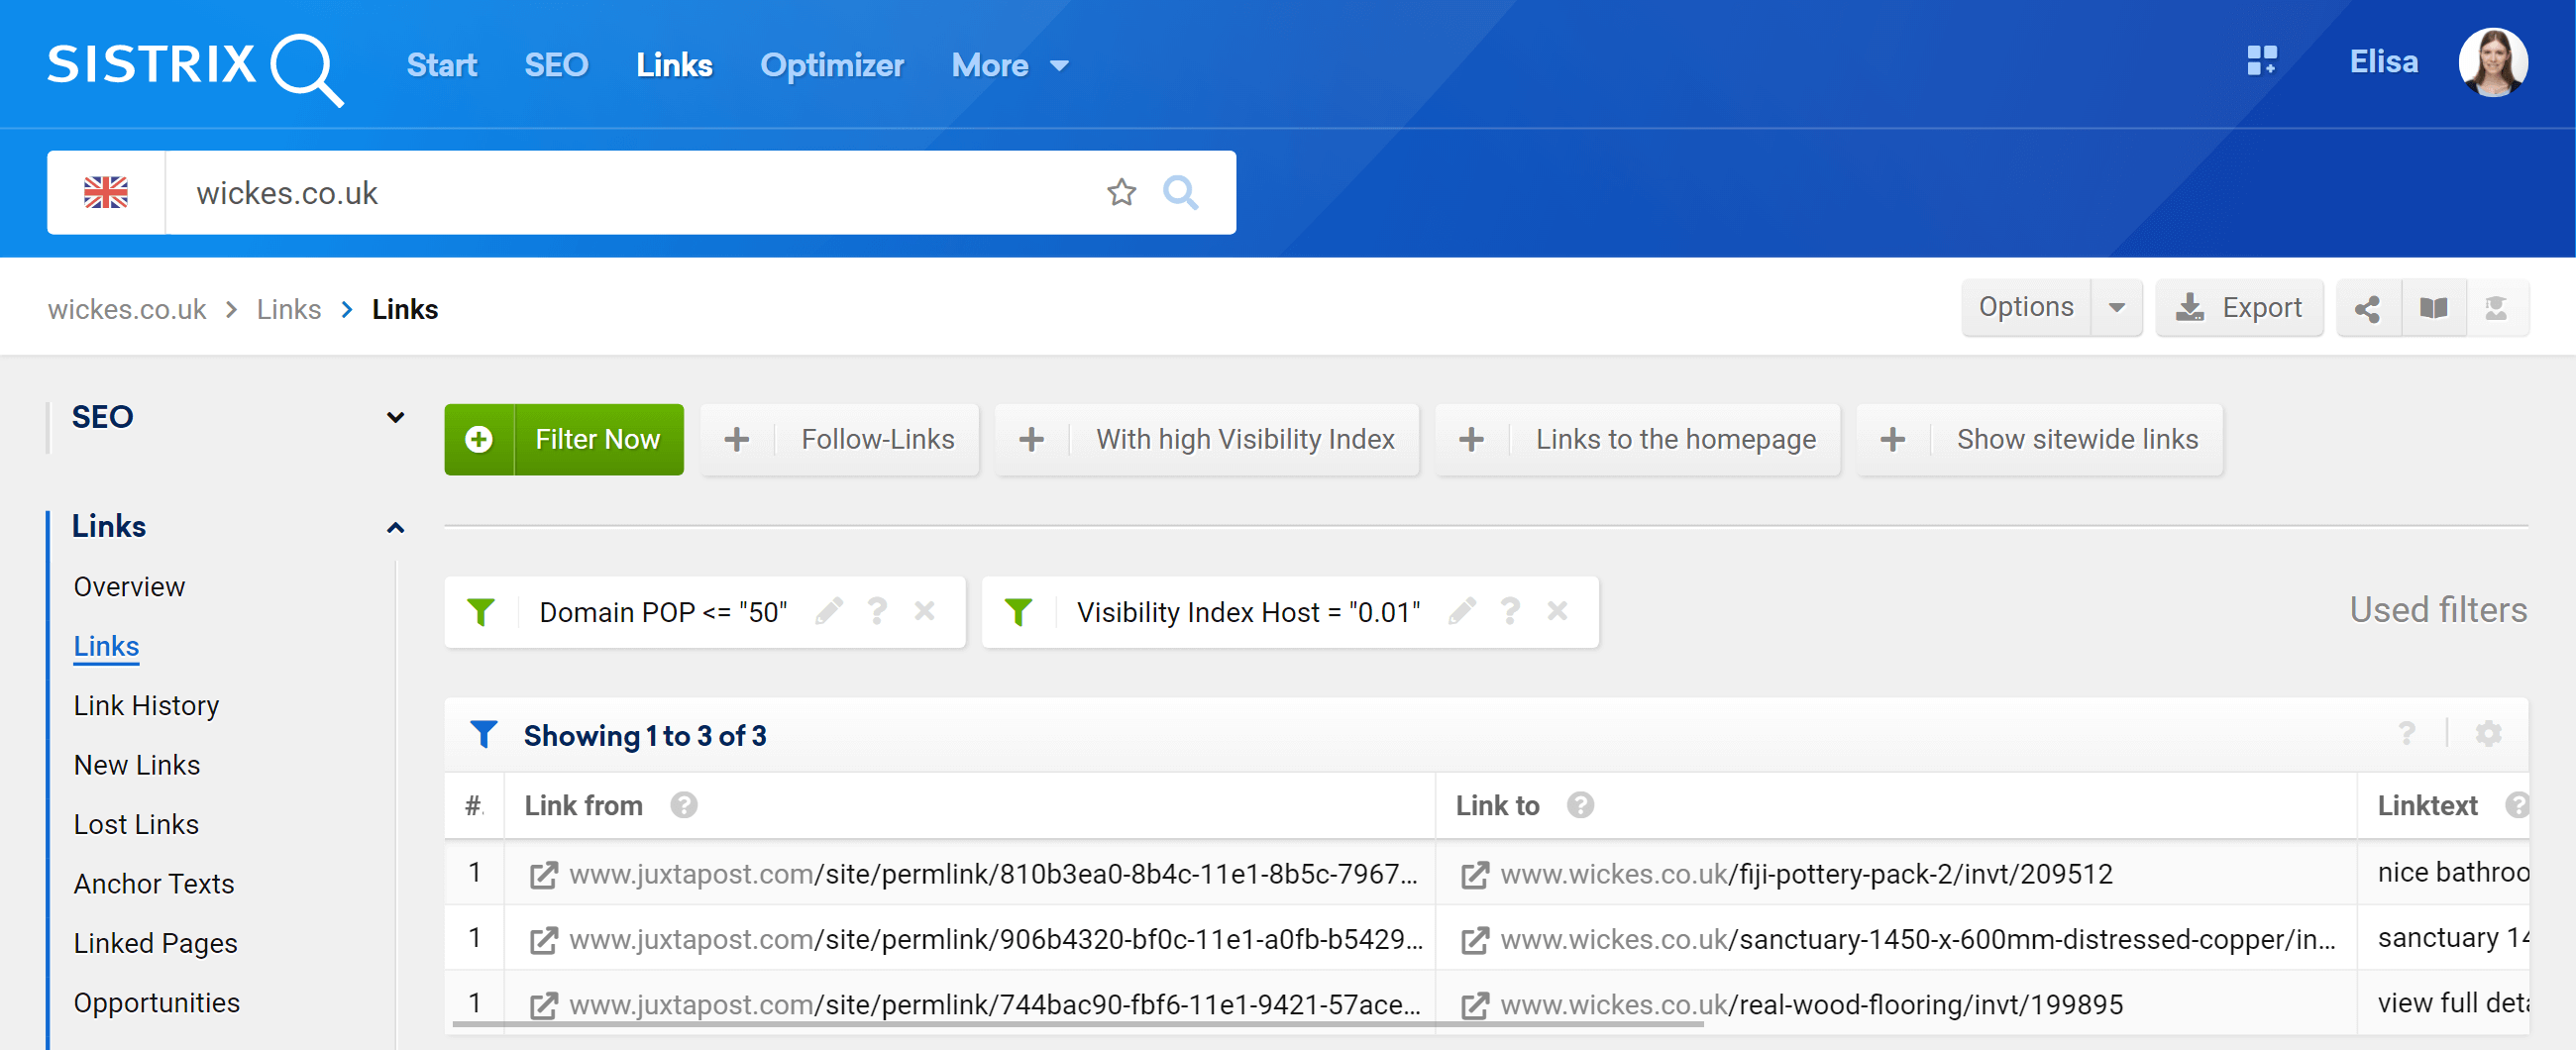
For this, we set up a filter for a domain popularity (Domain Pop) between 0 and 50. We then combine this filter with a “Visibility Index of Host” filter. A value of 0.01 for the later filter always worked well for me in the past.
Both filters are now below each other:
More individual filter possibilities
Not every analysis is about finding bad link sources. Advances should be something that you keep an eye on, too. In this case, link texts and link targets are good filters. If you have a current marketing-campaign set up on a specific subpage, it can be useful to set a filter for said page and regularly check where the links are coming from.
Sorting table columns
No matter what filters are being used, the table columns can be sorted. Just click on “URL”, “Text”, “Type” and so on to sort the values alphabetically starting at Z or A. This allows for an even more specific display of the filter results.
Conclusion
You can use filters in your evaluation to get straight to problems but also to check positive advancements. Make no mistake, you will still have to manually check the pages during your evaluation. Getting a link from a page that is not linked internally is not necessarily very positive, but you should not look down on the link before you have checked the page yourself. Filters are great in giving you a clean, structured overview and allow for a clear workflow, without having to spend much time searching.
